Fall Nail Looks You Can DIY at Home (No Salon Needed!)
November 16, 2025
Trending Finds Readers Are Loving
Explore affordable luxe discoveries people are clicking on right now.
See What's TrendingWhen the leaves start turning and sweater weather kicks in, your nails deserve a moment to match the season. But that doesn’t mean you need to run to the salon every two weeks. This fall, it’s all about empowered beauty at home — and yes, your nails can absolutely look pro without the pro. From cinnamon French tips to cozy matte press-ons, these DIY fall nail looks are easy to master, incredibly aesthetic, and totally on trend for your weekly photo dumps and pumpkin patch dates alike.
1. Pumpkin Glazed Nails — Fall’s Viral Staple

Let’s start with the look everyone is searching for: the viral pumpkin-glazed mani. This trend gives us all the cozy, spicy vibes of a warm latte with an editorial-level glow. To get the look:
- Start with a sheer caramel or amber-toned polish.
- Layer a milky chrome topcoat to get that reflective sheen.
- Buff lightly and apply with a sponge for a glazed effect.
💡 Pro Tip: Use a silicone applicator or makeup sponge to press chrome powder over semi-dry polish. Seal with a gel topcoat for mirror shine that lasts days.

Price: $5.99
Shop Similar:Modelones Milky Chrome Nail Powder Kit – a must-have featured in this post.
This look pops on almond and oval shapes and photographs beautifully in natural sunlight. It’s fall-girl magic in nail form.
2. DIY Press-On Sets in Fall Neutrals
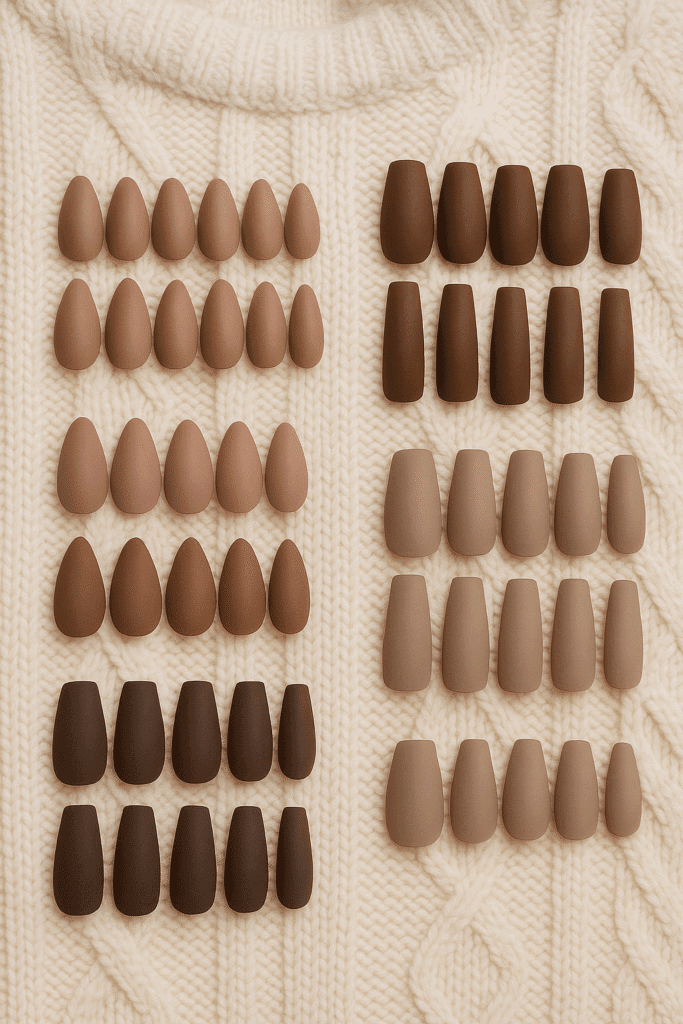
If you want variety without damage or dry time, press-ons are your dream come true. These aren’t your drugstore stickers from 2008 — think luxe matte finishes, clean shapes, and minimal effort.
Look for sets that include:
- Almond or coffin shapes
- Fall tones: chocolate, taupe, smoky lilac, slate gray
- Accent nails with foil or marble detailing
💡 Pro Tip: Gently file your nail beds before applying adhesive tabs. Press-ons stay longer and won’t lift at the corners. Bonus: You can reuse them.
Mix and match neutral tones for a soft palette moment, or go monochrome with a matte topcoat for that cashmere-soft vibe.
3. Cinnamon Sugar French Tips
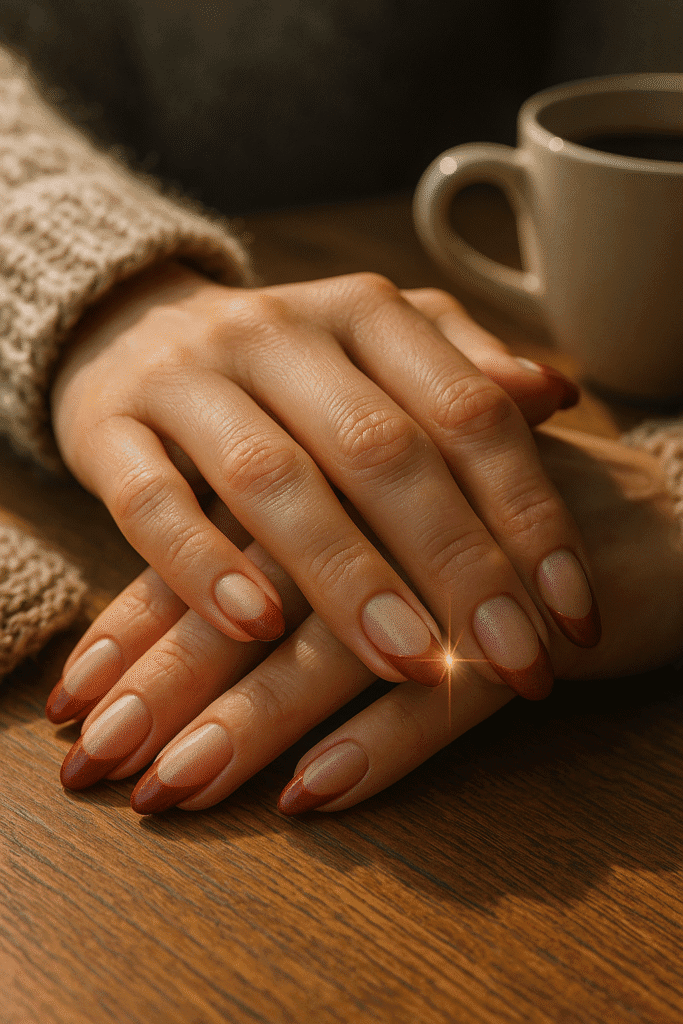
Think of this as the fall evolution of the classic French. Swap the harsh white tips for a spicy cinnamon or burnt terracotta, and you’ve got a look that’s trendy, wearable, and instantly chic.
What you’ll need:
- A sheer nude or blush-toned base
- Cinnamon-hued polish (warm brown or rust)
- French tip guides (or freehand with a liner brush)
💡 Pro Tip: Dust microglitter or shimmer powder over the tip before sealing to give it that “sugar-dusted” sparkle.
Best on shorter nails or medium almonds, this mani complements chunky knits, coffee cups, and your favorite cardigan selfies.
4. Olive Green & Gold Foil Accents
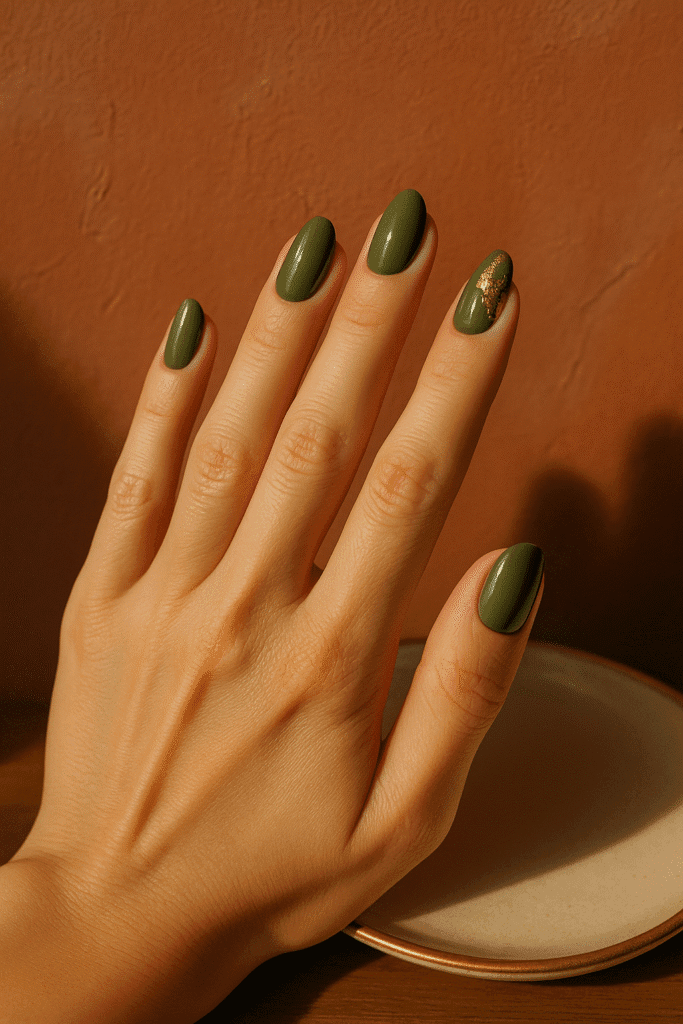
Olive green is the underrated shade of the season — deep, grounded, yet surprisingly glamorous when paired with metallic gold leaf.
To recreate:
- Apply a deep olive gel base
- Tear up small pieces of gold foil (found in nail art kits)
- Press onto a tacky polish layer and seal with topcoat
💡 Pro Tip: For a luxe finish, use foil only on two accent nails per hand — think ring and thumb — and leave the others matte.
This look gives editorial meets earthy goddess, and the contrast between matte green and glossy foil is chef’s kiss.
5. Apple Cider Ombré Fade
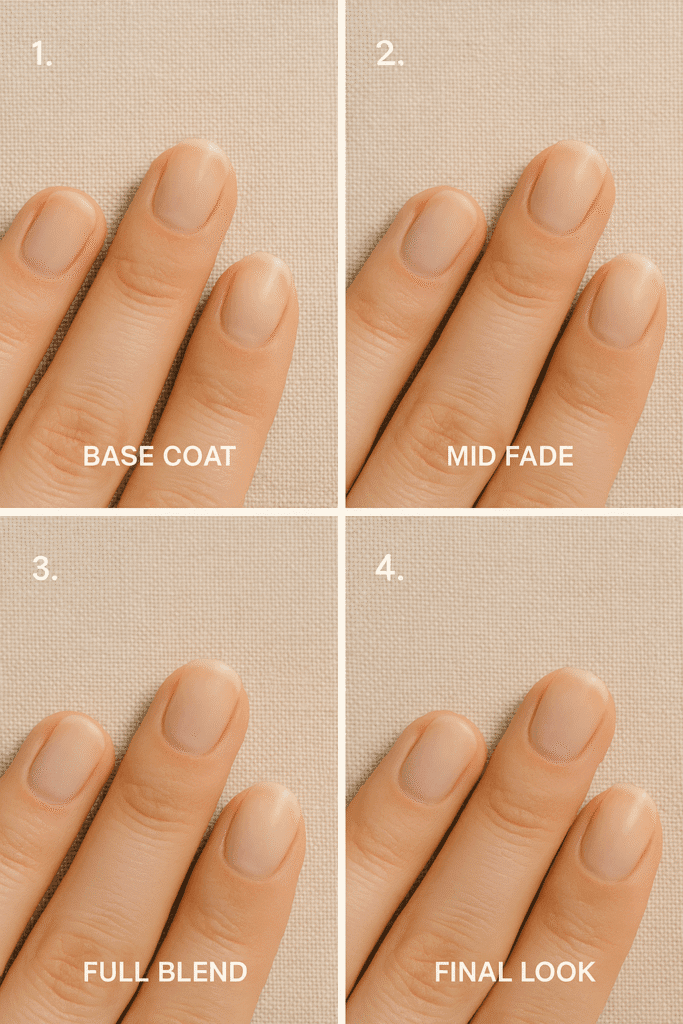
There’s something so satisfying about a smooth fall gradient, especially when it mimics the hues of spiced apple cider. This ombré style melts from pale gold to warm amber and into toffee brown at the tips.
Here’s the step-by-step:
- Start with a pale beige or honey-toned base
- Dab amber polish midway up with a sponge
- Finish with toffee brown toward the tips
- Blend in layers, sealing with a sheer gold shimmer coat
💡 Pro Tip: Use a latex barrier around the nail for easier cleanup during sponging.
It’s soft, glowy, and works especially well on squoval or round nails — perfect for those new to DIY gradients.
6. Knit Sweater Texture Nails
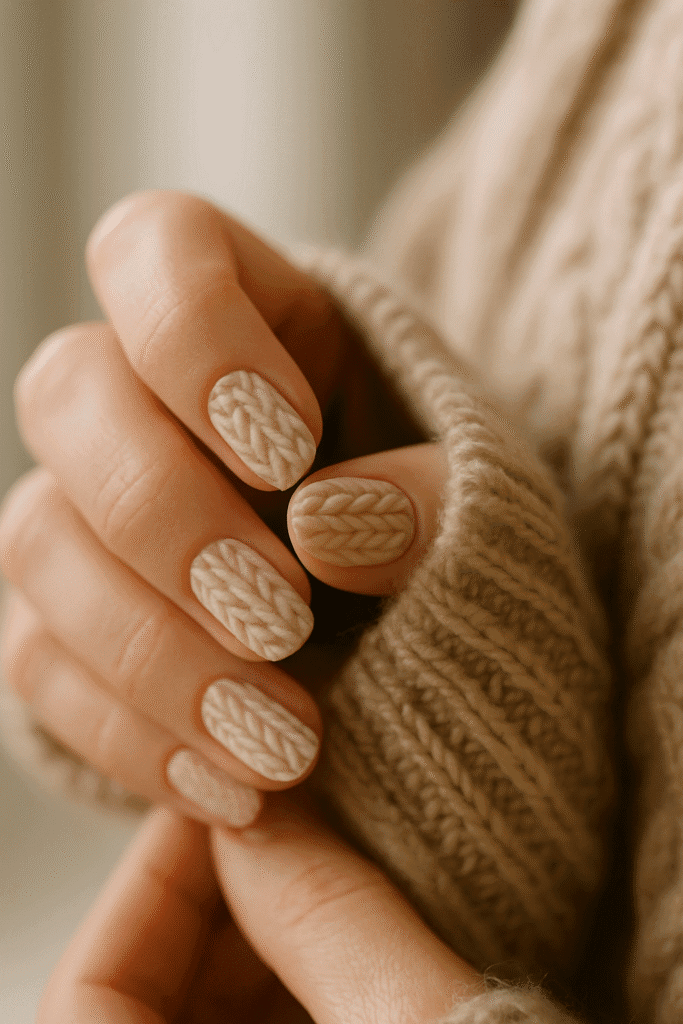
Want to get a little extra? Try 3D textured nail art that literally feels like your favorite knit sweater.
What you’ll need:
- A gel polish in cream, taupe, or blush
- A dotting tool or ultra-fine brush
- Matte topcoat
How to do it:
- Paint nails with your base color and cure
- Use gel to draw cable knit designs (lines, dots, etc.)
- Cure again, then matte seal
💡 Pro Tip: Apply a double layer of the texture lines to make them pop more visibly under matte topcoat.
This one takes more time and a steady hand — but looks amazing as a thumb or feature nail paired with simpler designs.
7. Minimalist Dot Art in Warm Tones
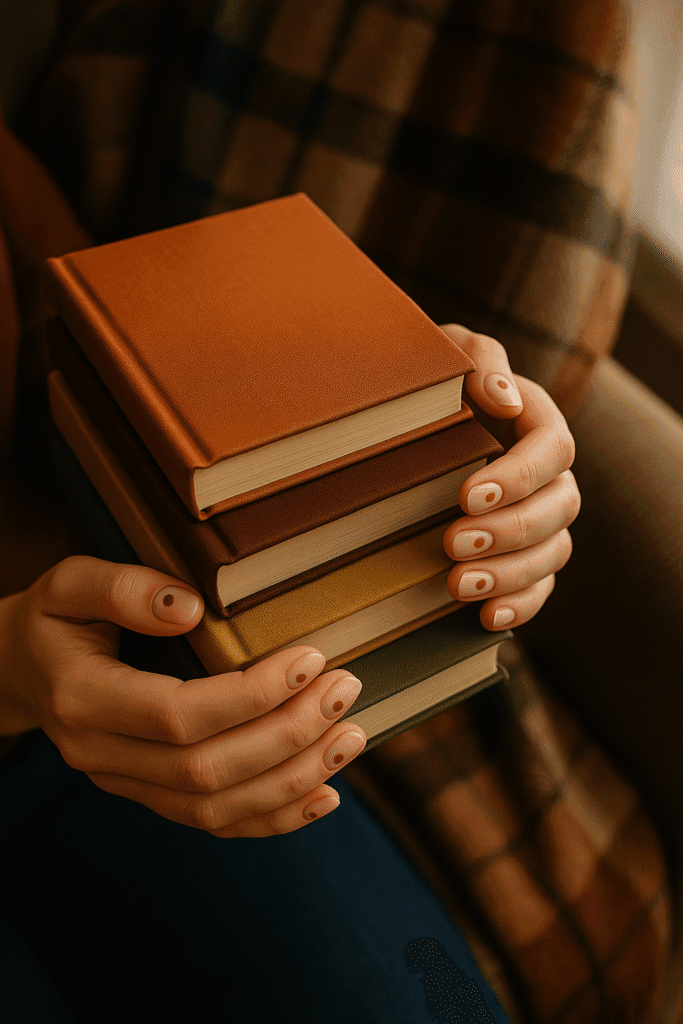
Not a fan of bold? Minimalist nail art is your fall girl bestie. A nude or clear base with tiny dots in warm tones like camel, chestnut, or sienna is all you need.
Try this layout:
- One centered dot near the cuticle
- Three small dots arranged diagonally
- Micro dot patterns on just two fingers per hand
💡 Pro Tip: Use a toothpick dipped in polish for perfect circles.
It’s chic, understated, and plays beautifully with layered rings and chunky sweaters.
8. Matte Mocha with Negative Space

This editorial look uses contrast to create sophistication. Paint just part of the nail in a rich matte mocha tone and leave the rest bare or coated in sheer polish.
Ideas:
- Diagonal half-painted nails
- Thin horizontal or vertical negative space lines
- Floating color-blocks near the cuticle
💡 Pro Tip: Use striping tape or nail vinyls to get crisp edges.
It’s giving “quiet luxury” meets downtown art school — all from your living room table.
9. Rust Red Nails with a Twist
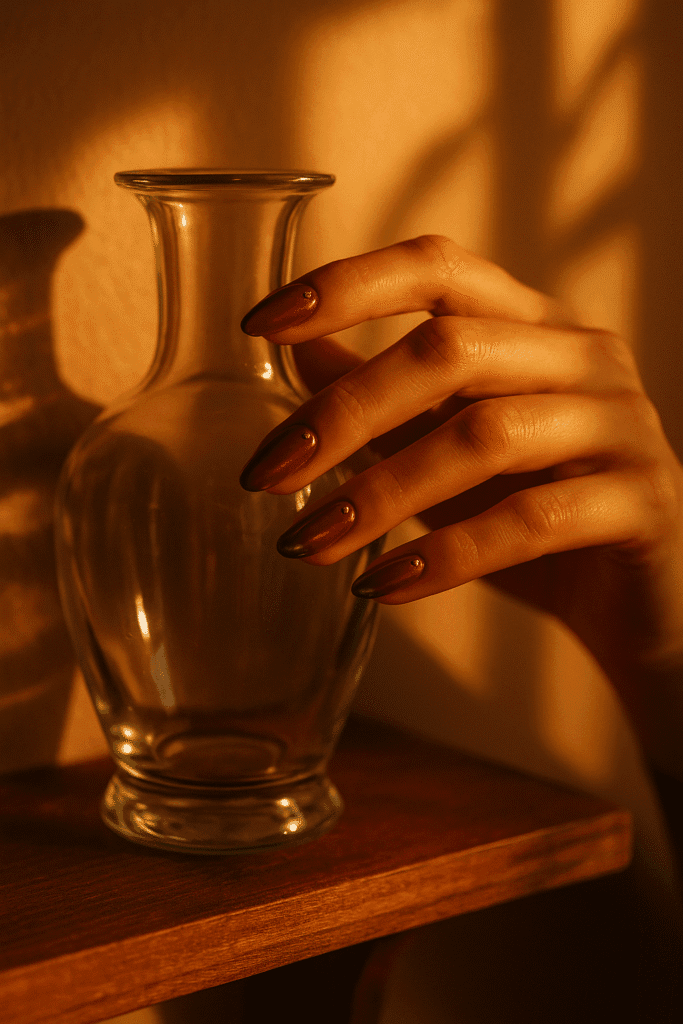
Rust red is timeless — but the update is in the finish. Swap your usual glossy topcoat for either:
- A matte sealer for velvet texture
- A glazed chrome coat for mirror shine
- Tiny gold studs placed at the base for contrast
💡 Pro Tip: Use a base coat that strengthens, especially for deeper pigments like rust red which can stain.
It’s rich, moody, and effortlessly elegant — fall in a bottle.
10. DIY Tortoiseshell Nails
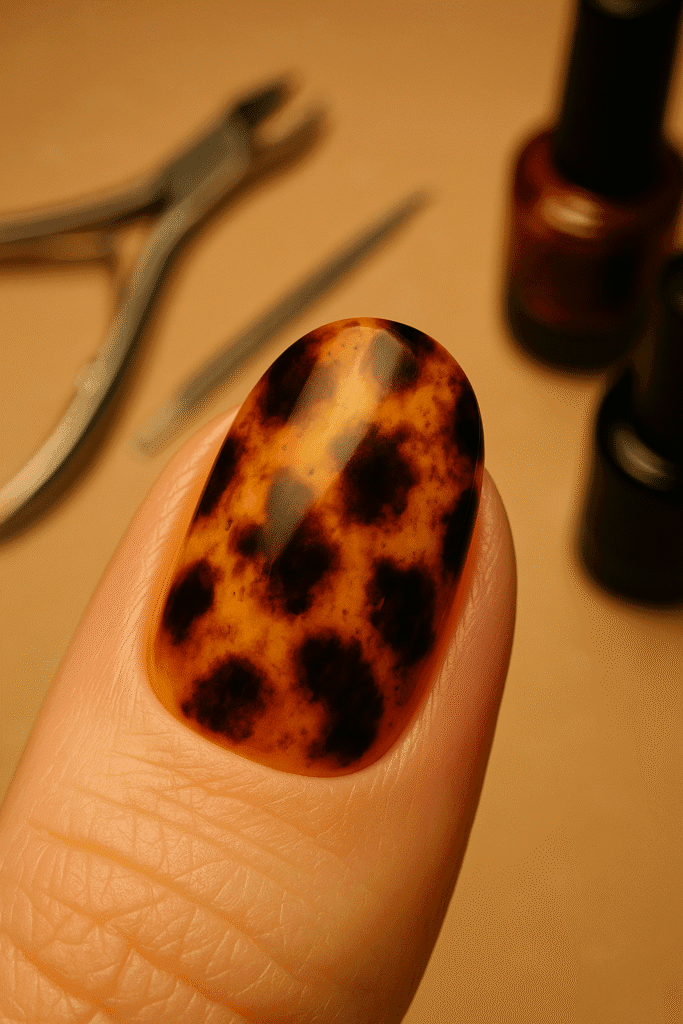
This trend is all about layering — and it’s easier than it looks.
Here’s the simplified method:
- Base layer: Sheer amber
- Add irregular blobs of dark brown and black
- Soften with a brush dipped in acetone
- Add another layer of amber, repeat blotting
- Seal with glossy topcoat
💡 Pro Tip: Do this one nail at a time to prevent drying out before you blend.