
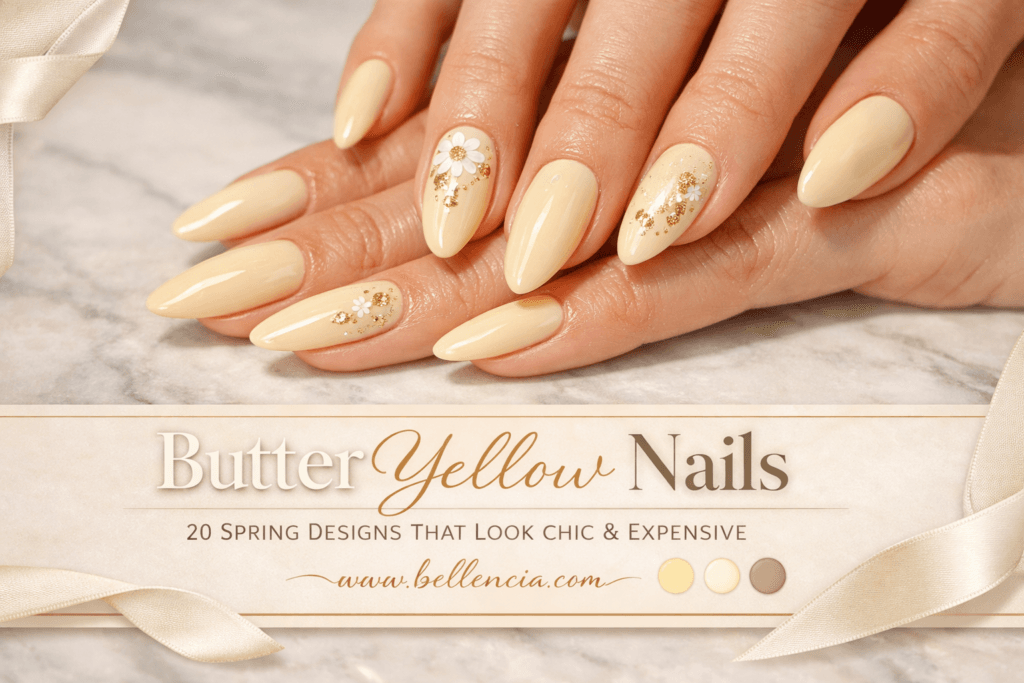
20 Butter Yellow Nail Designs That Look Expensive
May 10, 2026
Trending Finds Readers Are Loving
Explore affordable luxe discoveries people are clicking on right now.
See What's TrendingThere’s something about butter yellow that feels instantly like spring. It’s lighter than mustard, softer than lemon, and far more wearable than bright sunshine yellow. Instead of feeling loud or overpowering, butter yellow reads as creamy, warm, and quietly elegant—the kind of color that makes your hands look fresh, polished, and thoughtfully styled without trying too hard.
This season, butter yellow is showing up everywhere in fashion and beauty, from soft knitwear and dresses to accessories and nail trends. It fits perfectly into the wider “clean girl” and “quiet luxury” movement, where the goal isn’t to be flashy, but to look refined, put-together, and effortless. On nails, this shade is especially powerful because it works like a neutral—with just enough color to feel special.
If you’re usually a nude, milky, or sheer-pink nail person, butter yellow is the perfect next step. It gives you that same soft, wearable vibe, but with a fresh spring twist that feels seasonal and modern.
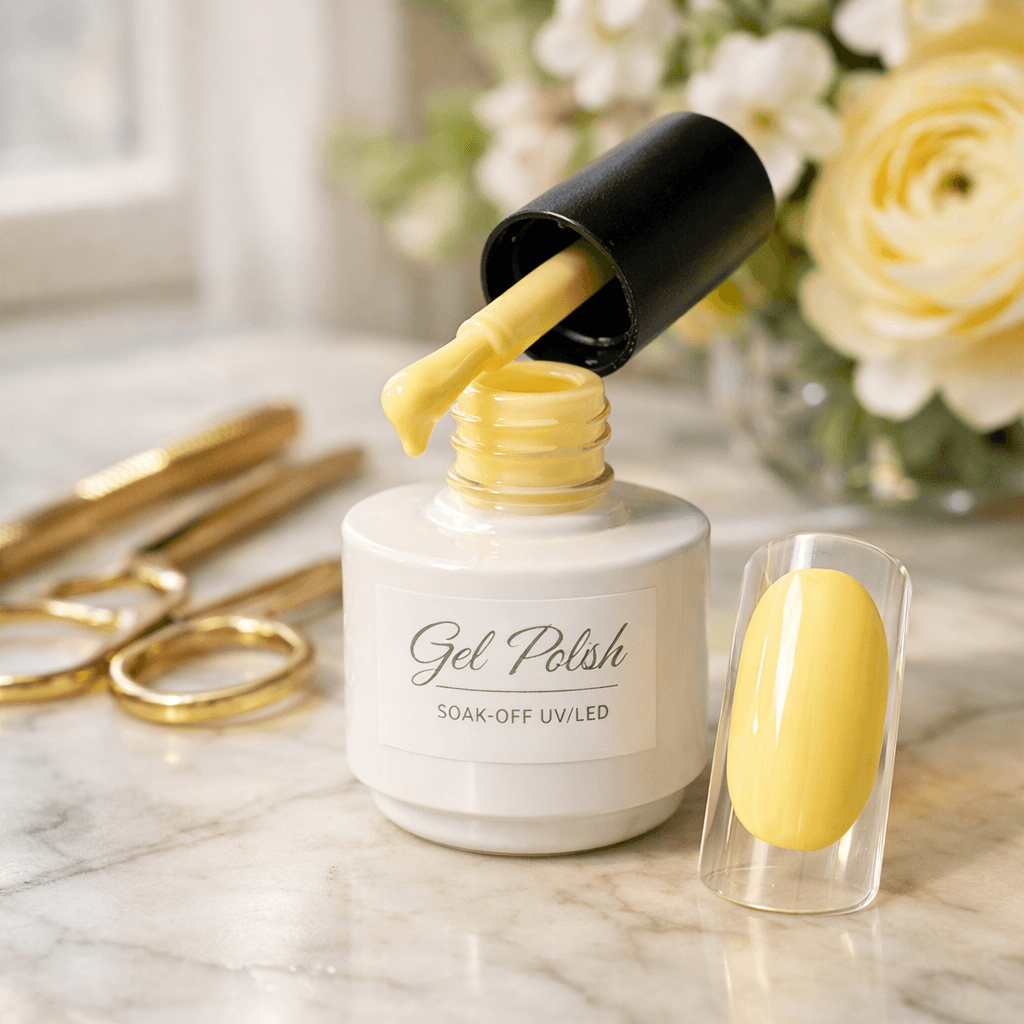
Price: 6.99
Shop Similar:modelones Yellow French Tip Liner Gel Polish – a must-have featured in this post.
In this guide, I’m going to show you 20 different ways to wear butter yellow nails—from ultra-minimal looks to soft florals, elegant French tips, and glazed, light-reflective finishes. Some designs are simple and clean, others feel more elevated and event-ready, but all of them keep the same goal in mind:
Soft. Chic. Expensive-looking. Never loud.
Why Butter Yellow Is the Perfect Spring Nail Color
Butter yellow works because it sits in that sweet spot between neutral and color. It’s warm, flattering on a wide range of skin tones, and pairs beautifully with:
- White
- Cream
- Gold
- Sheer pinks
- Soft florals
- Milky and glazed finishes
Unlike brighter yellows, butter yellow doesn’t dominate your look. It complements it. That’s why it works just as well for everyday outfits as it does for brunch, vacations, weddings, and spring events.
It also photographs beautifully, which is exactly why you’re seeing it everywhere on Pinterest and in spring trend roundups.
Product Strategy (Hybrid, So You’re Not Locked In)
For this chapter, we’re using a hybrid approach:
- I’ll recommend one great butter yellow gel polish as a reference
- But every single design in this guide can be done with any similar soft butter yellow shade you already own or prefer
That means:
- You get affiliate opportunities
- But the article stays future-proof and flexible
Some designs will also include optional glazed or pearly finishes, which you can easily create using your SAVILAND White Pearl Chrome Nail Powder from the previous chapter.
Before You Start: Nail Prep Still Makes All the Difference
Just like with the glazed nails chapter, the foundation matters.
Before doing any of these designs:
- Shape your nails (almond, oval, or short rounded all work beautifully with this color)
- Gently push back cuticles
- Lightly buff the surface
- Clean the nail plate
A clean, smooth base is what makes soft colors like butter yellow look luxurious instead of streaky.
The Base Methods You’ll Use for All 20 Designs
Every design in this guide starts with one of these simple bases.
Base Option 1: Solid Butter Yellow
- Apply two thin coats of your butter yellow polish or gel
- Cure or dry fully between coats
- This is your foundation for:
- Minimal looks
- French tips
- Accent designs
- Gold foil or floral details
Option 2: Sheer Butter Yellow
- Mix a small amount of butter yellow into a clear or milky base
- Or use a naturally sheer butter yellow shade
- This is perfect for:
- Clean girl looks
- Soft ombré
- Glazed finishes
Base Option 3: Butter Yellow + Glaze (Optional)
For some designs, you can:
- Apply a no-wipe top coat
- Lightly buff SAVILAND White Pearl Chrome Nail Powder on top
- Seal with glossy top coat
This creates that soft, luminous, light-reflective finish without changing the color itself.
The Look We’re Aiming For
With butter yellow, the rule is:
Creamy, not neon. Soft, not sharp. Elegant, not loud.
Think:
- Spring sunlight
- Vanilla cream
- Fresh flowers
- Soft fabrics
- Clean, warm, polished
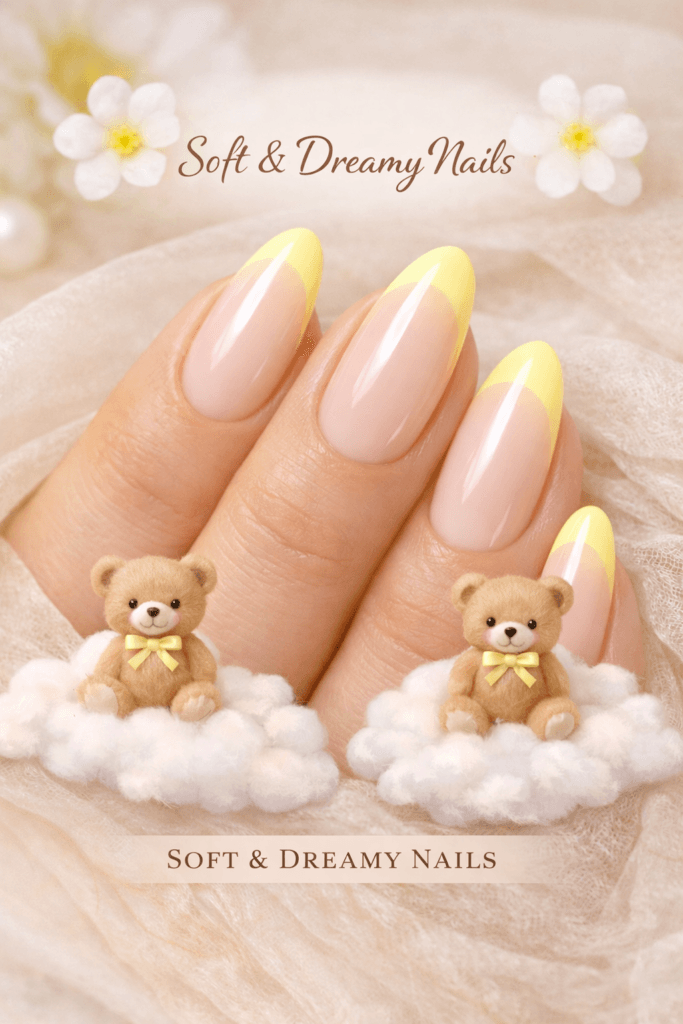
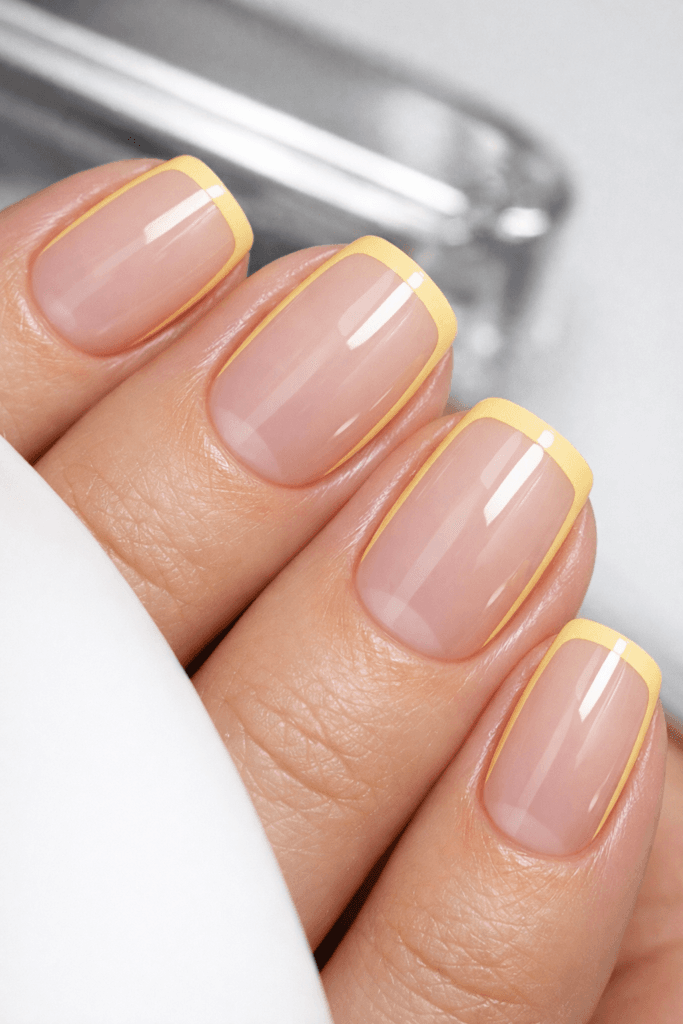
Design 1: Classic Butter Yellow French Tips
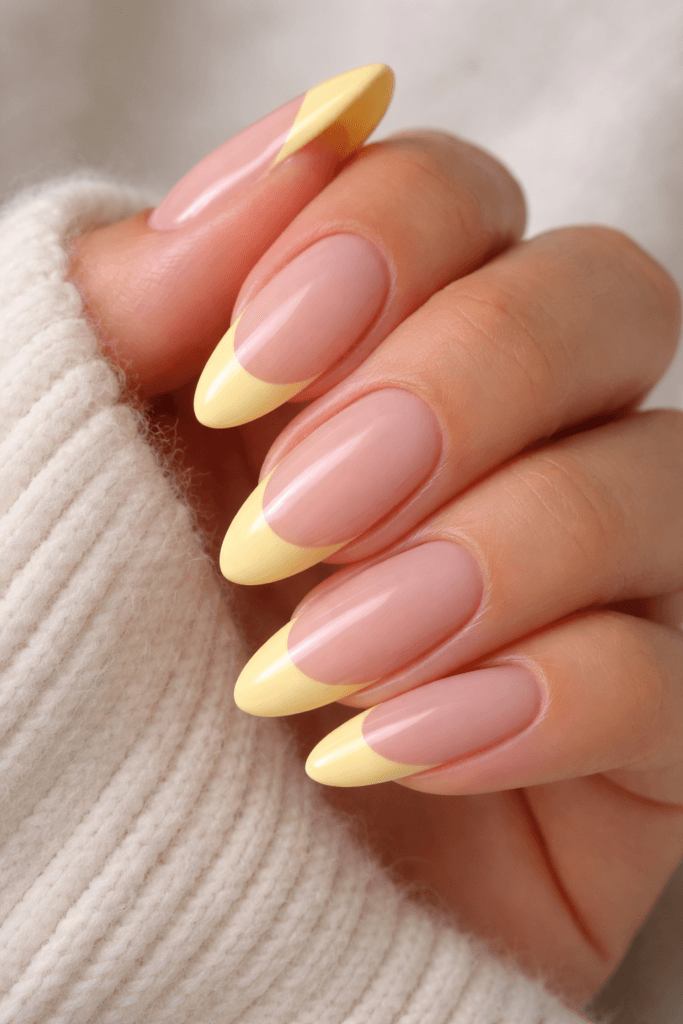
This is the most timeless and wearable way to introduce butter yellow into your nail routine. It keeps the base clean and neutral while adding just a soft touch of color at the tips.
How to do it:
- Start with a sheer nude or milky base and cure or dry fully.
- Using your butter yellow shade, paint a soft French tip (not too thick).
- If needed, slightly round or blur the edge so it doesn’t look harsh.
- Seal with a glossy top coat.
Why it looks chic:
It reads clean, fresh, and elegant—perfect if you want something spring-ready without committing to full color.
Design 2: Micro Butter Tips (Clean Girl Version)
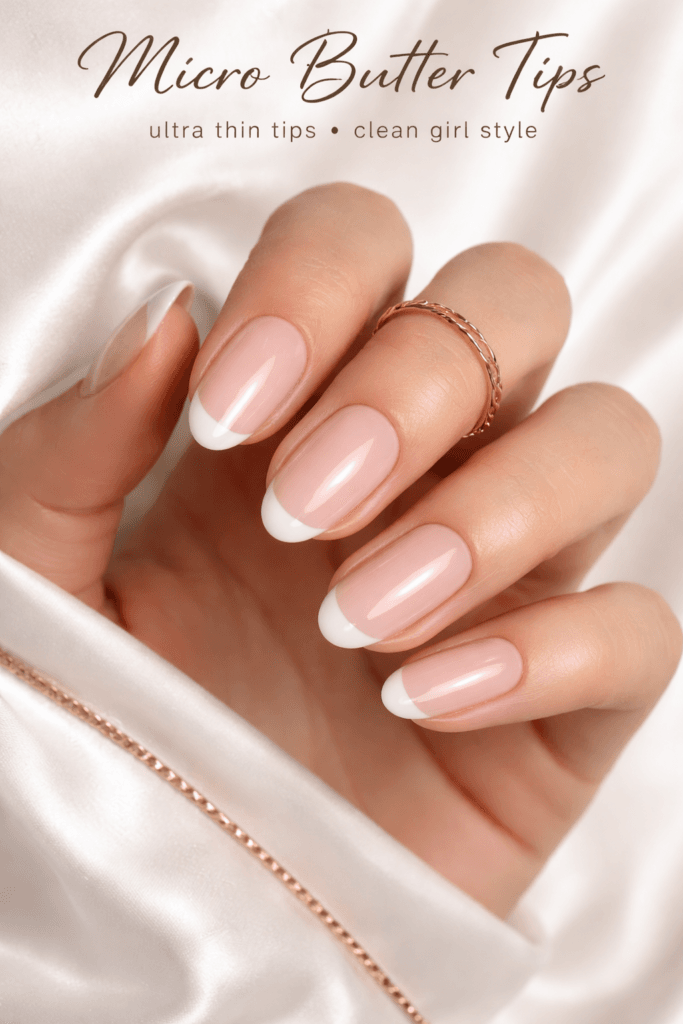
This is the ultra-minimal version of the French tip and one of the most “clean girl” looks in the entire guide.
How to do it:
- Apply a sheer or milky base.
- Paint a very thin butter yellow line right at the tip of the nail.
- Keep it delicate and barely there.
- Seal with a glossy top coat.
Why it works:
It gives you just a hint of color while keeping the overall look neutral, polished, and effortless.
Design 3: Butter Yellow + White Swirl
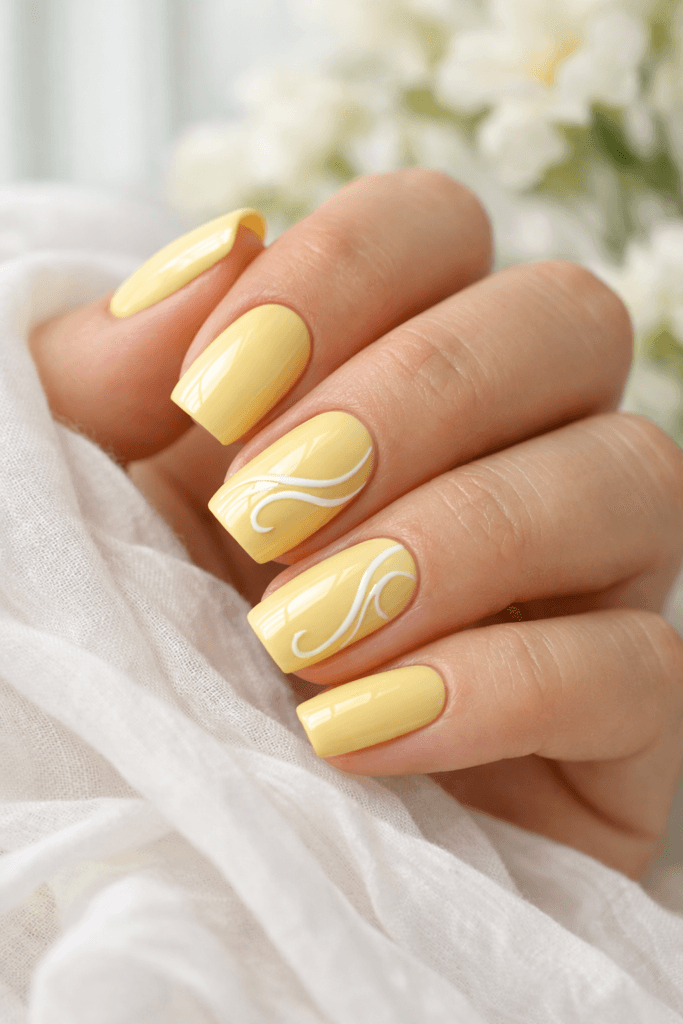
This is where butter yellow starts to feel more playful while still staying elegant.
How to do it:
- Apply a sheer or light butter yellow base.
- Using white and butter yellow, create soft swirl lines on one or two accent nails.
- Keep the lines thin and flowing, not busy.
- Seal with a glossy top coat.
Why it’s perfect for spring:
It feels light, airy, and fresh—like movement and sunshine in nail form.
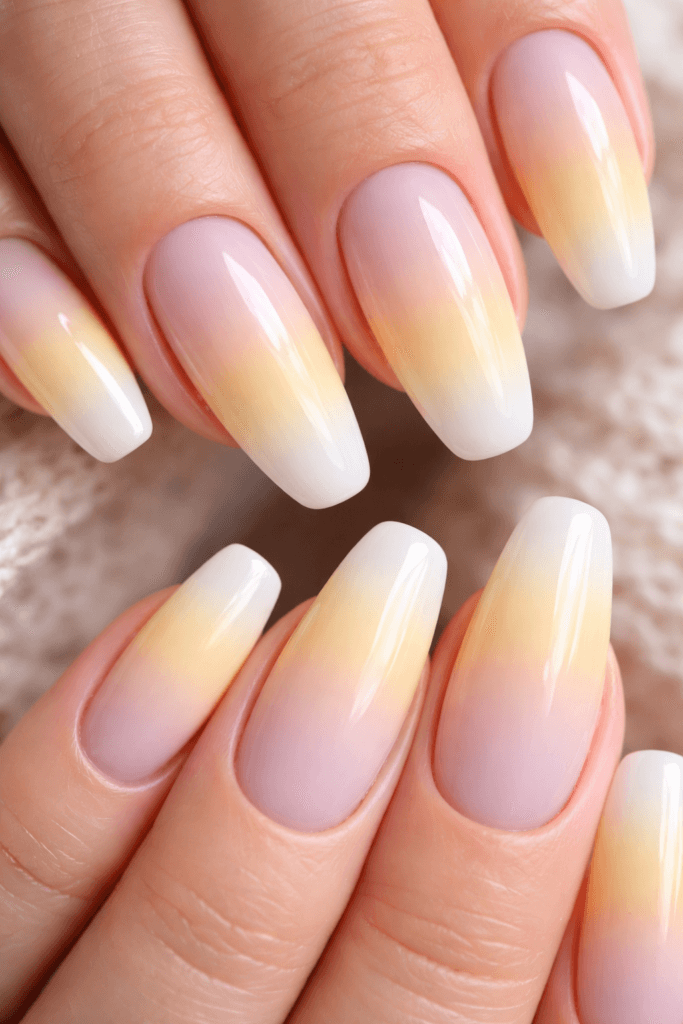
Design 4: Soft Butter Ombré
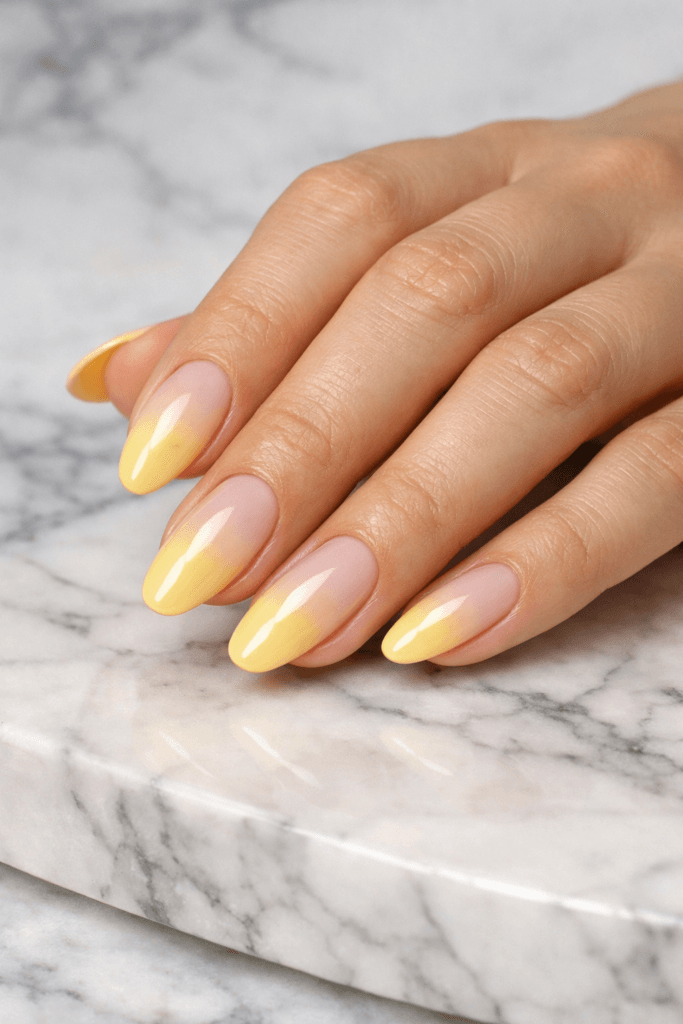
This look fades butter yellow into a neutral or milky base for a very soft, blended effect.
How to do it:
- Apply a sheer nude or milky base.
- Using a sponge or brush, gently blend butter yellow from the tip downward into the base.
- Build slowly until the fade looks smooth and seamless.
- Seal with a glossy top coat.
Why it looks expensive:
Ombré always feels more elevated than solid color, especially in soft shades like this.
Design 5: Butter Yellow Glazed Nails
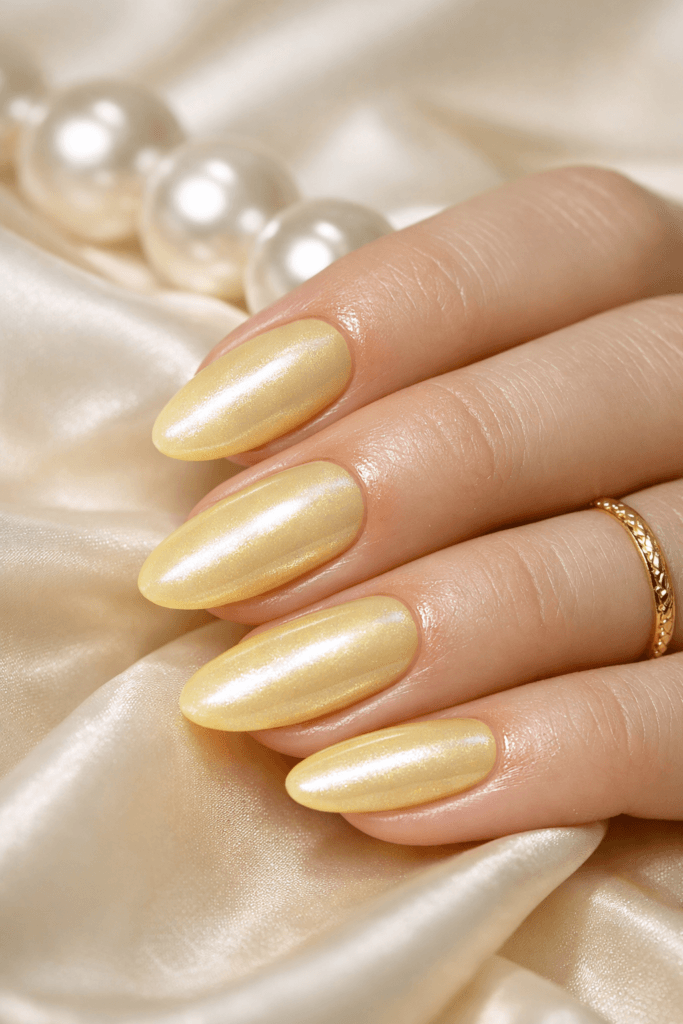
This design ties directly back to your glazed chapter and looks incredible in spring light.
How to do it:
- Apply your butter yellow base (solid or sheer).
- Apply a no-wipe top coat and cure.
- Lightly buff a tiny amount of SAVILAND White Pearl Chrome Powder over the nail.
- Seal with a glossy top coat.
Why it’s a standout:
The pearl glaze turns butter yellow into something luminous and almost creamy-glasslike instead of flat color.
Design 6: Butter Yellow + Gold Foil Accents
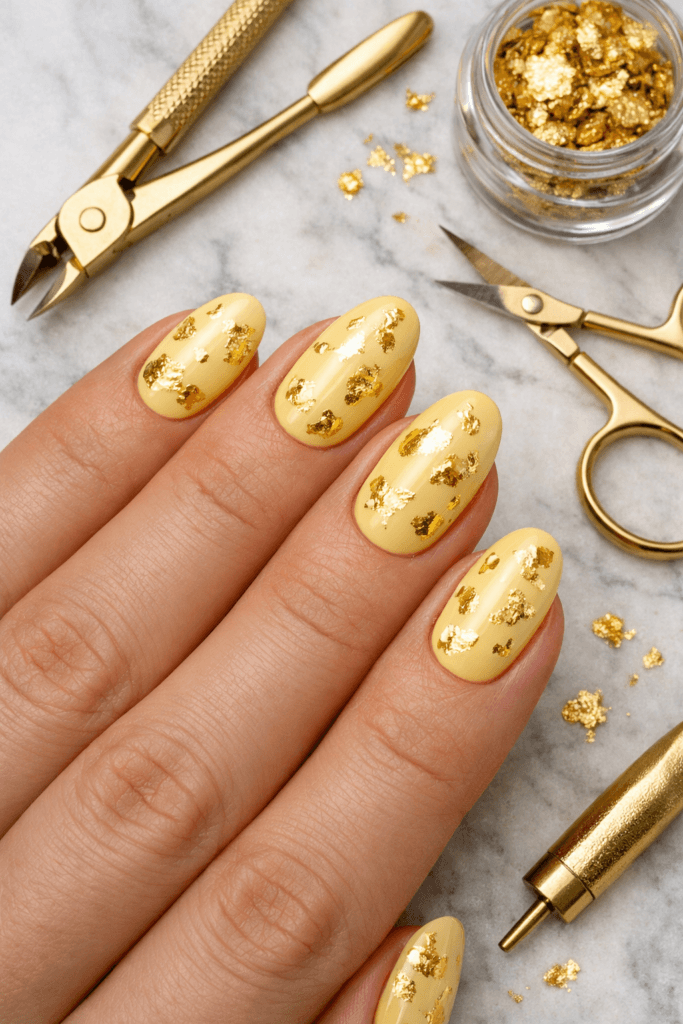
This look pairs butter yellow with tiny touches of gold for a subtle, jewelry-like effect.
How to do it:
- Apply a solid or sheer butter yellow base.
- Add small, irregular pieces of gold foil to one or two nails, or lightly scatter them across all nails.
- Press gently into the polish or gel layer and seal with glossy top coat.
Why it looks expensive:
The warm yellow and gold combination feels rich, soft, and very elevated without being flashy.
Design 7: Butter Yellow Daisy Accent Nails
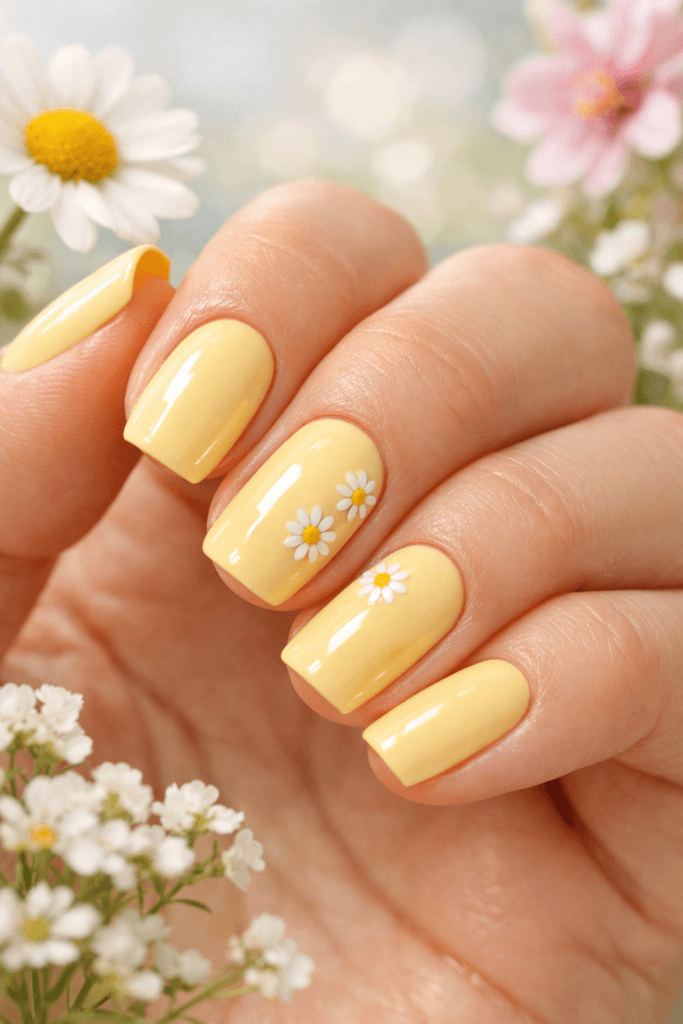
This is a perfect spring look that feels playful but still clean and refined.
How to do it:
- Apply a sheer or solid butter yellow base.
- On one or two accent nails, paint small white daisies with yellow centers.
- Keep the design minimal and spaced out.
- Seal with a glossy top coat.
Why it’s so wearable:
It gives you a seasonal floral moment without turning the whole manicure into nail art overload.
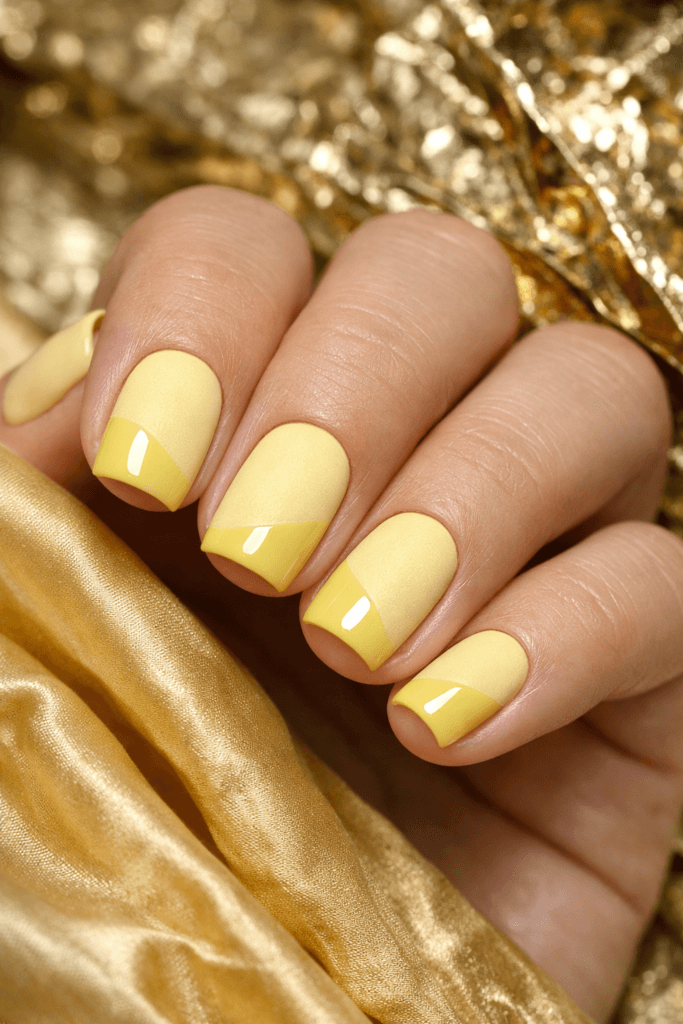
Design 8: Butter Yellow Side French
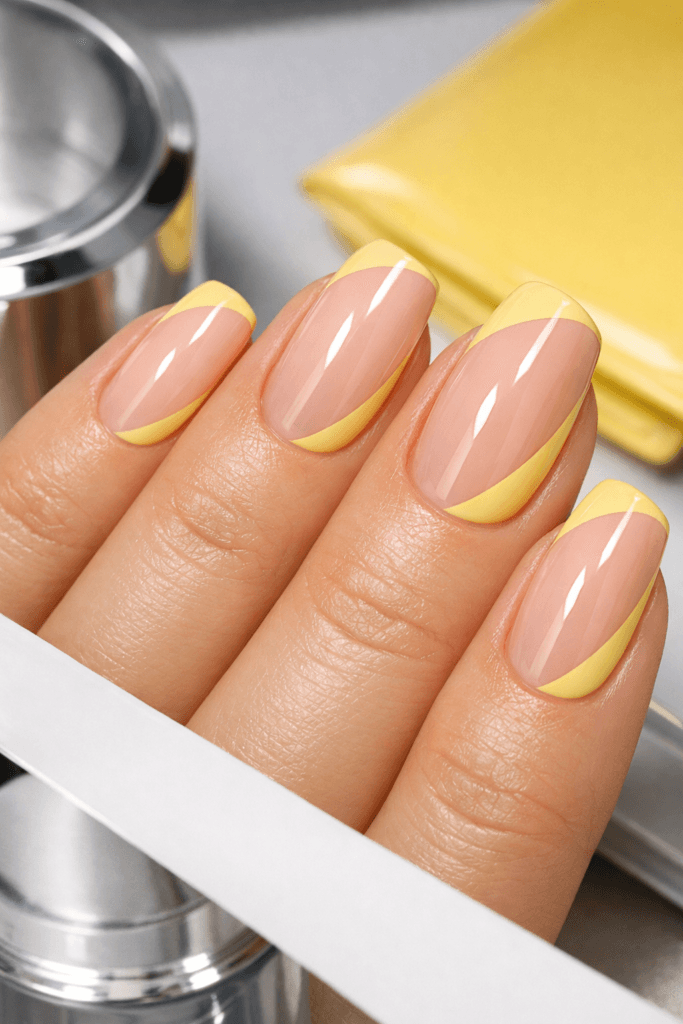
This is a modern twist on the classic French that feels more editorial and fresh.
How to do it:
- Start with a sheer nude or milky base.
- Paint a butter yellow French tip along one side of the nail instead of straight across.
- Keep the line thin and softly curved.
- Seal with a glossy top coat.
Why it’s flattering:
The diagonal line visually elongates the nail and feels more fashion-forward than a traditional French.
Design 9: Butter Yellow + Sheer Pink Base
This look blends warmth and softness for a very “your nails but better” effect.
How to do it:
- Apply a sheer pink base and cure or dry.
- Add butter yellow as a soft French tip, fade, or minimal accent.
- Keep the yellow subtle.
- Seal with a glossy top coat.
Why it works:
The pink keeps everything looking natural and fresh, while the butter yellow adds just enough spring color.
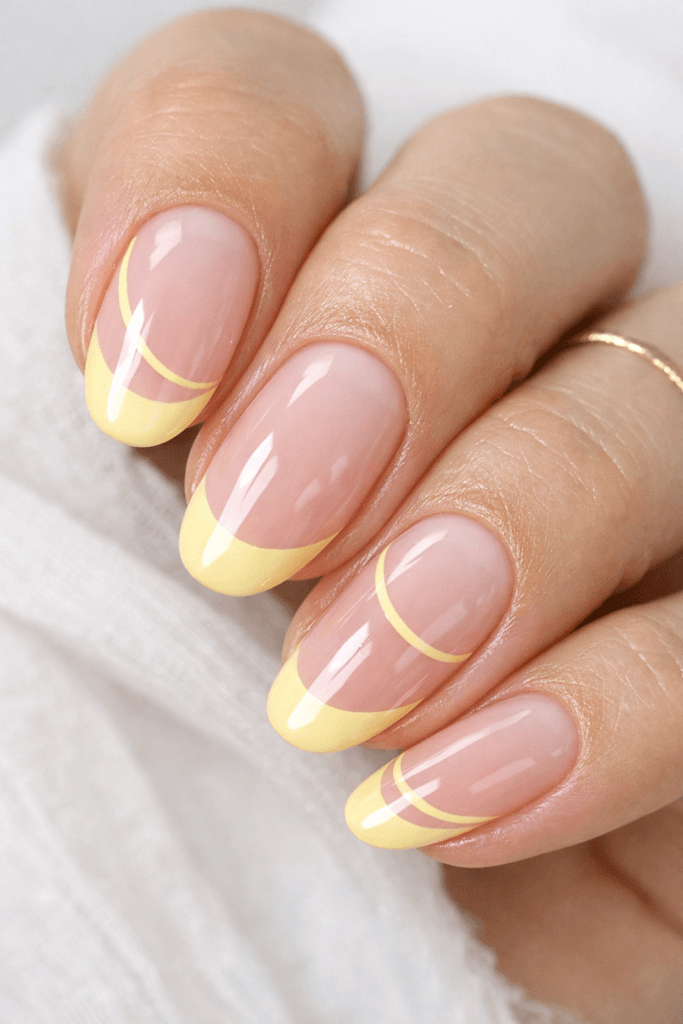
Design 10: Double French Butter Yellow

This design adds two delicate lines instead of one for a more styled, intentional look.
How to do it:
- Apply a sheer or milky base.
- Paint a thin butter yellow line at the tip.
- Then add a second thin curved line near the cuticle.
- Keep the center of the nail clean and sheer.
- Seal with a glossy top coat.
Why it feels designer:
The double detail makes the manicure look custom and thoughtfully designed rather than simple or basic.
Design 11: Butter Yellow Micro Florals
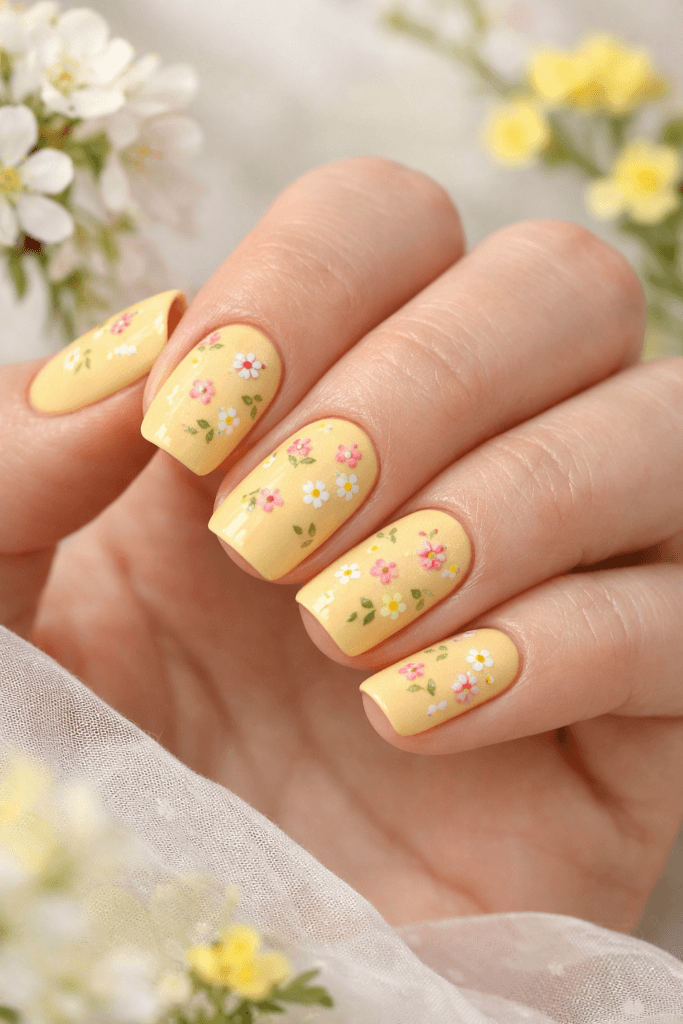
This is a more delicate, refined floral version that keeps the manicure light and airy instead of busy.
How to do it:
- Apply a sheer or soft butter yellow base.
- On one or two accent nails, paint tiny white or pastel flowers using a fine brush or dotting tool.
- Keep the florals small and spaced out.
- Seal with a glossy top coat.
Why it works:
It feels romantic and spring-like without overpowering the rest of the manicure.
Design 12: Butter Yellow + White French Fade
This is a softer, more blended take on the French tip.
How to do it:
- Apply a sheer nude or milky base.
- Using a sponge or soft brush, blend white into butter yellow at the tips.
- Keep the fade smooth and subtle.
- Seal with a glossy top coat.
Why it looks expensive:
The gradient effect always reads more high-end than a sharp line.
Design 13: Butter Yellow Minimal Lines
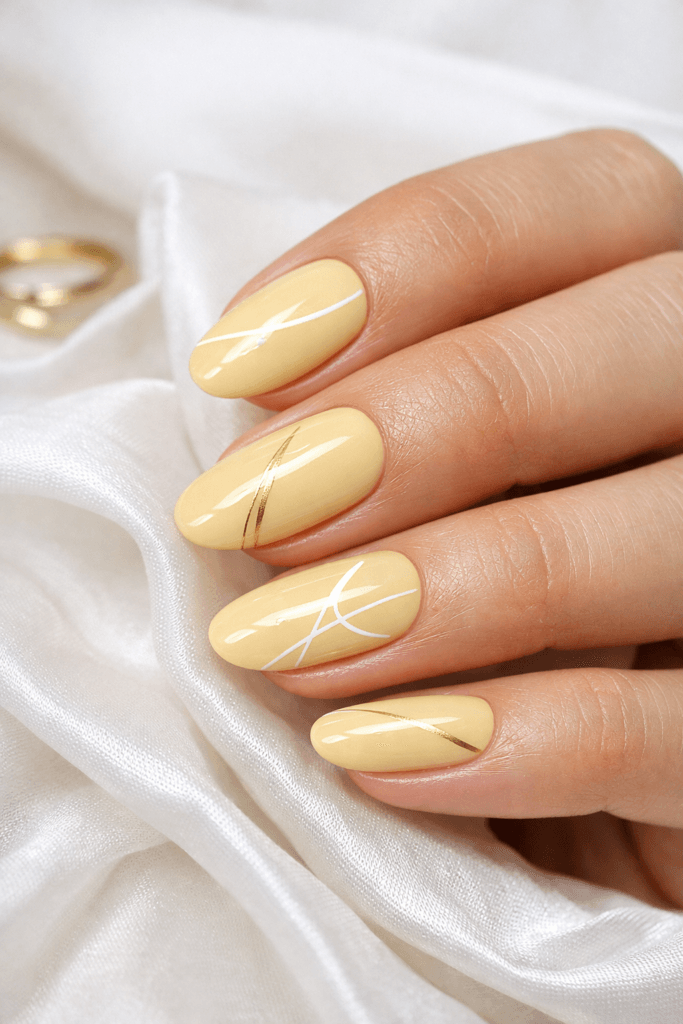
This is a modern, graphic look that still stays very clean and wearable.
How to do it:
- Apply a sheer or solid butter yellow base.
- Add one or two thin white or gold lines across the nail or near the cuticle.
- Keep the lines fine and intentional.
- Seal with a glossy top coat.
Why it feels chic:
Minimal line art makes the nail look designed without feeling busy or trendy in a way that will date quickly.
Design 14: Butter Yellow Pearl Accents
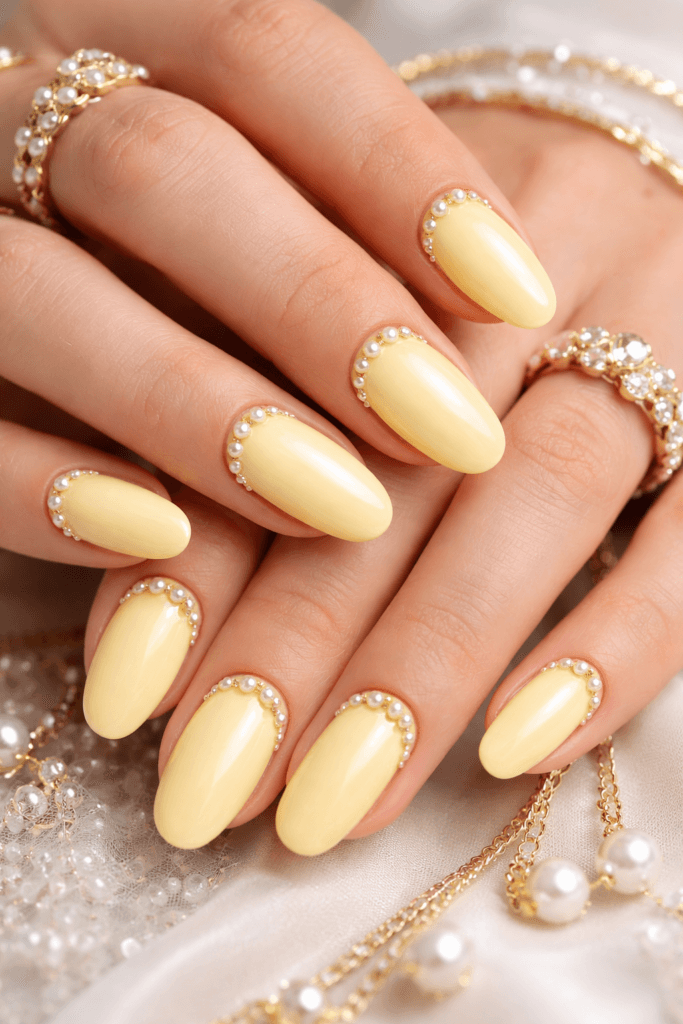
This design uses tiny pearls or pearl-like dots to add dimension.
How to do it:
- Apply your butter yellow base.
- Add one or two small pearl accents near the cuticle or along the side of the nail.
- Keep placement minimal.
- Seal carefully with a glossy top coat.
Why it’s beautiful:
It adds a jewelry-like detail while keeping the overall look soft and elegant.
Design 15: Butter Yellow + Milky Base
This look blends butter yellow into a milky, sheer base for a very soft, wearable finish.
How to do it:
- Apply a milky or sheer nude base.
- Add butter yellow as a French tip, fade, or soft accent.
- Blend gently so the transition looks seamless.
- Seal with a glossy top coat.
Why it’s so flattering:
The milky base keeps the color from feeling too strong and makes the whole manicure look clean and creamy.
Design 16: Butter Yellow Matte + Gloss Contrast
This design plays with texture instead of color, giving you a modern, editorial look that still feels clean and wearable.
How to do it:
- Apply your butter yellow base and cure or dry fully.
- Apply a matte top coat and cure.
- On the areas you want glossy (tips, half-moons, or side sections), apply a glossy top coat and cure again.
- The contrast between matte and shine is the design.
Why it looks high-end:
Texture contrast always feels more fashion-forward and intentional than plain color alone.
Design 17: Butter Yellow Frame Nails
This uses butter yellow as a soft outline instead of filling the whole nail.
How to do it:
- Start with a sheer nude or milky base.
- Using butter yellow, paint a thin outline around the edge of the nail.
- Keep the center of the nail clean and sheer.
- Seal with a glossy top coat.
Why it’s so chic:
It feels architectural and modern while still being subtle.
Design 18: Butter Yellow + Gold Flakes
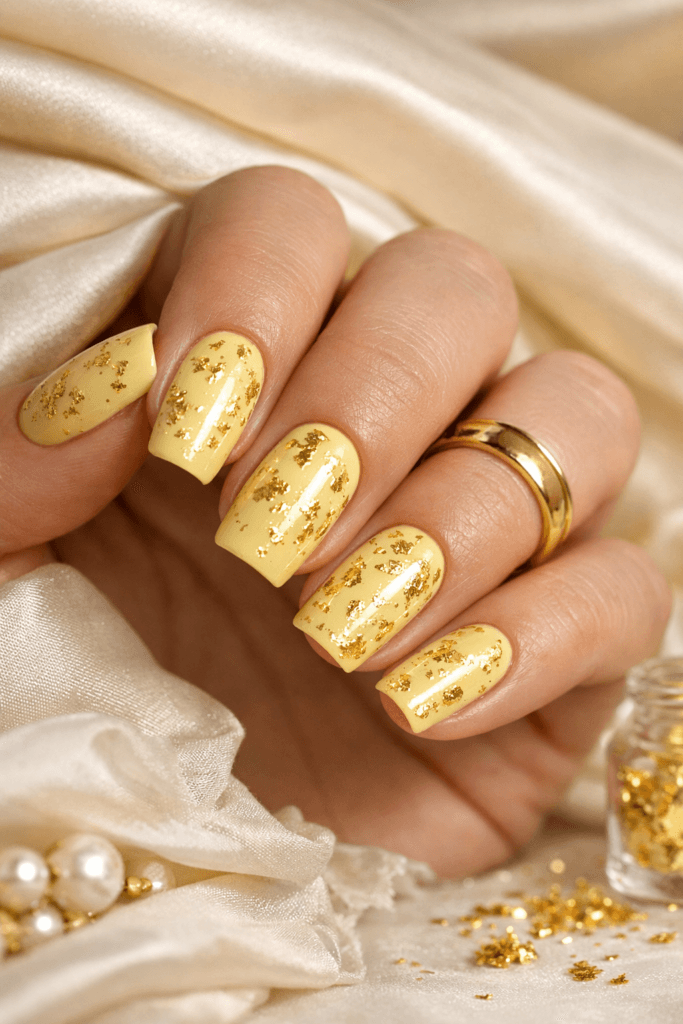
This is a more organic, softly glamorous version of gold-accent nails.
How to do it:
- Apply a butter yellow base.
- Add tiny, irregular gold flakes to one or two nails or lightly across all nails.
- Press gently into the polish or gel and seal with a glossy top coat.
Why it works:
The scattered gold looks rich and dimensional without overwhelming the soft yellow.
Design 19: Short Butter Yellow Clean Girl Nails
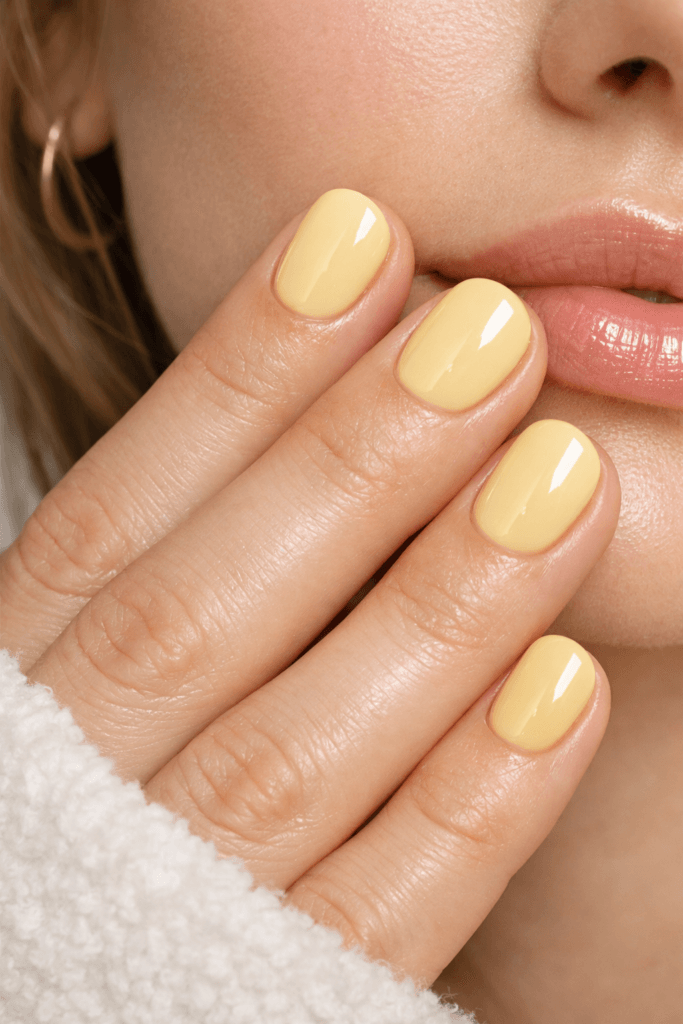
This adapts the entire butter yellow trend for short, rounded nails.
How to do it:
- Use a sheer or soft butter yellow shade.
- Keep the application clean and simple—either solid color or with micro tips.
- Seal with a glossy top coat.
Why it’s perfect for everyday:
It looks fresh, neat, and effortless while still feeling on-trend and seasonal.
Design 20: Almond Luxe Butter Yellow Editorial Nails (Hero Look)
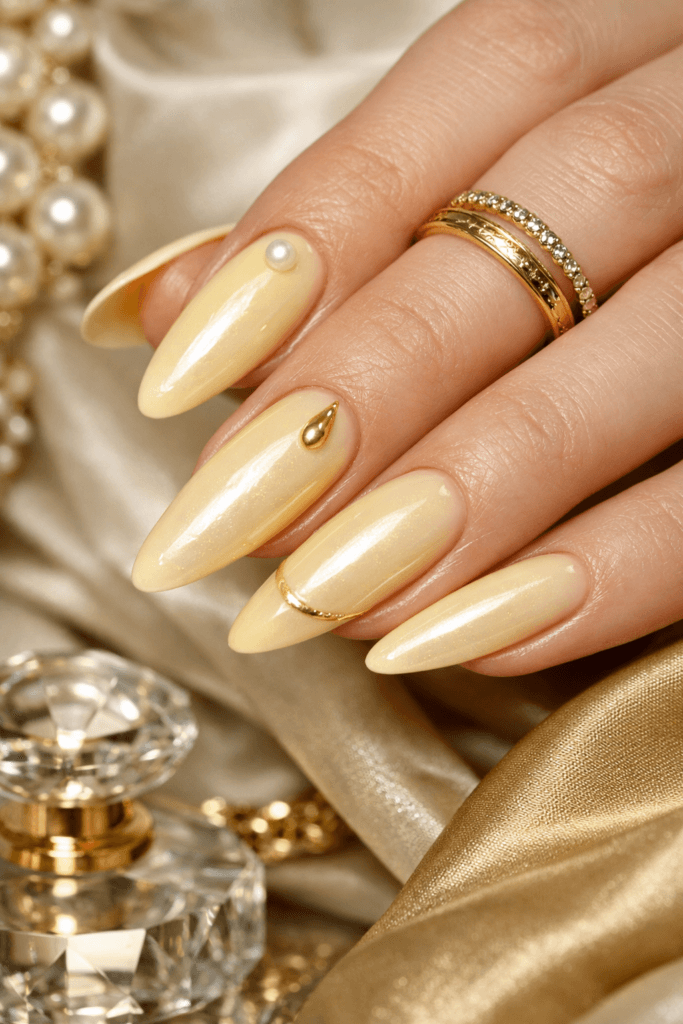
This is the statement, cover-worthy version of butter yellow nails.
How to do it:
- Use long almond-shaped nails.
- Apply a creamy butter yellow base.
- Add subtle details like:
- A soft fade
- A glazed finish
- Or minimal gold or pearl accents
- Seal with a glossy top coat.
Why it’s the ultimate version:
It combines shape, color, and finish into one truly elevated, editorial manicure.
Bellencinista Notes
Some visual and written assets in this article were created with the help of AI to better illustrate design concepts and inspiration.
Final Thoughts: Why Butter Yellow Deserves a Spot in Your Spring Rotation
Butter yellow proves that you don’t need bold or neon colors to make a seasonal statement. When done in the right shade and with thoughtful designs, it becomes:
- Soft
- Elegant
- Fresh
- And incredibly wearable
From ultra-minimal looks to more detailed, elevated styles, this color adapts beautifully to every mood and occasion.