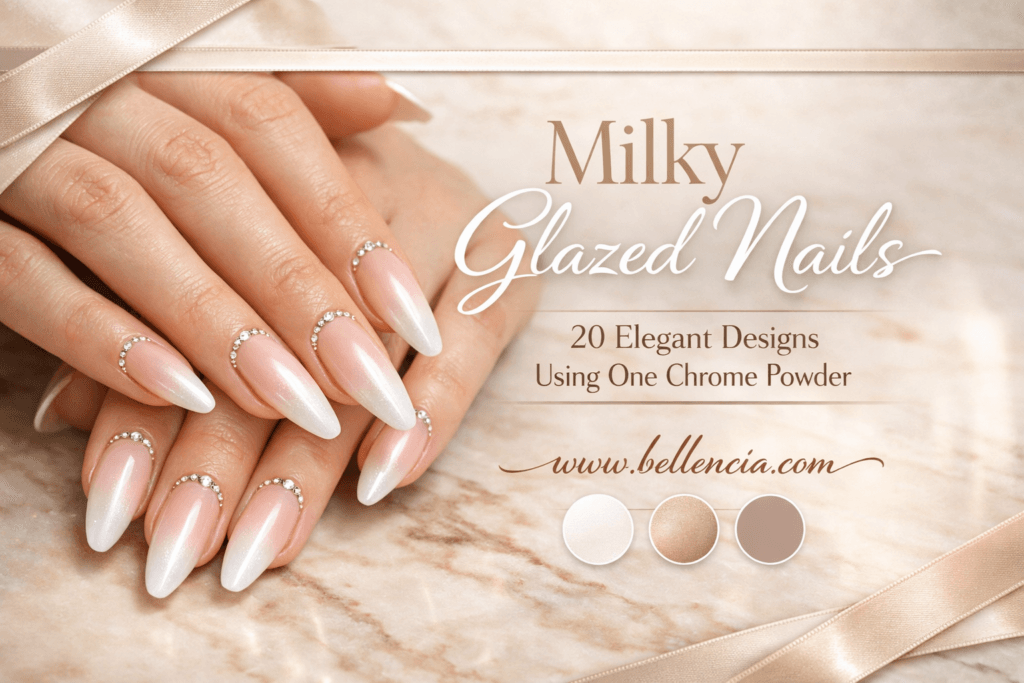
20 Milky Glazed Nail Designs You Can Create with One Chrome Powder
May 7, 2026
Trending Finds Readers Are Loving
Explore affordable luxe discoveries people are clicking on right now.
See What's TrendingThere’s something undeniably magnetic about a manicure that looks soft, glossy, and expensive without screaming for attention. That’s exactly why milky glazed nails—also known as pearl or “glazed donut” nails—have quietly taken over Pinterest, Instagram, and salon inspiration boards everywhere. They’re sheer, light-reflective, and elegant in a way that makes your hands look instantly polished, no matter what you’re wearing.
Beauty editors have been calling this finish one of the most wearable nail trends in recent years. Allure famously spotlighted the glazed nail look as a modern classic because it walks that perfect line between minimal and glamorous, making it just as appropriate for everyday wear as it is for weddings and special events. You can see their take on the trend here:
https://www.allure.com/story/glazed-donut-nails-trend
What has Byrdie highlighted
At the same time, Byrdie has highlighted the rise of milky, sheer nail aesthetics as part of the broader “clean” and “quiet luxury” beauty movement—where the goal is to look refined, healthy, and effortlessly put together rather than overdone:
https://www.byrdie.com/milky-nails-trend-7484687
Price: 6.99
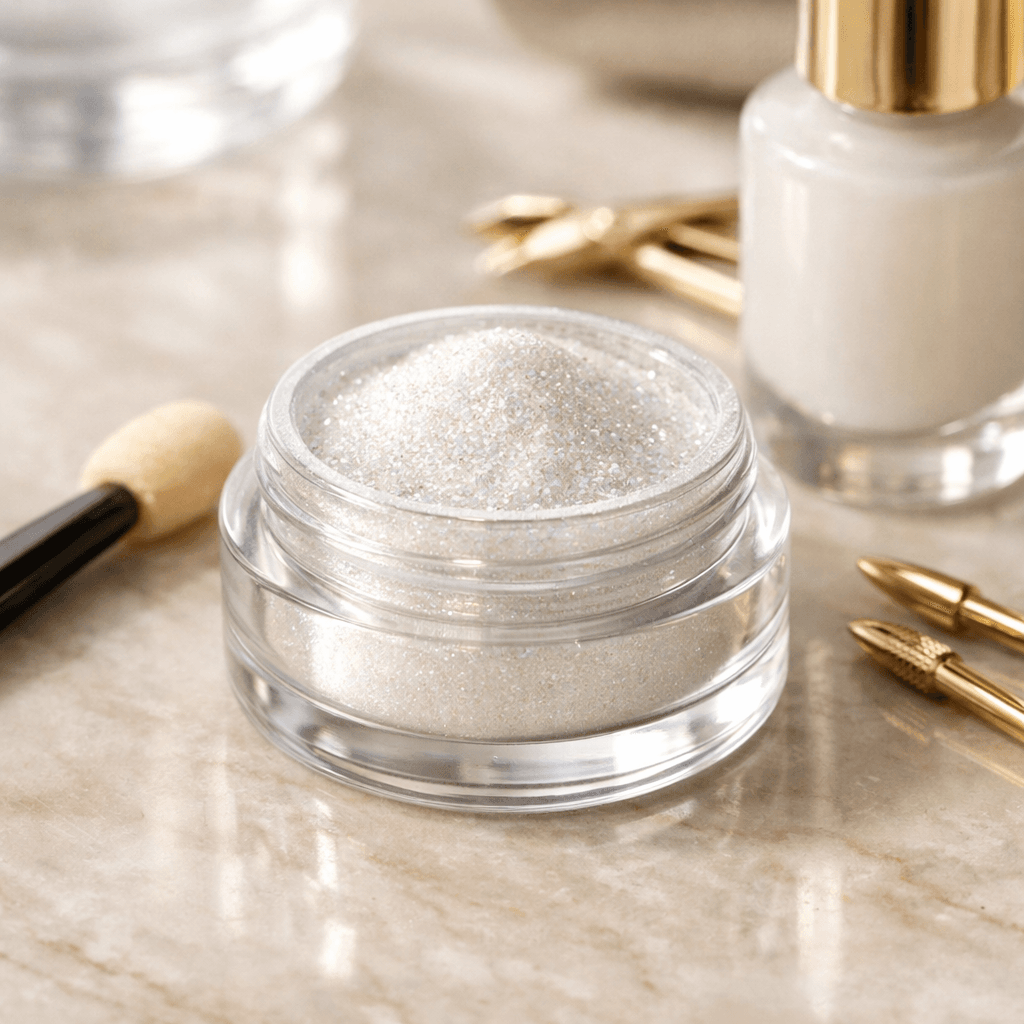
Shop Similar:SAVILAND White Pearl Chrome Nail Powder – a must-have featured in this post.
What makes this look even more appealing is how simple the formula actually is.
You don’t need ten different products.
Don’t need complicated nail art skills.
You don’t need a drawer full of powders.
With the right technique and one good chrome powder—specifically the SAVILAND White Pearl Chrome Nail Powder—you can create dozens of variations of this same elegant, high-end look.
In this guide, I’m going to show you:
- The one base method you’ll use for every design
- How to control the finish so it stays soft and milky instead of harsh and metallic
- And then, in the next sections, 20 different design variations you can create using this exact same product—ranging from subtle everyday styles to bridal-level elegance
This is the kind of manicure system that saves you money, simplifies your routine, and still makes your nails look like you just walked out of a high-end salon.
Before You Start: Nail Prep Still Matters
Even the most beautiful glaze won’t look right if the base isn’t clean and healthy. According to nail care experts at Healthline, proper prep—gentle shaping, cuticle care, and hydration—is one of the biggest factors in making manicures look smoother and last longer:
https://www.healthline.com/health/how-to-strengthen-nails
So before you start any of these looks:
- Shape your nails (almond, oval, or short rounded work best for this style)
- Gently push back cuticles
- Lightly buff the surface
- Clean with alcohol or nail cleanser
This alone makes the final result look 10x more professional.
The One Base Method You’ll Use for All 20 Designs
Every single design in this article starts with the same foundation. The only thing that changes is where and how you apply the SAVILAND White Pearl Chrome Powder.
Step 1: Apply Your Base Color
Choose a sheer milky pink, sheer nude, or sheer milky white gel polish.
This is critical.
The beauty of this look comes from transparency and light, not opacity. Two thin coats is usually perfect. Cure fully.
Step 2: Apply a No-Wipe Top Coat
Apply a no-wipe gel top coat and cure it according to your lamp’s instructions.
This is the surface the chrome powder will stick to.
Step 3: Apply the SAVILAND White Pearl Chrome Powder
Using a sponge applicator or eyeshadow applicator:
- Pick up a very small amount of powder
- Gently buff it onto the nail
- Build slowly and lightly
The goal is not a mirror chrome.
The goal is a soft, pearl, glazed sheen that still lets the base show through.
You can:
- Apply it only on the tips
- Only near the cuticle
- Around the edges
- Or across the whole nail
(depending on the design we’re doing)
Step 4: Seal Everything In
Apply a regular glossy top coat and cure.
This smooths the surface and gives that glassy, expensive finish.
The Secret to Keeping It Elegant (Not Metallic)
Here’s the most important rule:
Less powder = more luxury.
If you apply too much, the nails start to look silver or chrome instead of milky and soft. The best versions of this look are barely there, like light is just gently reflecting off the nail.
Think:
- Pearl
- Not mirror
- Glow
- Not foil
Why This One Product Is So Powerful
Because the SAVILAND White Pearl Chrome Nail Powder is:
- Fine enough to look sheer and soft
- Not chunky or glittery
- Buildable from subtle to more dramatic
- And works over any sheer base color
…it becomes a design tool, not just a finish.
That’s why you can create 20 completely different nail looks using this same exact product.
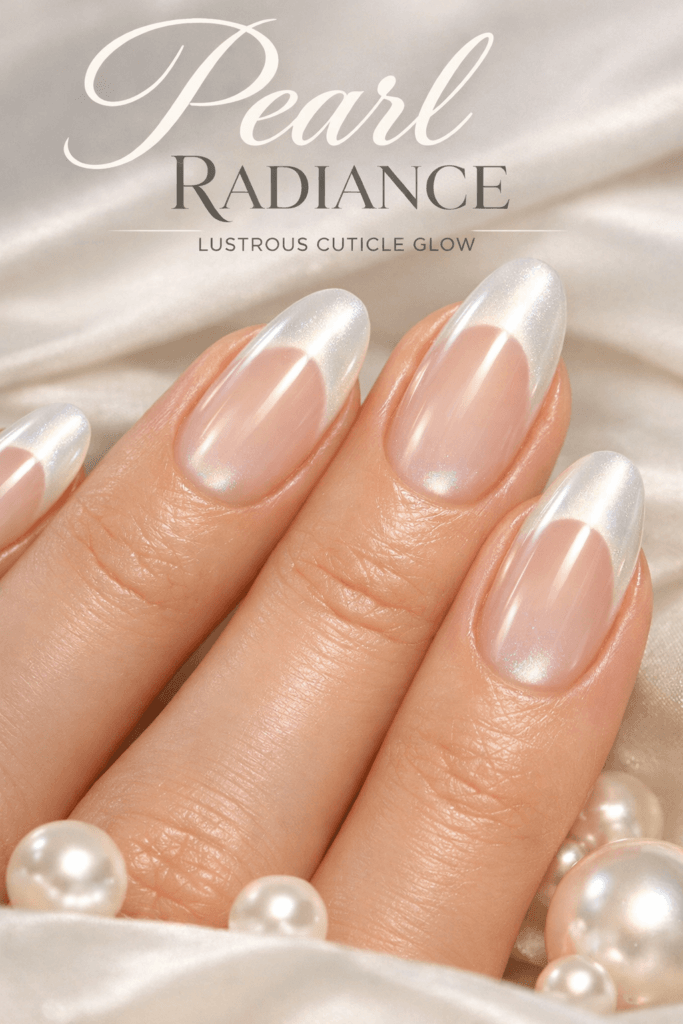
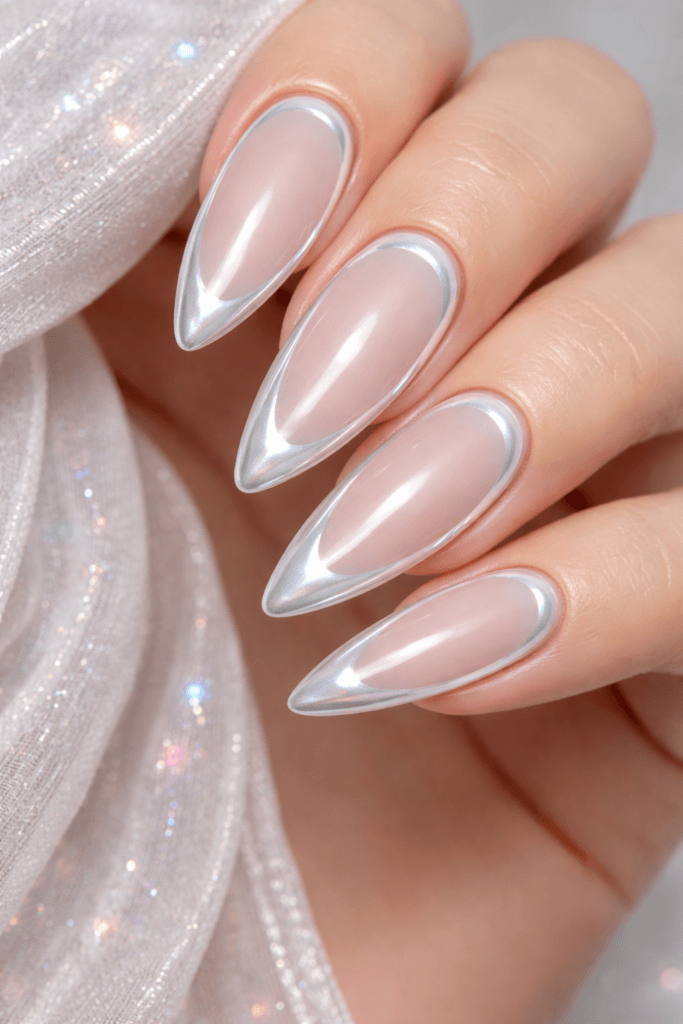
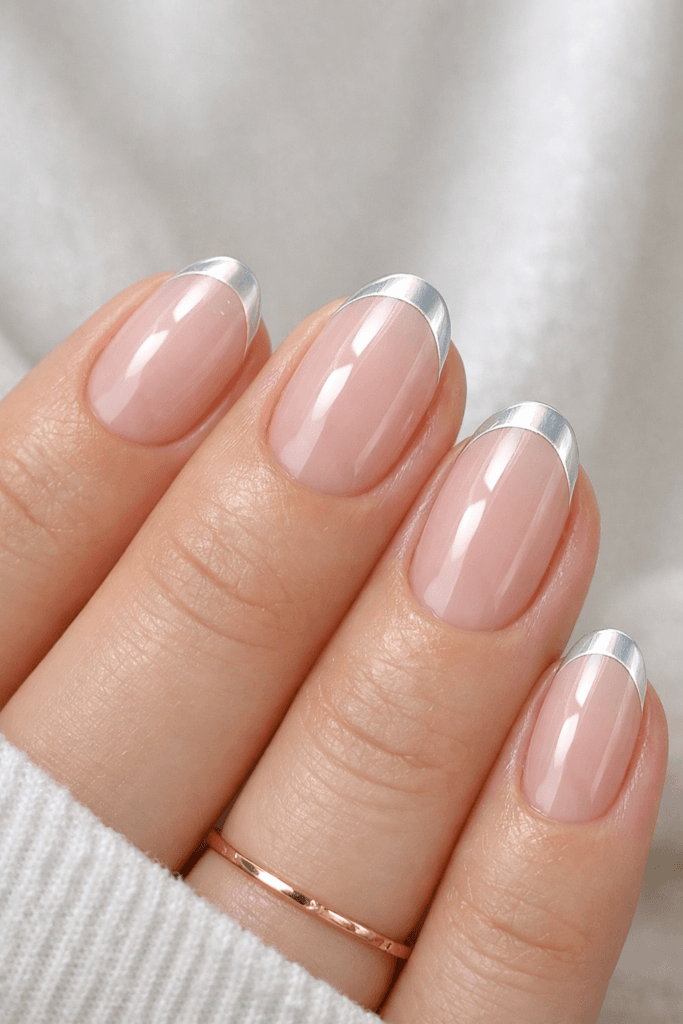
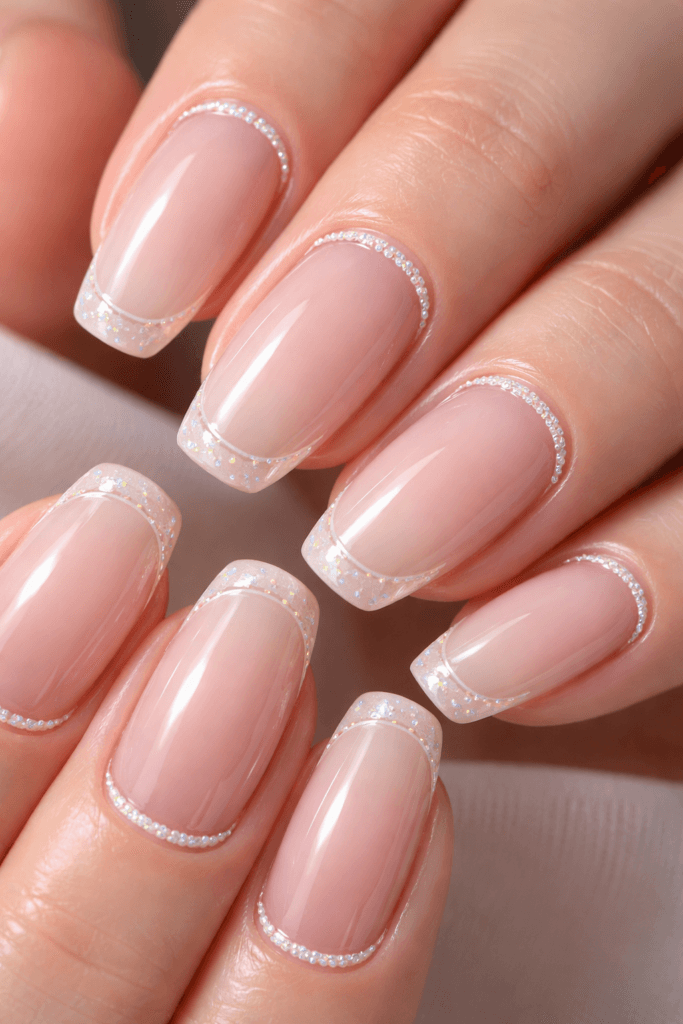
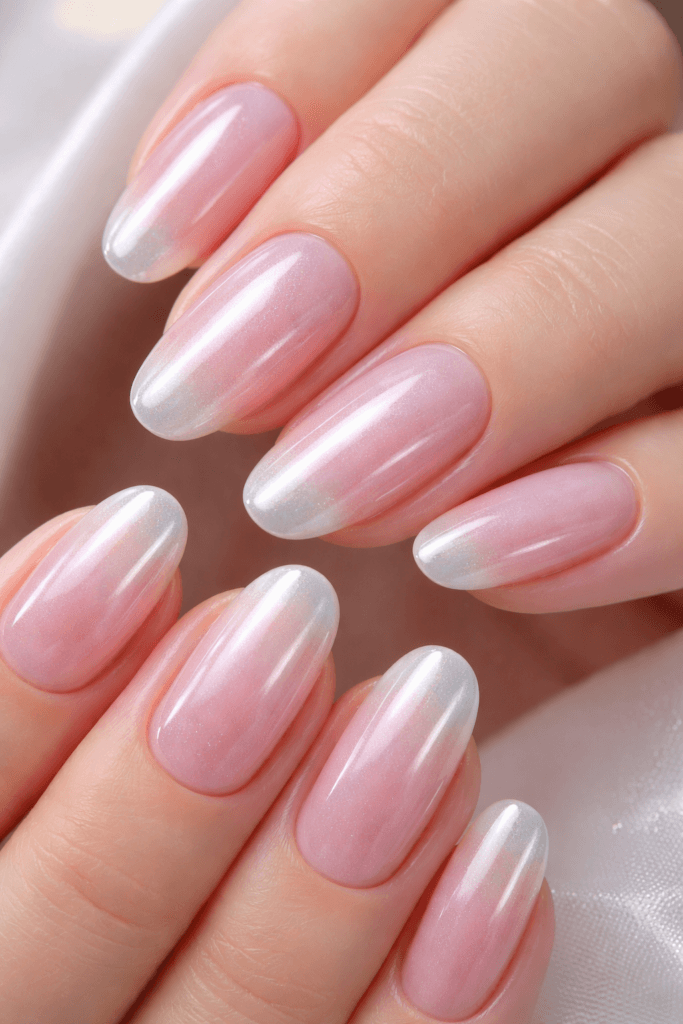
Design 1: Classic Glazed French Fade (The Signature Look)
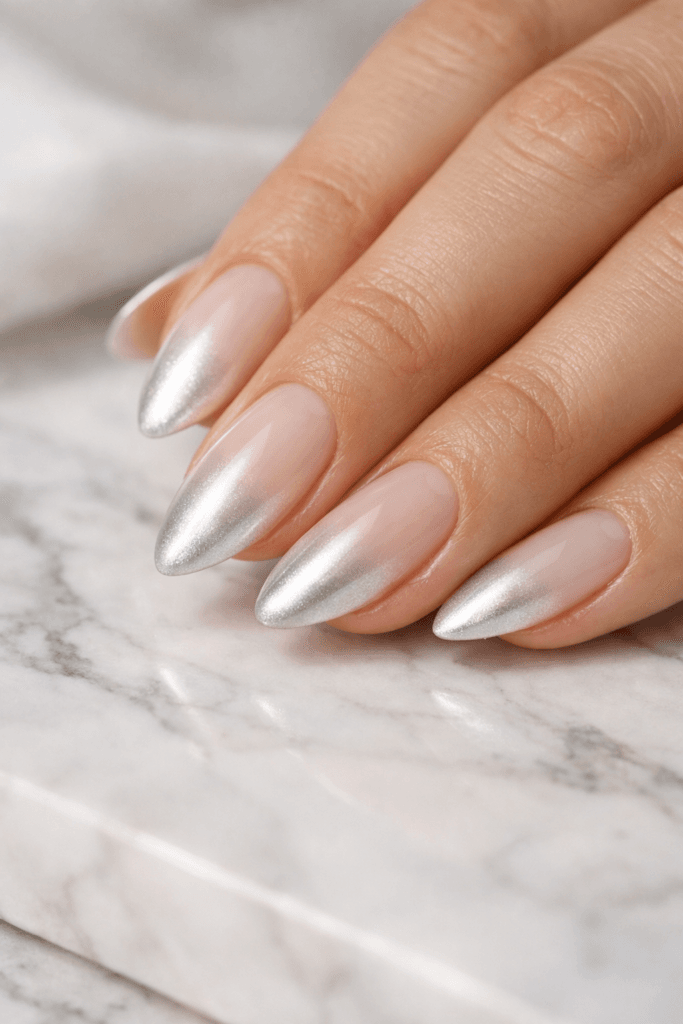
This is the exact style that inspired this entire series—the soft, milky base with a pearl glow concentrated at the tips and gently faded inward. It’s elegant, timeless, and makes your hands look instantly refined.
How to do it:
- Apply your sheer milky base and no-wipe top coat as described in Part 1.
- Pick up a very small amount of the SAVILAND powder.
- Gently buff it onto the tips only, working in small circular motions.
- Use a clean applicator to lightly blend the edge of the powder downward so the glow fades softly into the base.
- Seal with glossy top coat.
Why it looks expensive:
Because the glow is concentrated only where the light naturally hits the nail, it looks intentional, soft, and extremely polished instead of metallic.
Design 2: Reverse French Halo
Instead of placing the glow at the tips, this design moves the pearl effect to the cuticle area, creating a soft halo at the base of the nail.
How to do it:
- Apply the base and no-wipe top coat.
- Buff the SAVILAND powder gently around the cuticle curve only.
- Keep the center and tip mostly sheer.
- Seal with glossy top coat.
Why it works:
This draws attention to the shape of the nail and the cuticle line while keeping the overall look minimal and modern.
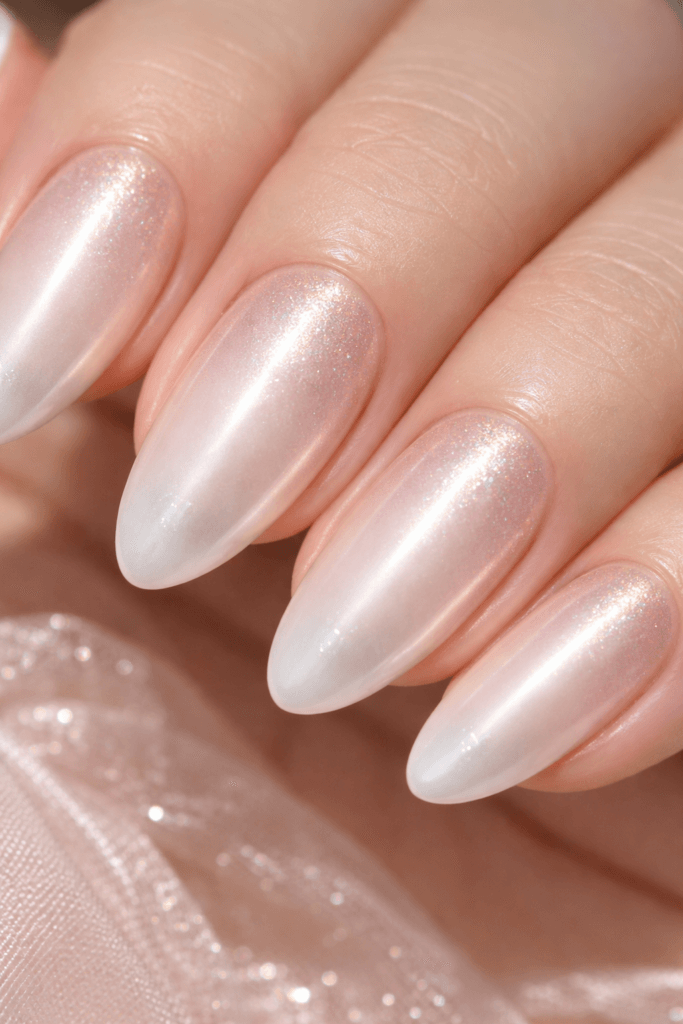
Design 3: Full Milky Glaze Glass Nails
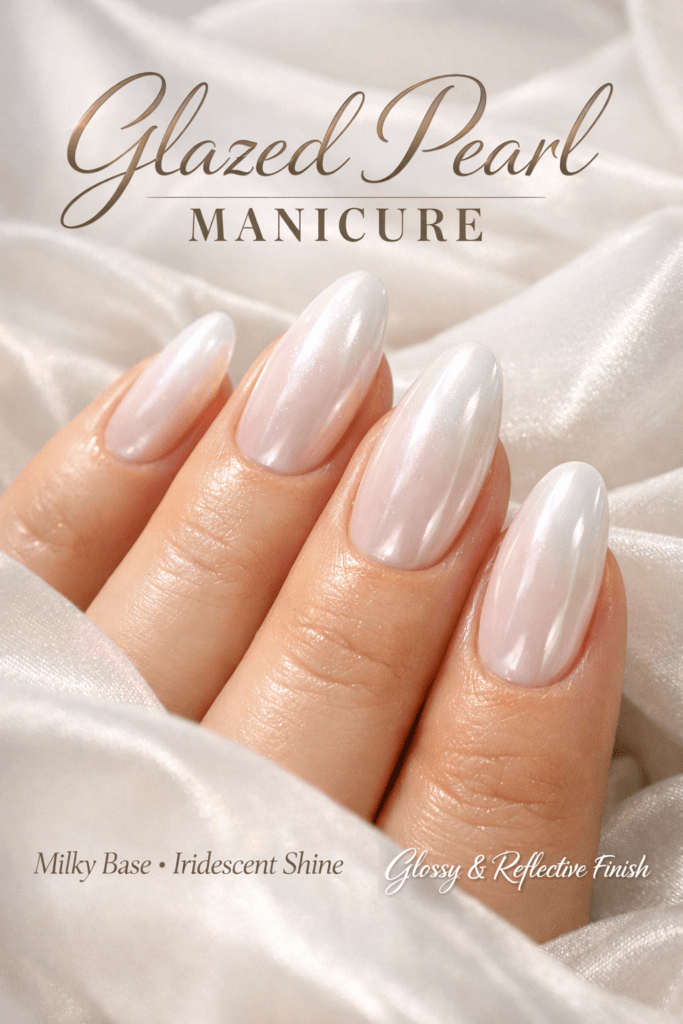
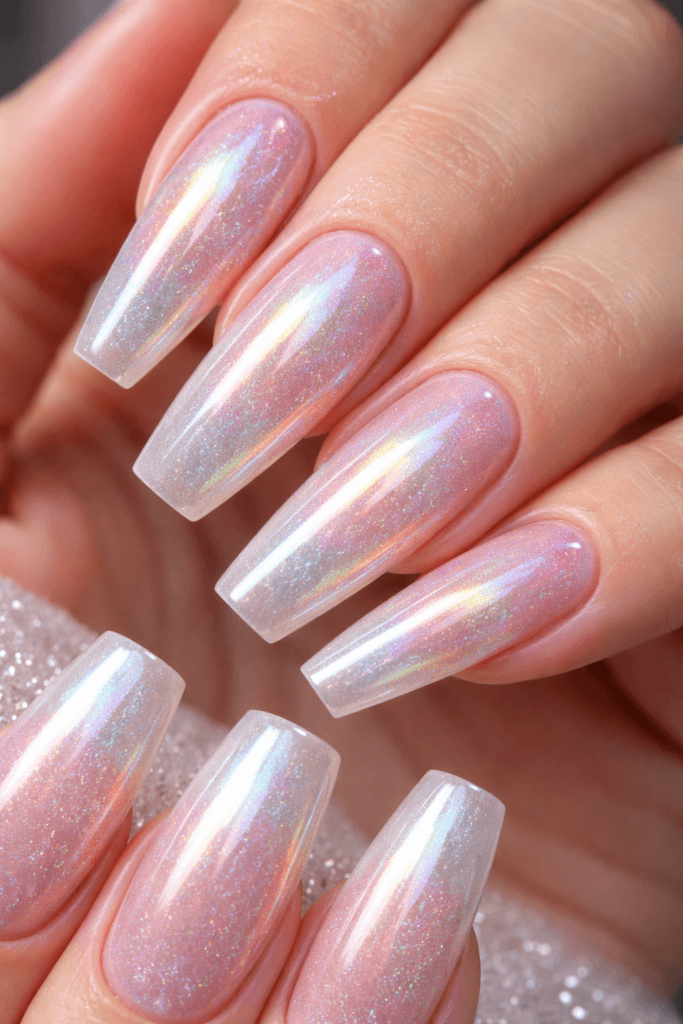
This is the most uniform and luminous version of the look—every nail gets a full, sheer, pearl glaze.
How to do it:
- Apply base and no-wipe top coat.
- Using a very light hand, buff the SAVILAND powder over the entire nail.
- Focus on building a soft glow, not full opacity.
- Seal with glossy top coat.
Important tip:
If it starts to look silver or chrome, you’re using too much powder. The goal is a pearl veil, not a mirror.
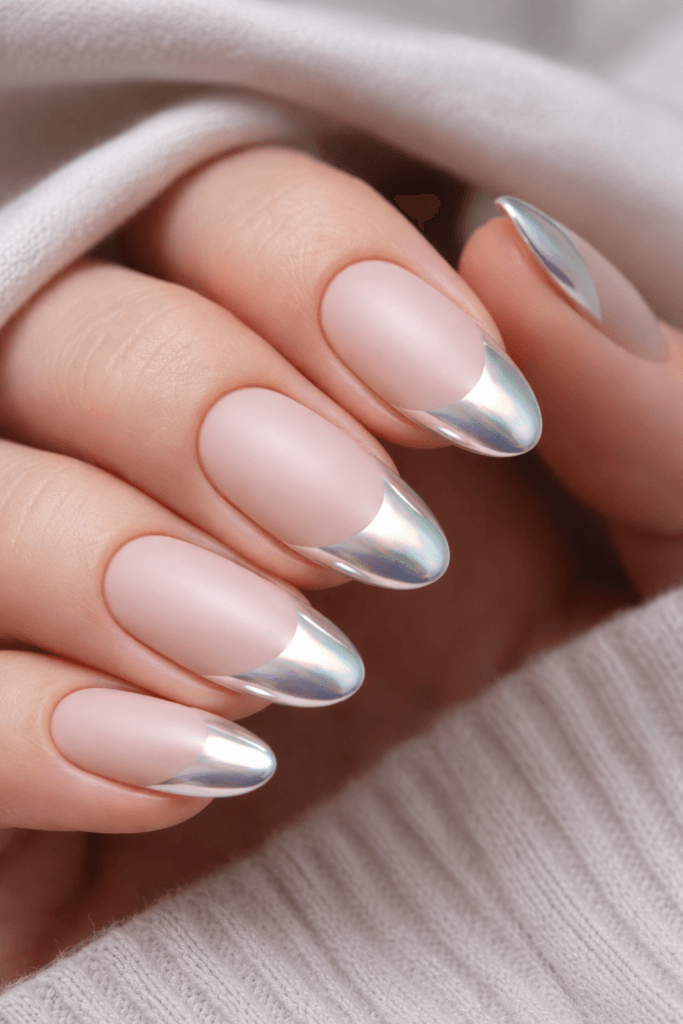
Design 4: Soft V-Tip Glaze
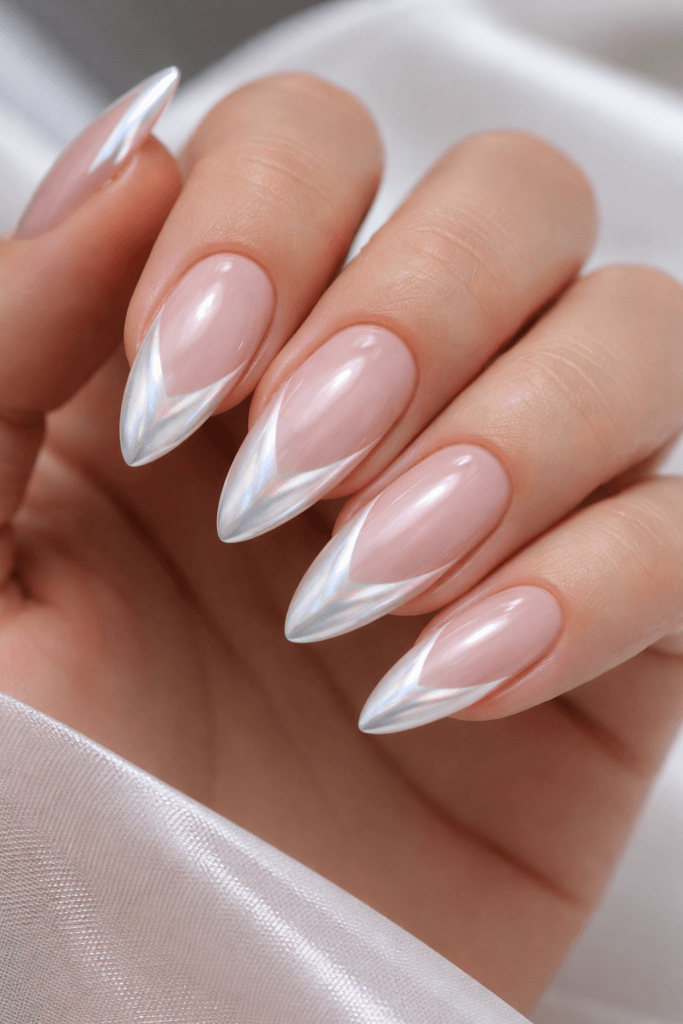
This is a modern twist on the French tip that feels more editorial and elongates the nail visually.
How to do it:
- Apply base and no-wipe top coat.
- Using the applicator, place the powder in a soft V shape starting from the tip and pointing toward the center of the nail.
- Lightly blend the edges so it fades seamlessly.
- Seal with glossy top coat.
Why it’s flattering:
The V shape makes the nail look longer and more sculpted while still keeping the design subtle.
Design 5: Side-Swipe Pearl Glaze
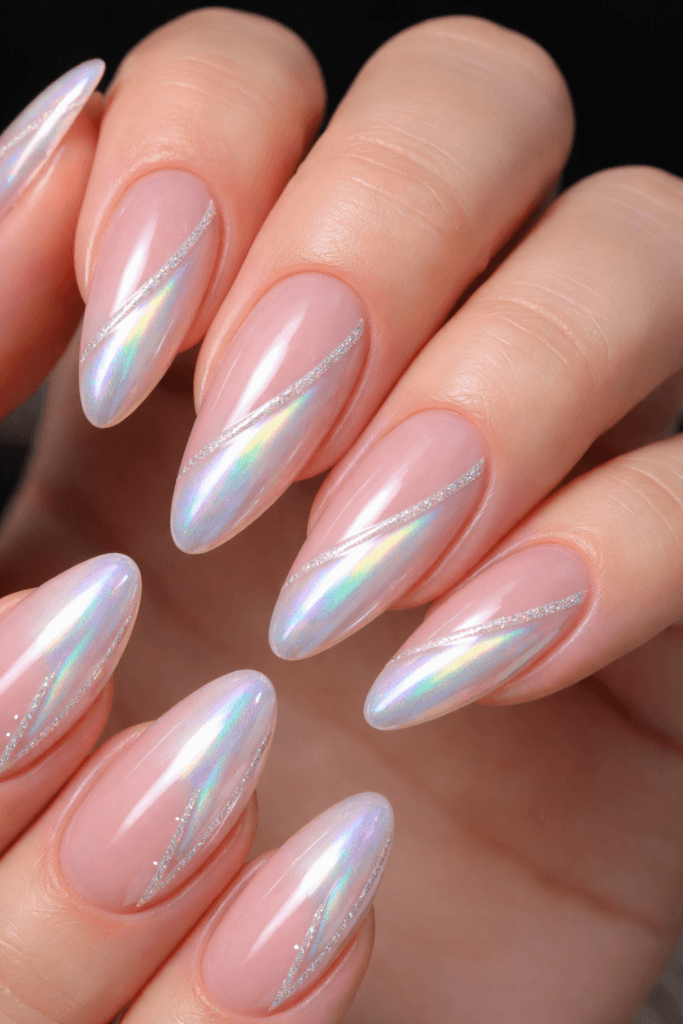
This look shifts the glow diagonally across the nail for a fashion-forward, editorial feel.
How to do it:
- Apply base and no-wipe top coat.
- Buff the SAVILAND powder from one side of the nail toward the center at a diagonal angle.
- Leave the opposite side more sheer.
- Seal with glossy top coat.
Why it feels modern:
It breaks the symmetry in a very intentional way and looks especially beautiful on almond or oval shapes.
Why These First Five Work So Well Together
All five designs:
- Use the same exact product
- Use the same base method
- But look completely different because of placement and blending
This is the core idea of this entire tutorial:
You’re not buying 20 products. You’re learning 20 techniques with one tool.
Design 6: Outline Halo Nails
This look uses the pearl glaze as a frame rather than a fill, creating a very high-end, editorial effect that feels modern and minimal.
How to do it:
- Apply your base and no-wipe top coat.
- Using a small amount of SAVILAND powder, gently buff it only around the outer edge of the nail.
- Keep the center of the nail sheer and clean.
- Seal with glossy top coat.
Why it looks luxe:
Because the light catches the perimeter of the nail, it creates a subtle glowing outline that feels intentional and fashion-forward.
Design 7: Micro-Glazed Tips
This is the ultra-minimal version of a glazed French—perfect if you love clean, barely-there nails.
How to do it:
- Apply your base and no-wipe top coat.
- Using a very small applicator, buff the powder just at the very edge of the tip.
- Keep the line thin and soft.
- Seal with glossy top coat.
Why it works:
It adds just a hint of shine without changing the overall neutral, clean look of the nail.
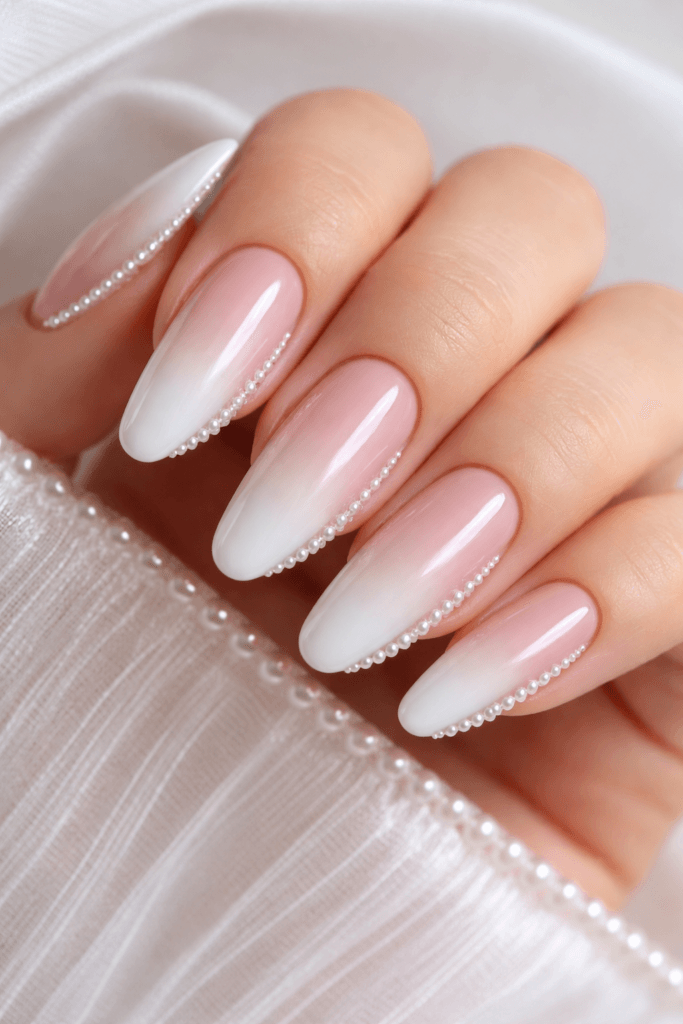
Design 8: Milky Ombré Glaze
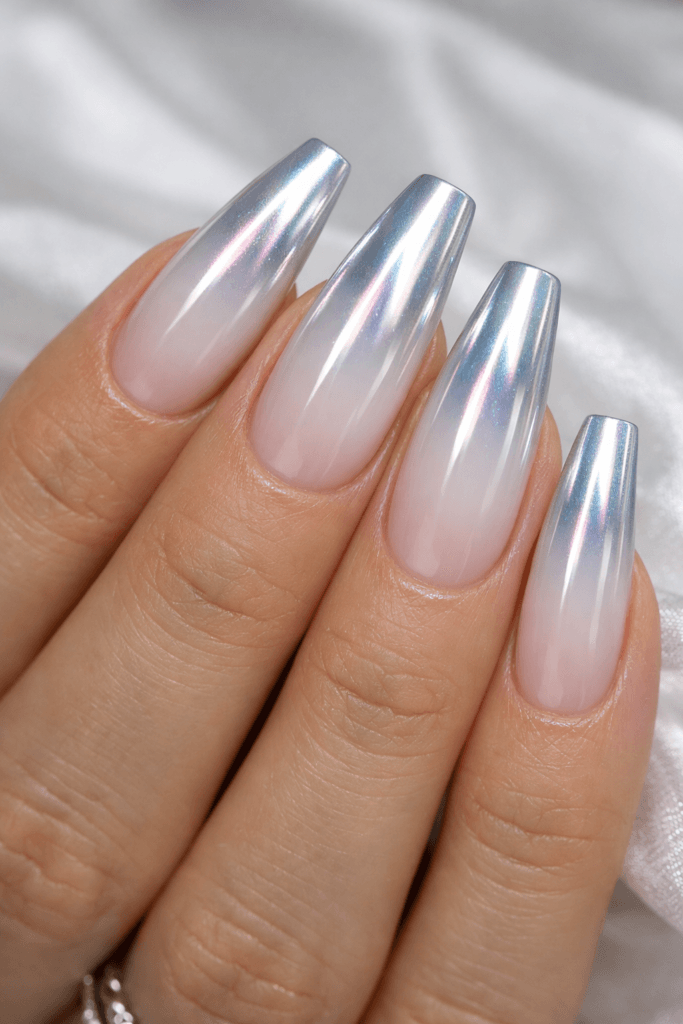
This is one of the most wearable and flattering versions of the trend—a soft fade from sheer to pearl glow.
How to do it:
- Apply base and no-wipe top coat.
- Buff the SAVILAND powder more heavily at the tip.
- Gradually use less pressure as you move toward the center of the nail.
- Blend until the transition is seamless.
- Seal with glossy top coat.
Pro tip:
Use a clean applicator to soften the fade if it starts to look too strong.
Design 9: Cuticle-to-Center Fade
This flips the ombré direction so the glow starts at the base of the nail instead of the tip.
How to do it:
- Apply base and no-wipe top coat.
- Buff the powder near the cuticle area and lightly fade it toward the middle of the nail.
- Leave the tip mostly sheer.
- Seal with glossy top coat.
Why it’s interesting:
It highlights the cuticle area and makes the nail bed look longer and more elegant.
Design 10: Double-French Pearl
This look adds two thin accents instead of one—one at the tip and one near the cuticle.
How to do it:
- Apply base and no-wipe top coat.
- Buff a thin pearl line at the tip.
- Then buff another thin curved line near the cuticle.
- Keep the center of the nail sheer.
- Seal with glossy top coat.
Why it feels designer:
The double detail makes the nail look custom and intentional while still staying clean and minimal.
The Pattern You Should Notice
By now, you can see the formula:
- Same base
- Same powder
- Same steps
The only thing changing is:
Placement + pressure + blending
That’s what gives you endless designs without endless products.
Design 11: Accent Nail Full Chrome
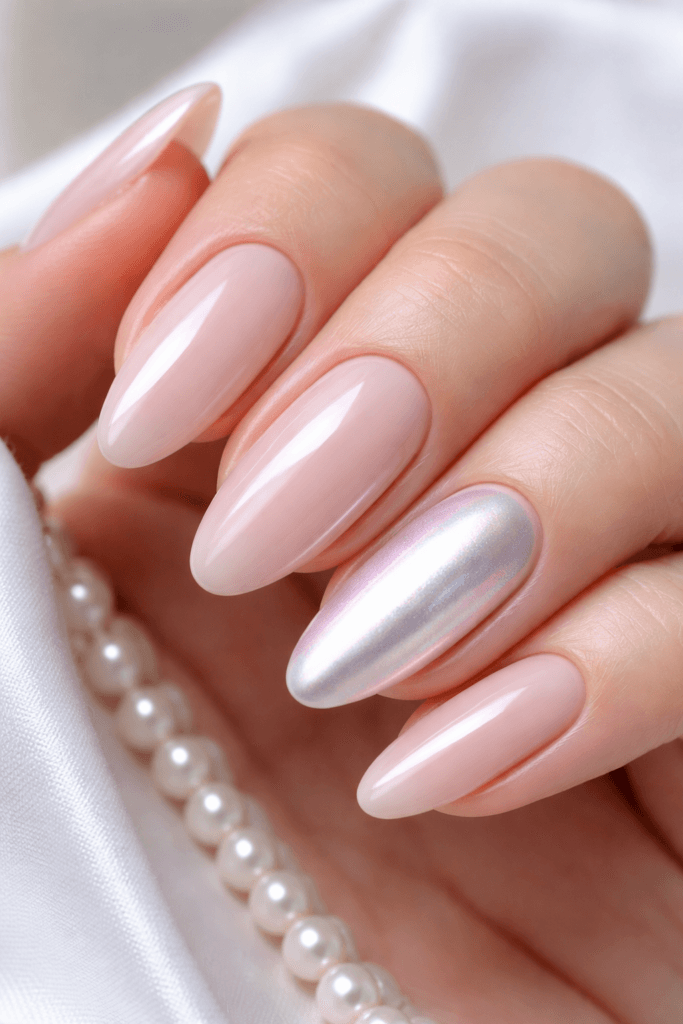
This design keeps most nails soft and minimal while letting one nail steal the spotlight with a full pearl glaze.
How to do it:
- Apply the base and no-wipe top coat to all nails.
- On one accent nail, buff the SAVILAND powder over the entire nail.
- On the remaining nails, use one of the softer styles (like micro tips or a light fade).
- Seal all nails with glossy top coat.
Why it works:
The contrast makes the full-glaze nail look intentional and elevated instead of overwhelming.
Design 12: Bridal Pearl Glow
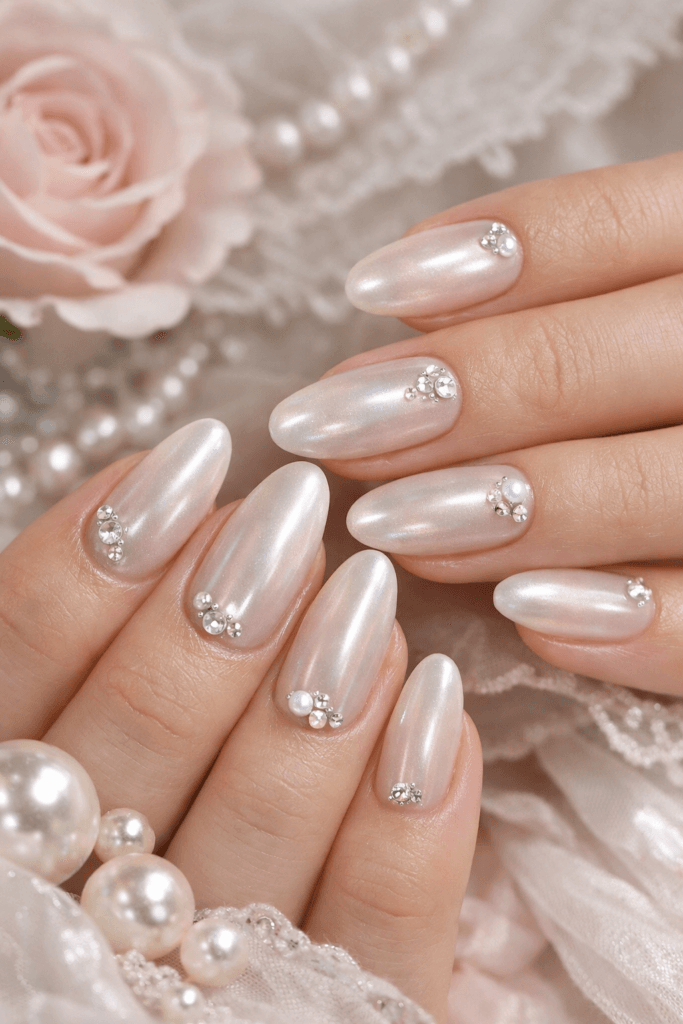
This is the softest, most romantic version of the glazed nail—perfect for weddings, events, or any time you want something extra refined.
How to do it:
- Apply the base and no-wipe top coat.
- Buff a very light layer of powder across the entire nail.
- Optionally add tiny crystals or pearls near the cuticle on one or two nails.
- Seal with glossy top coat.
Why it looks expensive:
The glow is so subtle it almost looks like natural light reflecting off perfectly healthy nails.
Design 13: Minimal Dot Halo
This style uses the pearl effect as a delicate accent, not a full design.
How to do it:
- Apply the base and no-wipe top coat.
- Buff a small amount of powder in a tiny curved area near the cuticle or add a few micro-dot accents.
- Keep the rest of the nail completely sheer.
- Seal with glossy top coat.
Why it’s chic:
It feels like jewelry for your nails—small, intentional, and very modern.
Design 14: Sheer “Lip Gloss” Nails
This is the most natural, “your nails but better” version of the trend.
How to do it:
- Apply a sheer pink or nude base and no-wipe top coat.
- Buff the tiniest amount of SAVILAND powder over the entire nail.
- The effect should be barely visible—just a soft, glossy glow.
- Seal with glossy top coat.
Why it’s perfect for everyday:
It works with everything and always looks clean, healthy, and polished.
Design 15: French Fade + Side Outline Combo
This look combines two techniques for a more editorial, custom feel.
How to do it:
- Create a soft French fade using the powder at the tip.
- Then lightly buff a thin pearl outline along one side of the nail.
- Keep both effects subtle and blended.
- Seal with glossy top coat.
Why it feels high-end:
Layering two soft details makes the nail look designed rather than just decorated.
You’re Now Seeing the Full Range
By this point in the article, you’ve covered:
- Ultra-minimal styles
- Bridal and elegant looks
- Editorial, fashion-forward designs
- And everyday, wearable versions
All using one single product.
Design 16: Matte + Pearl Contrast
This design plays with texture instead of placement, creating a modern, fashion-editorial look.
How to do it:
- Apply your base color and cure.
- Apply matte top coat and cure.
- On the areas you want glossy (tips, edges, or half the nail), apply a no-wipe top coat and cure again.
- Buff the SAVILAND powder only onto the glossy areas.
- Seal the entire nail with a final glossy top coat.
Why it’s striking:
The contrast between matte and pearl-gloss makes the design look intentional and high-end without adding any extra colors.
Design 17: Pearl Frame Nails
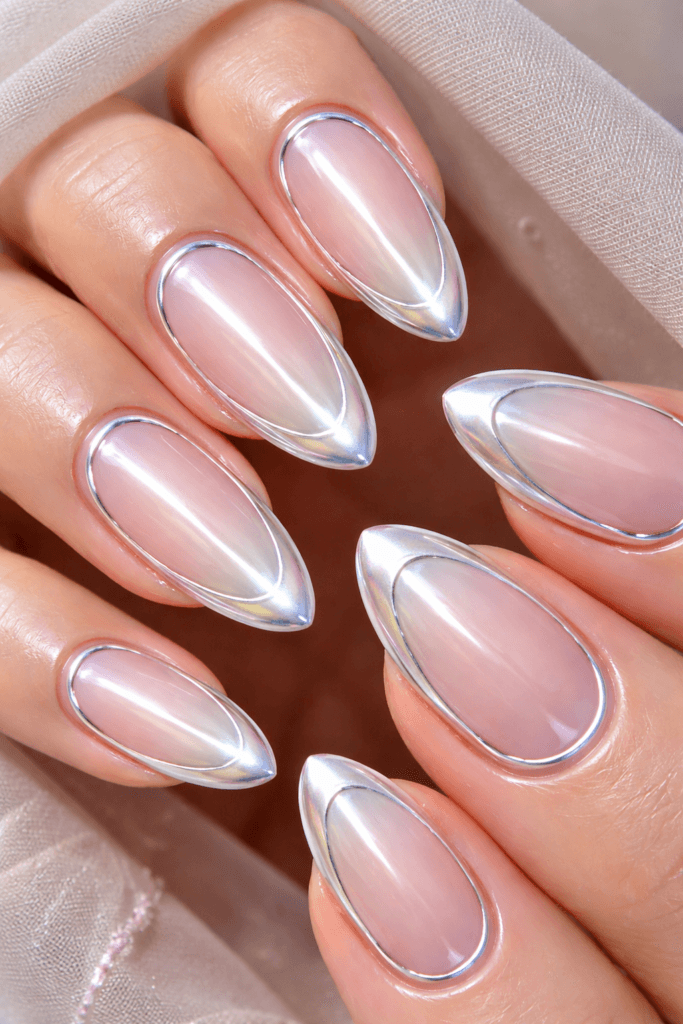
This look uses the powder to frame the nail like a soft halo, leaving the center clean and sheer.
How to do it:
- Apply base and no-wipe top coat.
- Buff the SAVILAND powder around the perimeter of the nail, keeping the center mostly untouched.
- Blend softly so the frame looks diffused, not harsh.
- Seal with glossy top coat.
Why it looks editorial:
It feels architectural and modern—more like a design choice than nail art.
Design 18: Micro-Glitter Overlay Glaze
This version adds extra sparkle while still keeping the look refined.
How to do it:
- Apply a very fine, subtle glitter base and cure.
- Apply no-wipe top coat and cure.
- Lightly buff the SAVILAND powder over the nail.
- Seal with glossy top coat.
Why it works:
The chrome powder softens the glitter underneath, turning it into a smooth, pearl-like glow instead of a chunky sparkle.
Design 19: Short Clean Girl Glaze
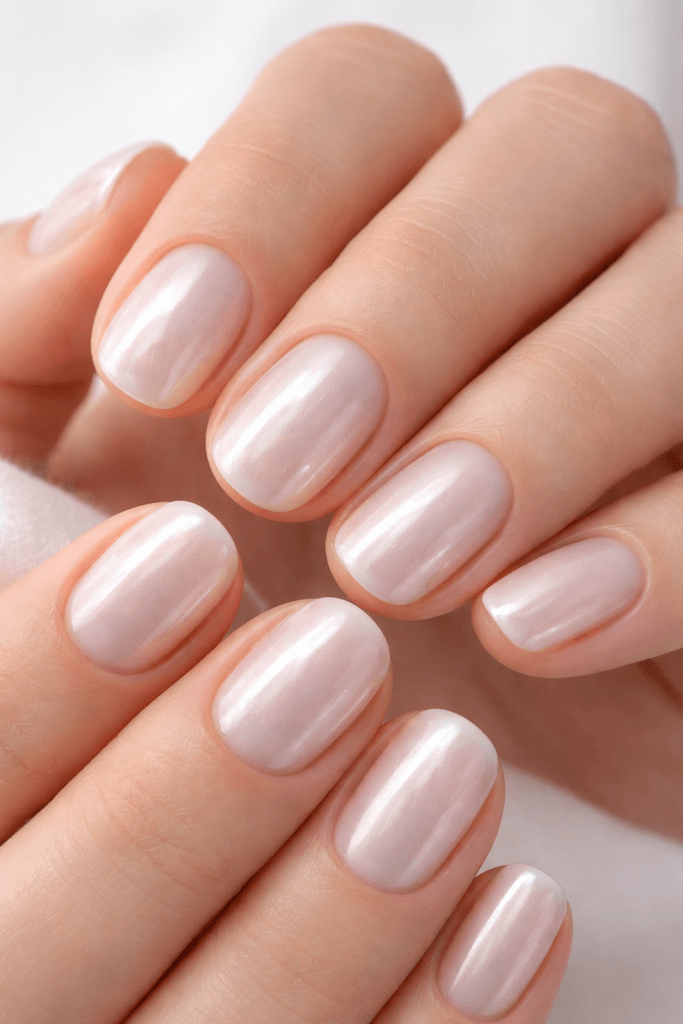
This adapts the entire trend specifically for short, rounded nails.
How to do it:
- Use a sheer nude or milky pink base.
- Apply no-wipe top coat.
- Buff a very light layer of SAVILAND powder over the entire nail or just the tips.
- Seal with glossy top coat.
Why it’s perfect for everyday:
It looks clean, fresh, and low-maintenance while still feeling polished and intentional.
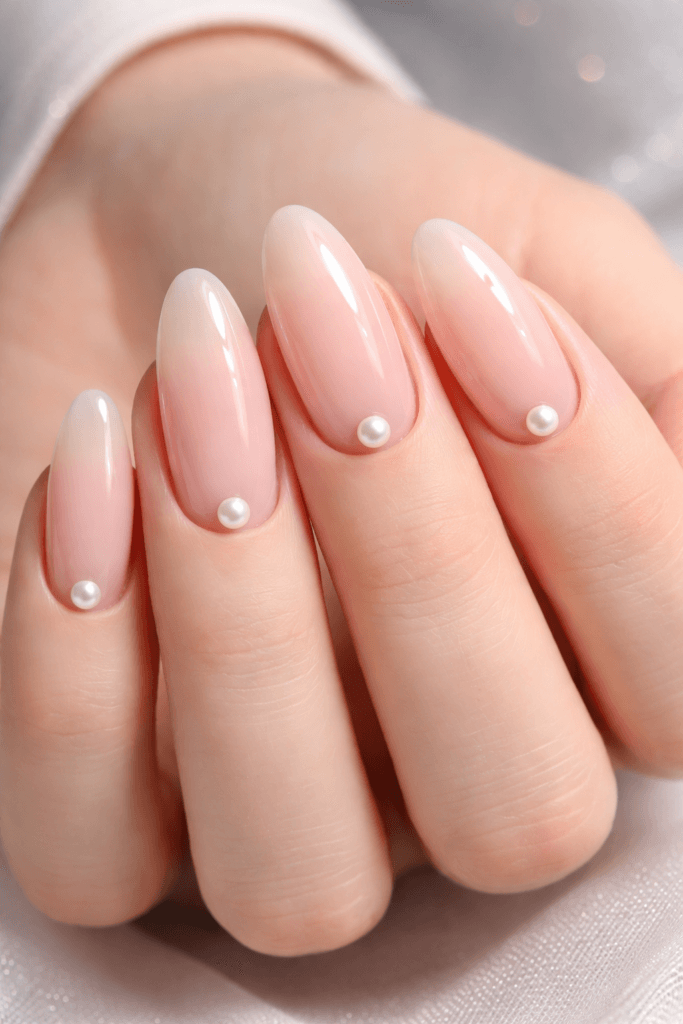
Design 20: Almond Luxe Editorial Glaze (The Hero Look)
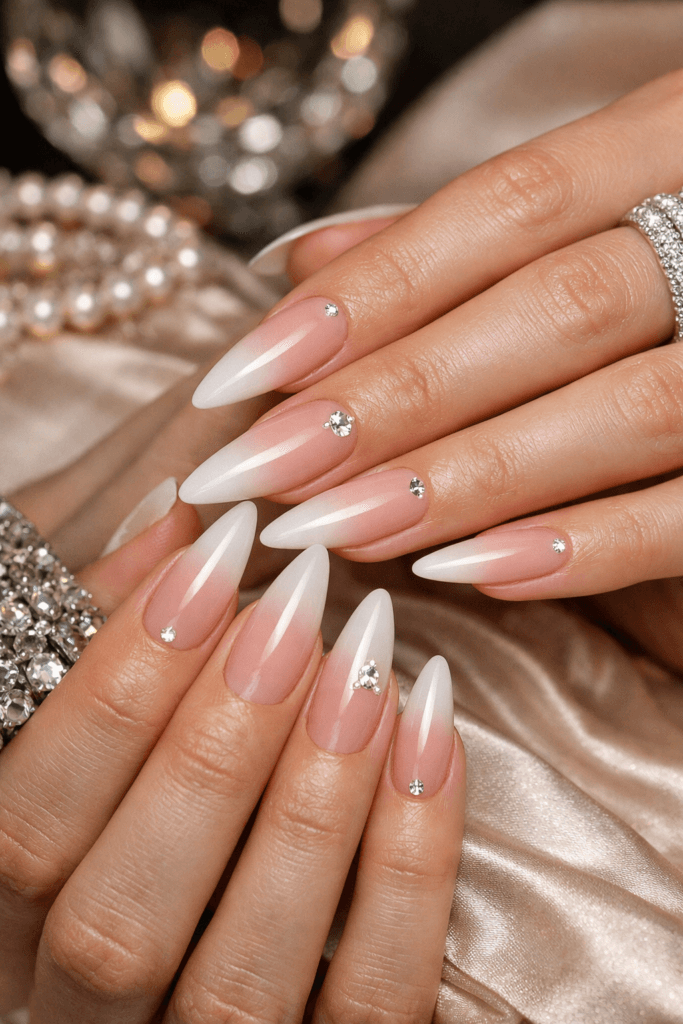
This is your statement, cover-worthy design—the one you’d use as the main image for the article.
How to do it:
- Use long almond-shaped nails with a sheer milky base.
- Apply no-wipe top coat.
- Create a soft French fade with the SAVILAND powder.
- Optionally add tiny crystals or pearl accents near the cuticle on one or two nails.
- Seal with glossy top coat.
Why it’s the ultimate version:
It combines everything—shape, glow, softness, and elegance—into one truly high-end look.
Why This One Product Gives You Endless Looks
Every single design in this guide uses:
The same base method. The same powder. The same tools.
The only things changing are:
- Placement
- Pressure
- Blending
- And design intent
That’s what makes the SAVILAND White Pearl Chrome Nail Powder such a powerful tool—it’s not just a finish, it’s a design medium.
Bellencinista Notes
Some visual and written assets in this article were created with the help of AI to better illustrate design concepts and inspiration.
Final Thoughts: Build a Whole Nail Wardrobe with One Product
Milky glazed nails aren’t just a trend—they’ve become a modern classic because they’re:
- Soft
- Elegant
- Wearable
- And endlessly customizable
Instead of buying a drawer full of products, you can build an entire nail aesthetic around one single powder and a few smart techniques.
Whether you love:
- Ultra-minimal nails
- Bridal elegance
- Clean girl beauty
- Or editorial statement looks
…there’s a version of this trend in this guide for you.
And the best part?
Once you master the base method, you’ll never run out of new ways to wear it.