Trending Finds Readers Are Loving
Explore affordable luxe discoveries people are clicking on right now.
See What's TrendingWhen it comes to stylish and affordable home accents, few things beat the magic of a tiered tray. Whether you’re dressing up a cozy coffee bar or creating an elegant welcome moment on your entry table, a tiered tray offers structure, height, and endless styling potential. Even better? You don’t need to spend a fortune to make it happen. This DIY Dollar Tree tiered tray looks high-end but comes together with a handful of simple, chic materials—and yes, it’s absolutely renter-friendly.
Let me show you exactly how I made it, how I styled it two different ways, and where you can grab similar pieces online to recreate the look at home.
Step 1: Gather Your Core Materials
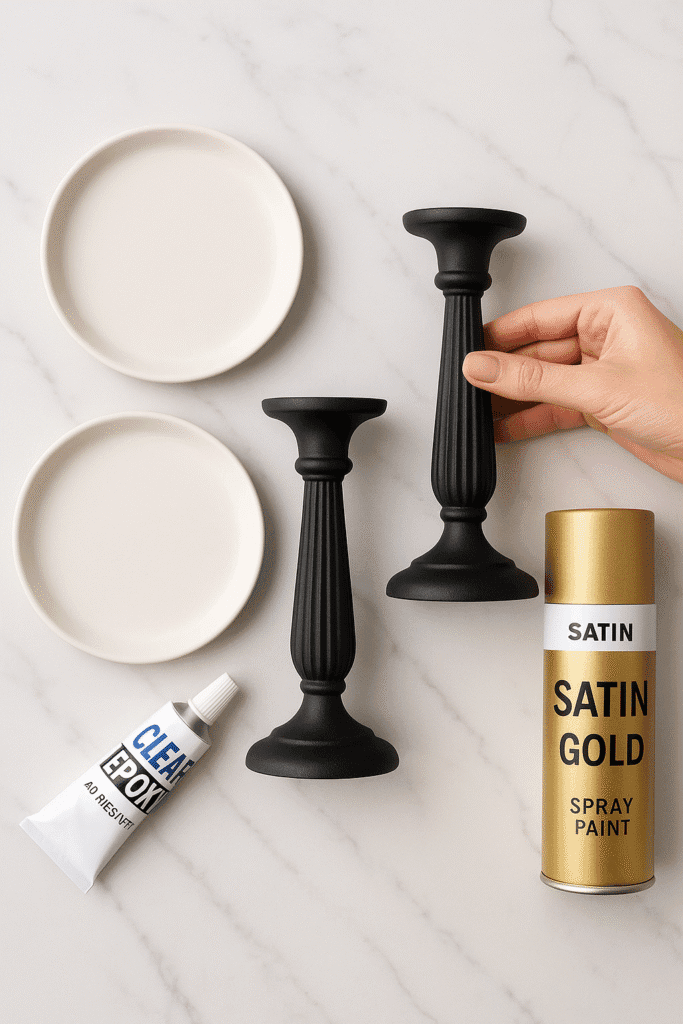
To build the base of your tray, head to Dollar Tree (or your local budget store) and grab the following:
Price: $17.99
Shop Similar: Pillar Candle Holders Stands Set of 2 – a must-have featured in this post.
- Two dinner plates (opt for white, faux marble, or metallic finishes)
- One salad or dessert plate for the top tier
- Two candlestick holders
- Strong glue or epoxy adhesive
- Optional: spray paint (gold, matte black, or champagne work beautifully)
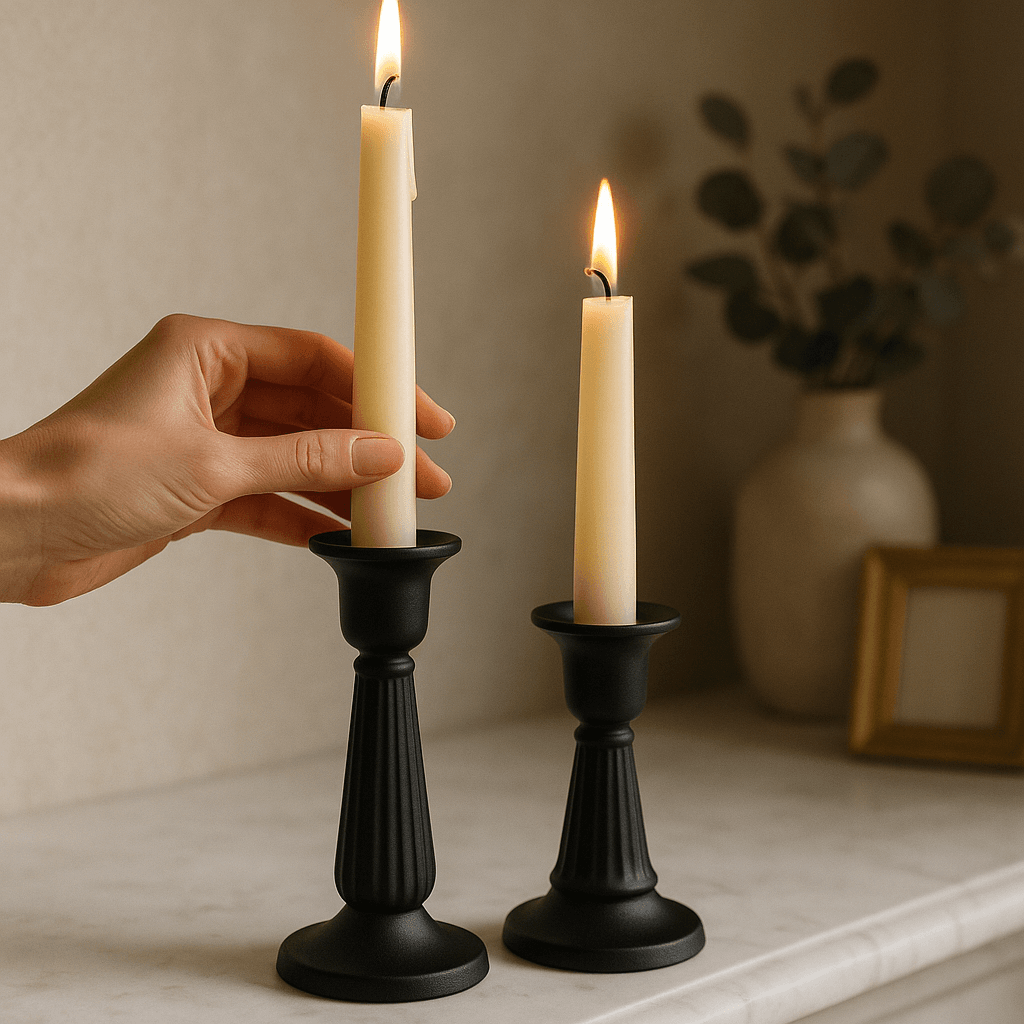
Tip: If you want a soft glam or Parisian café vibe, spray your candlestick holders in matte ivory or blush and layer your trays with white ceramics and gold rimmed details.
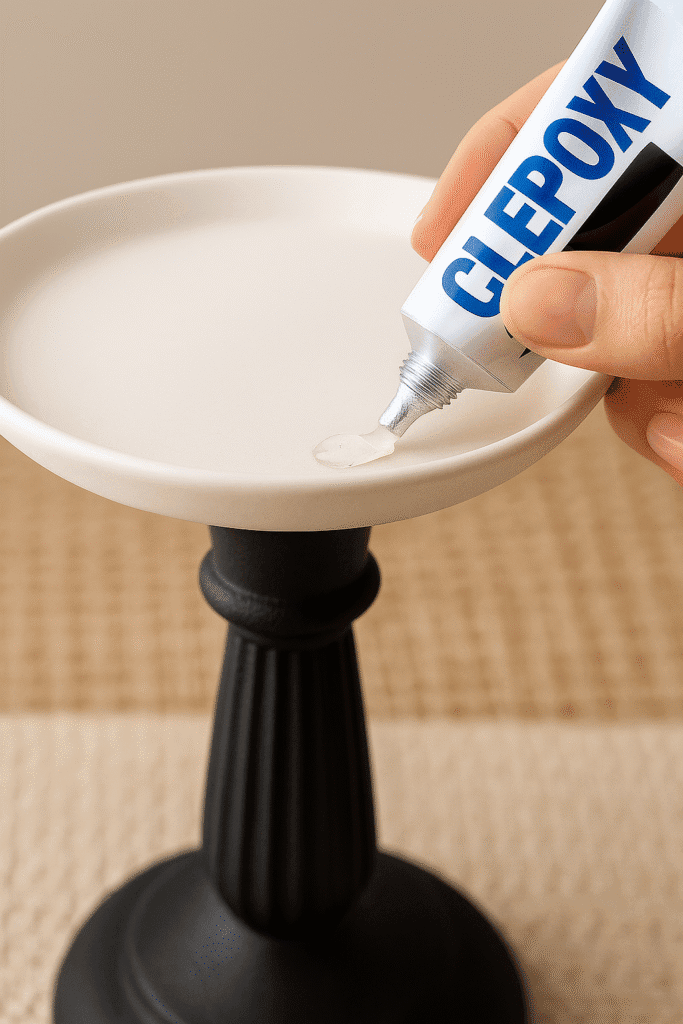
Once you’ve got your pieces, glue one candlestick to the center of the bottom dinner plate and place the second plate on top. Repeat with the top candlestick and finish with the smaller dessert plate. Let it dry completely for at least 24 hours before styling.
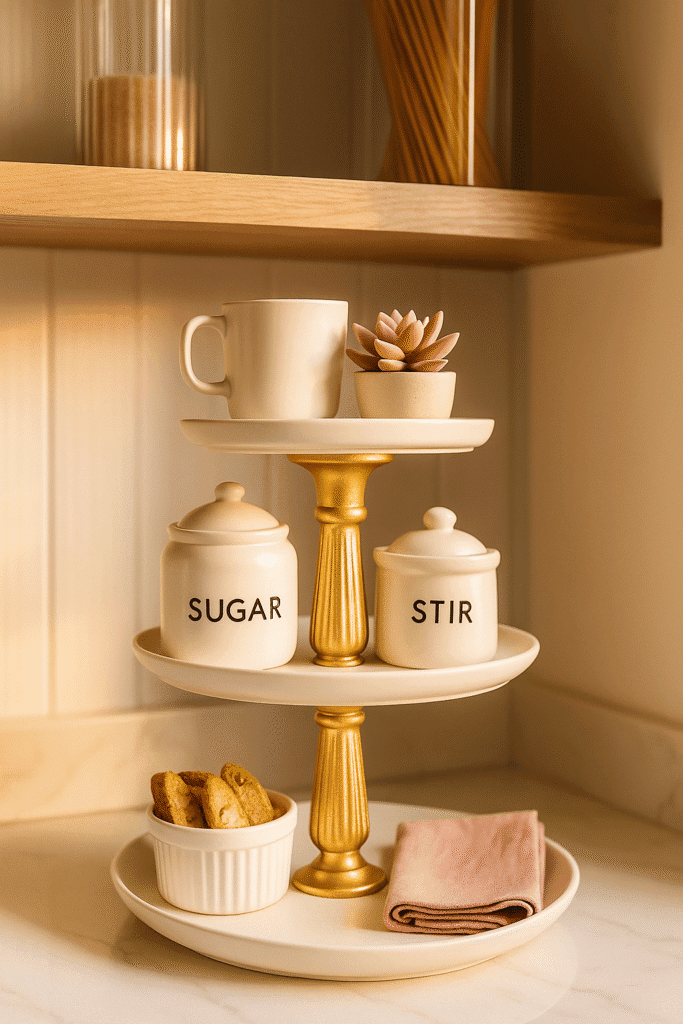
Step 2: Coffee Bar Styling That Feels Boutique-Worthy
This is where the real fun begins—styling your tray! For a chic coffee bar setup, I kept things neutral with pops of texture and soft metallics. Here’s how I styled it:
- Top Tier: stacked espresso mugs, a gold spoon, and a small faux succulent
- Middle Tier: mini white canisters labeled “sugar” and “stir sticks” in glam script font (vinyl label DIY), plus a mini seasonal sign
- Bottom Tier: a white ramekin filled with wrapped biscotti and napkins fanned out beside it
Behind the tray, I placed a white framed print that reads “But First, Coffee,” and hung a hook for my favorite monogrammed mug. It feels personal, stylish, and intentionally curated. And the best part? It all cost under $20.
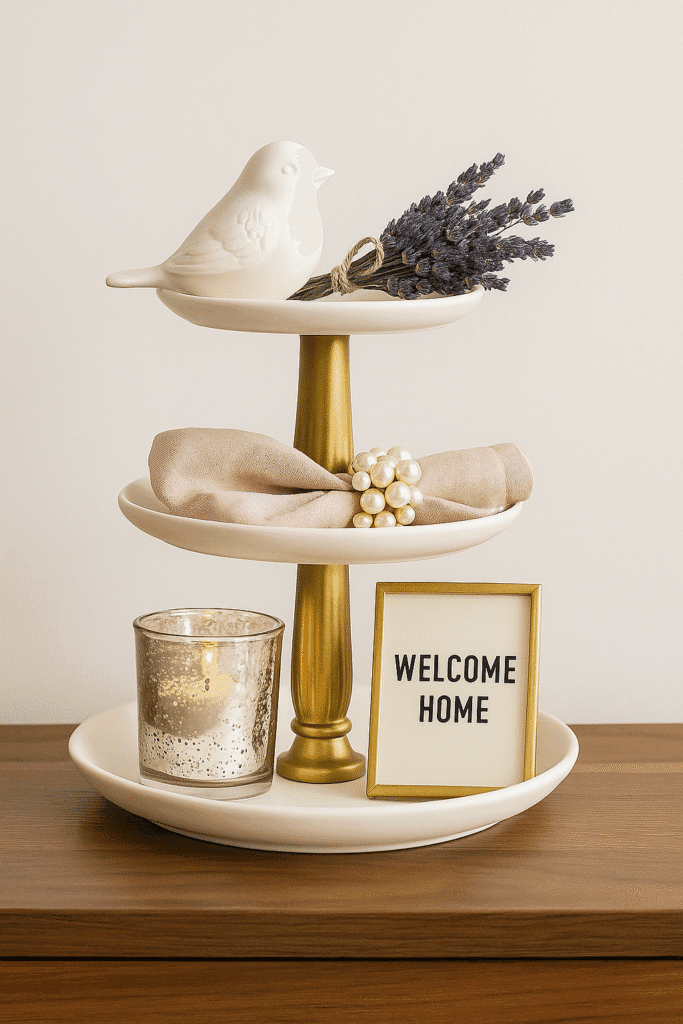
Step 3: Entry Table Version with Subtle Glam
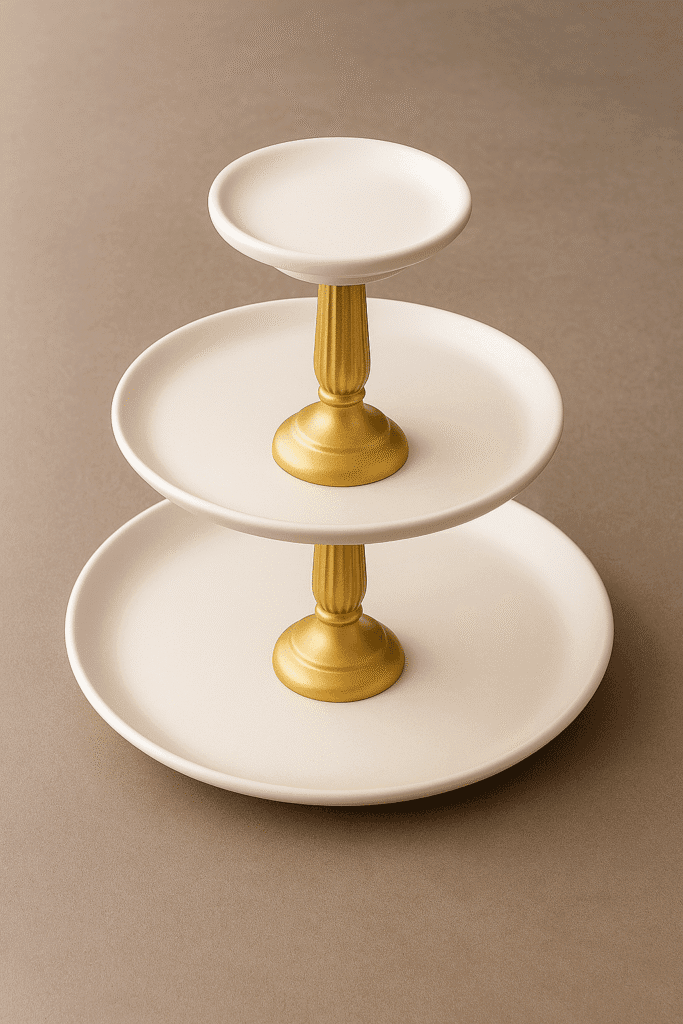
You can use 3 different sizes as seen here, or…..
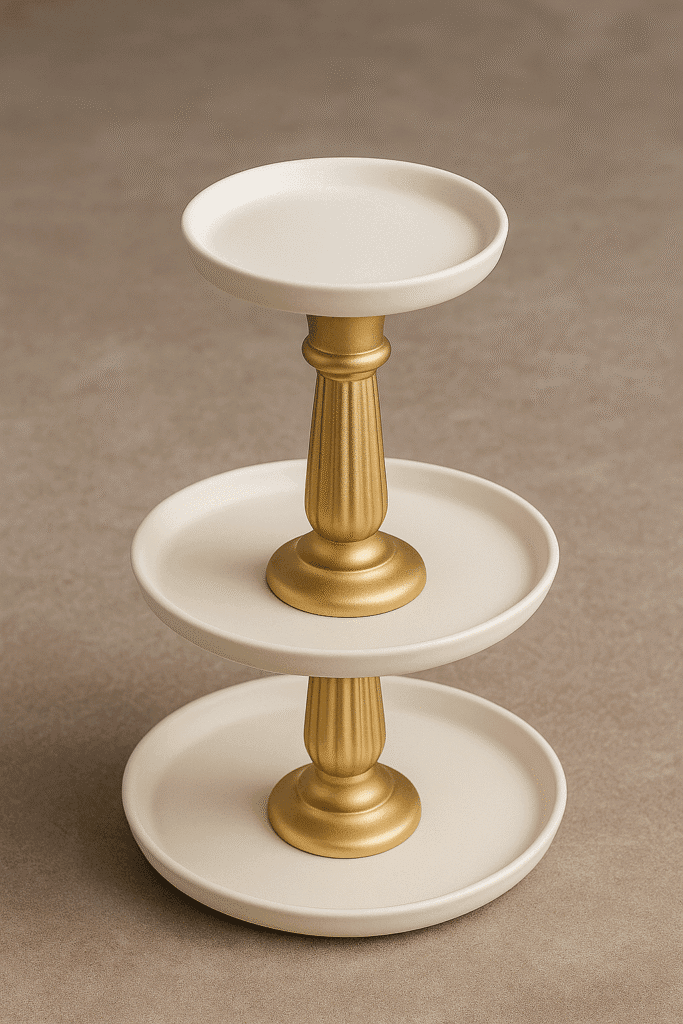
two different sizes with thetop tier being the smallest size!
If your home doesn’t need a coffee station, this tray works just as beautifully on an entry table. The key is blending height, softness, and sparkle.
- Top Tier: a ceramic dove figurine and a mini lavender bundle wrapped in twine
- Middle Tier: folded linen napkins with a faux pearl napkin ring and a single faux rose resting inside
- Bottom Tier: a clear candle in a mercury glass jar and a mini framed quote (“Welcome Home”)
Style the base of the tray with a beaded garland, a velvet ribbon, or a stack of fashion books to finish the look. The reflection from a mirror hung just behind makes the tray feel even taller and more luxe.
How to Transition This Tray Through Every Season
This is truly the tray that keeps on giving. You can keep the structure the same year-round and simply update the styling elements with the seasons:
- Fall: Add mini pumpkins, acorn fillers, plaid napkins, and burnt orange touches
- Winter: Use mini bottle brush trees, silver ornaments, and a pine-scented candle
- Spring: Pastel floral stems, bird nest decor, and soft gingham fabric
- Summer: Lemon slice coasters, faux greenery, and pops of turquoise
The versatility is what makes this DIY such a long-term win. You’re not just making a centerpiece—you’re building a year-round home styling tool.
Where to Get Similar Items Online
Even if you can’t make it to Dollar Tree, you can still recreate this DIY with affordable online finds. Below is a roundup of similar products that’ll give you the same luxe-for-less finish (and yes, they ship fast):
- Pillar Candle Holders Stands – perfect for layering between tiers or placing at the base
- Mini White Ceramic Plates – smooth, modern, and match nearly anything
- Gold Spray Paint – for coating candlesticks or adding subtle accents
- Boho Beaded Garland – to drape across the tray base or edge
- Mini Faux Succulent in Pot – for a soft modern accent on any tier
Final Thoughts

This DIY tiered tray project proves that budget décor doesn’t have to look basic. With just a few thoughtful styling choices and a little creativity, you can elevate any nook of your home—whether it’s your kitchen coffee corner or your elegant entryway. Don’t be surprised when your guests ask where you got it. And yes, you can absolutely say: “I made it!”