Trending Finds Readers Are Loving
Explore affordable luxe discoveries people are clicking on right now.
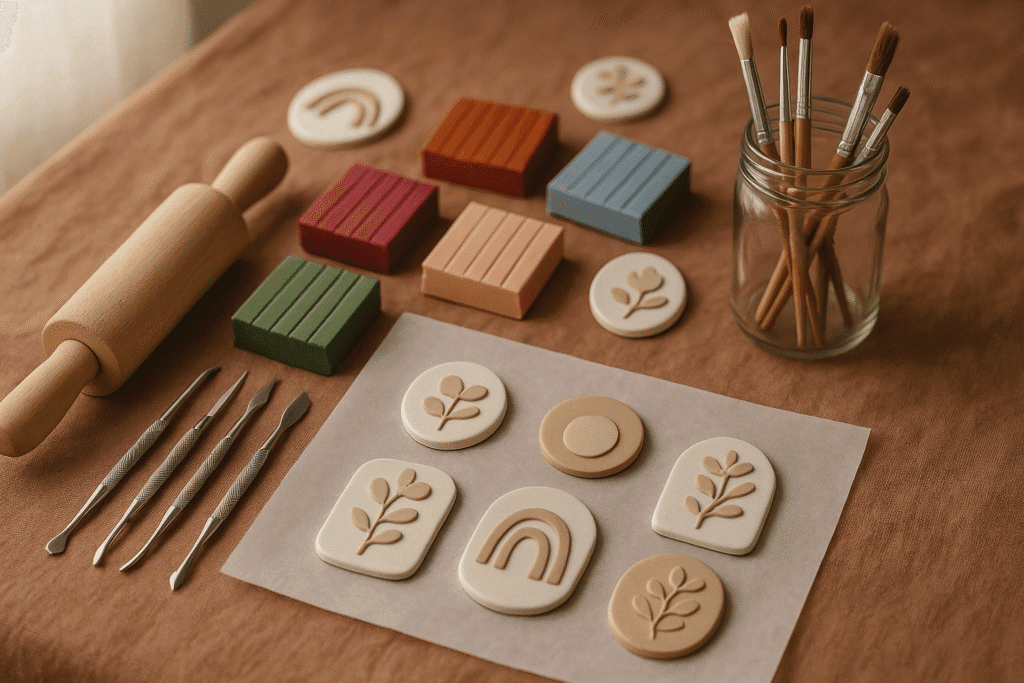
See What's TrendingLooking for an easy yet chic way to level up your fridge, whiteboard, or workspace? These DIY polymer clay magnets are budget-friendly, beginner-friendly, and bursting with personality. Whether you’re into earthy boho styles, bright kawaii vibes, or elegant neutrals, polymer clay gives you full creative control.
Why Polymer Clay is the Perfect Material for DIY Magnets

Polymer clay is a dream for DIY lovers. It’s easy to mold, bakes in a regular oven, and comes in virtually every color imaginable. Once baked, it becomes hard and durable—perfect for crafting custom magnets that hold up paper, photos, or notes. The best part? It’s incredibly versatile. From floral motifs to marble swirls or abstract shapes, you can shape your magnets into anything your heart desires.
Supplies You’ll Need
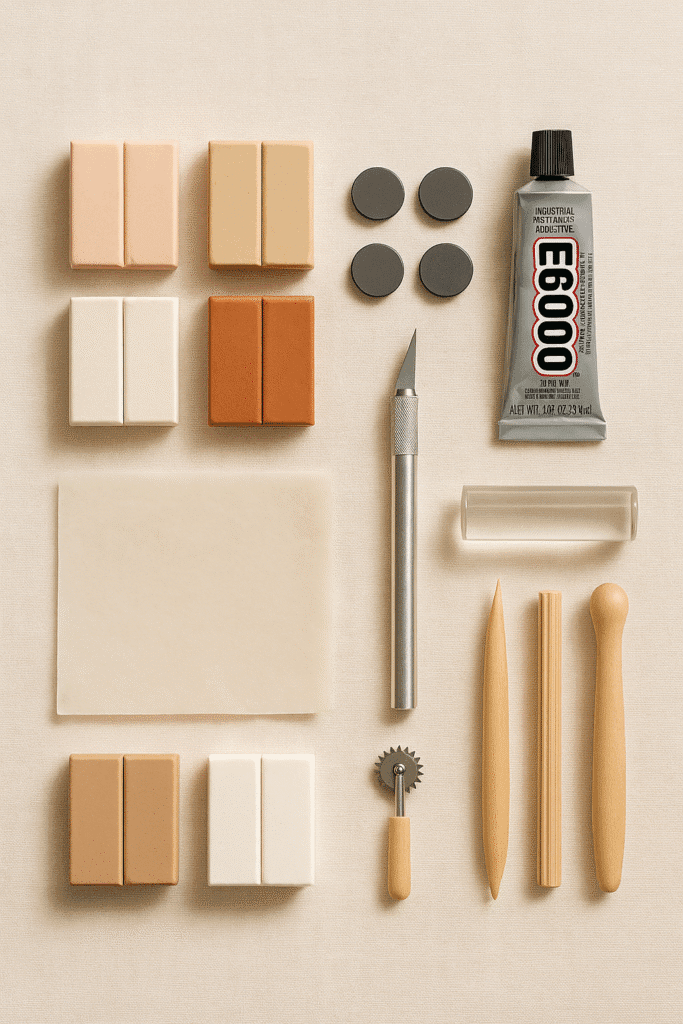
- Polymer clay (your color palette of choice)
- Small magnets (flat, strong types work best)
- Super glue or E6000 adhesive
- Craft blade or clay cutter
- Rolling pin or acrylic roller
- Baking tray + parchment paper
- Optional: texture tools, metallic foil, glaze, or paint
Tip: Choose magnets that are strong enough to actually hold paper on the fridge—some decorative magnets are cute but not functional.
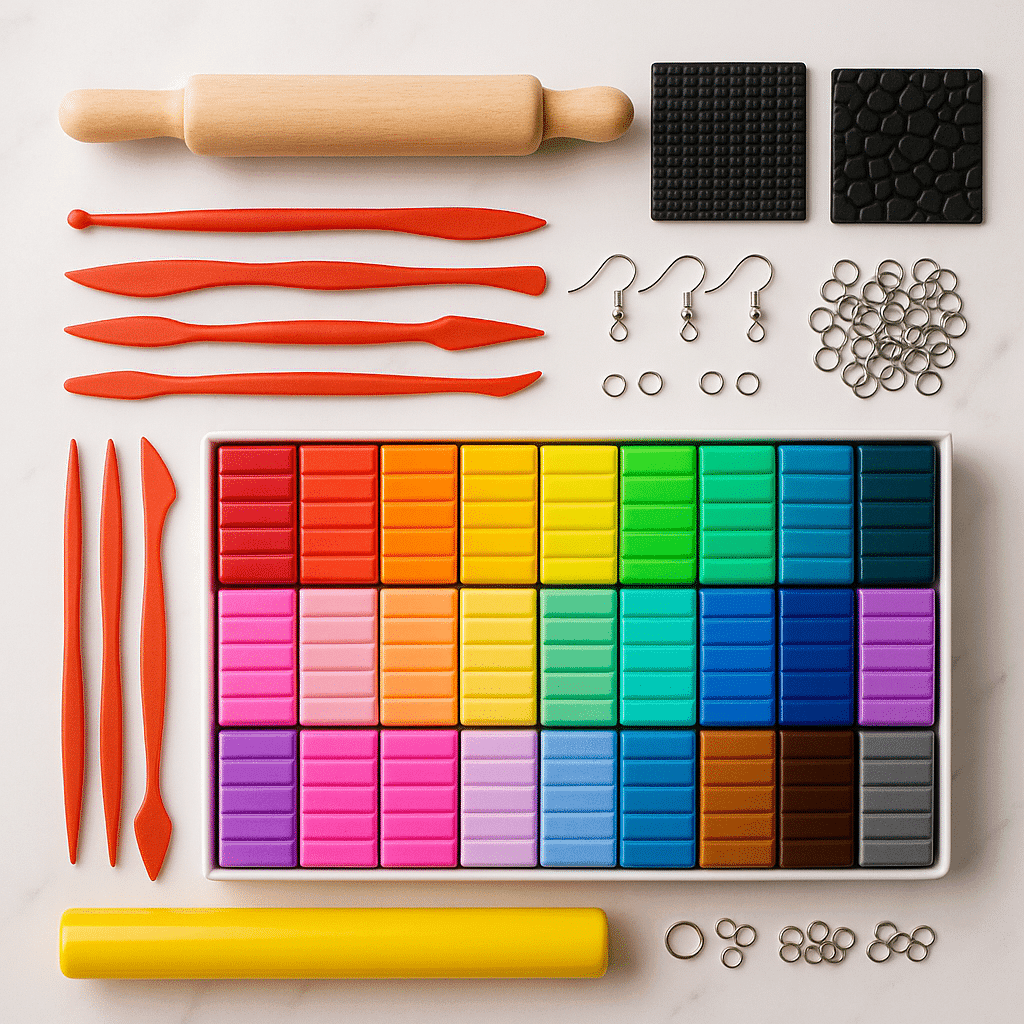
Price: $23.99
Shop Similar: Art Polymer Clay Kit - 60 Colors, 19 Tools, and 16 Accessories – a must-have featured in this post.
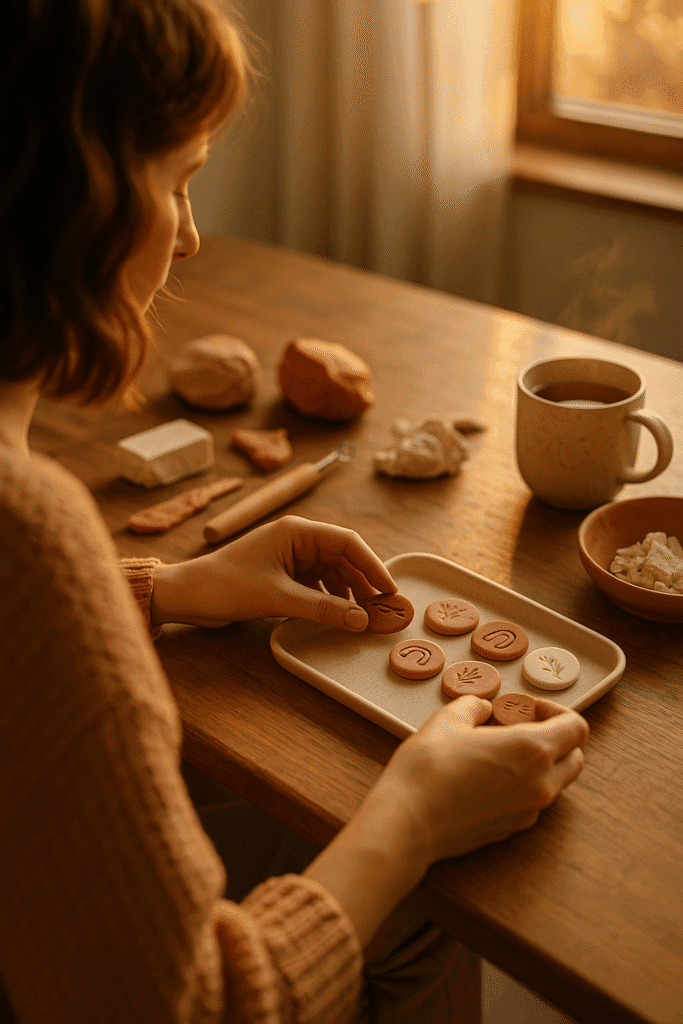
Step-by-Step: How to Make Polymer Clay Magnets
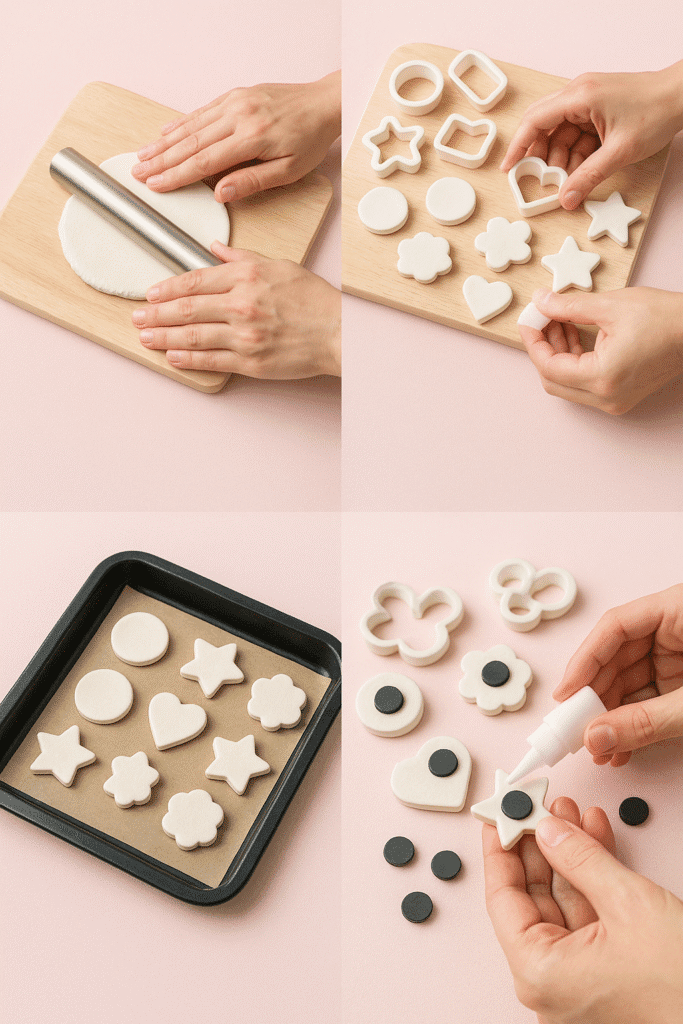
1. Condition the Clay
Start by softening your polymer clay. Knead it with your hands or use a roller until it becomes warm and pliable. You can also mix colors to create custom shades or marbled effects.
2. Roll Out the Clay
Use a roller or smooth glass bottle to roll your clay out on a clean surface. Aim for a thickness of about 1/4 inch. Too thin, and the magnets will be fragile; too thick, and they’ll become heavy.
3. Cut Out Shapes
Use cookie cutters, clay blades, or shape templates to cut out your desired designs. Florals, moons, stars, fruits, letters—this is where your creativity shines! For added texture, press a doily, leaf, or rubber stamp into the surface before baking.
4. Bake the Clay
Place your clay shapes on a baking tray lined with parchment paper. Follow the temperature and time instructions on your clay package (typically 265°F–275°F for 15–30 minutes depending on thickness).
5. Cool & Decorate
Let your pieces cool completely before handling. At this point, you can add extra flair: hand-paint designs, add metallic leafing, or glaze for a glossy finish. Be sure everything is fully dry before moving to the next step.
6. Attach Magnets
Flip your clay shapes over and glue a small magnet onto the back of each one. Let them cure for at least 12–24 hours (refer to your glue’s instructions) before putting them on the fridge.
Design Inspiration
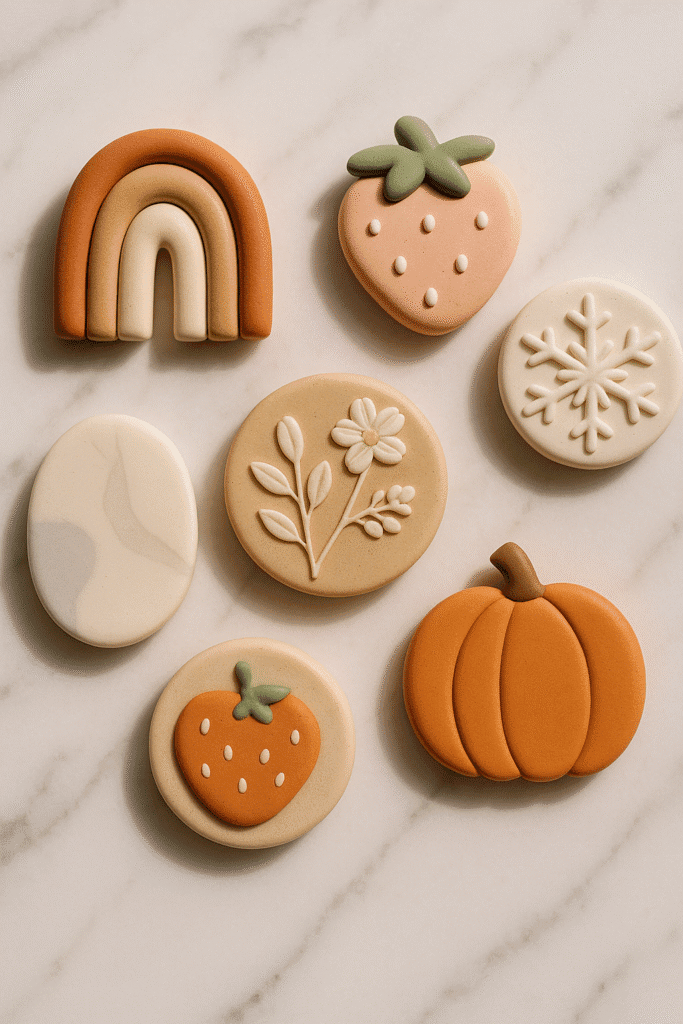
- Boho Chic: Terracotta arch shapes, speckled terrazzo finishes, or pressed florals.
- Minimalist: Abstract color blocks, neutral tones, or faux-stone effects using textured clay.
- Kawaii Cute: Pastel fruits, smiley faces, rainbows, or cloud shapes with painted cheeks.
- Seasonal Sets: Pumpkins for fall, snowflakes for winter, hearts for Valentine’s Day.
Creative Bonus: Use alphabet stamps to personalize them with initials or inspiring words like “joy,” “breathe,” or “focus.” These also make adorable gifts and stocking stuffers!
Where to Use Your Polymer Clay Magnets

- On your kitchen fridge to hold recipes or grocery lists
- In your office to display goals or reminders
- On a whiteboard to add a little flair to your to-do list
- As creative party favors or handmade Etsy shop items
Final Thoughts
Polymer clay magnets are one of those rare DIYs that check all the boxes—simple, fun, functional, and ridiculously aesthetic. Whether you want to upgrade your home vibe or just unwind with a crafty project, these little pieces pack a big creative punch. So roll out that clay, pour yourself something cozy, and start shaping your magnetic masterpiece.