Trending Finds Readers Are Loving
Explore affordable luxe discoveries people are clicking on right now.
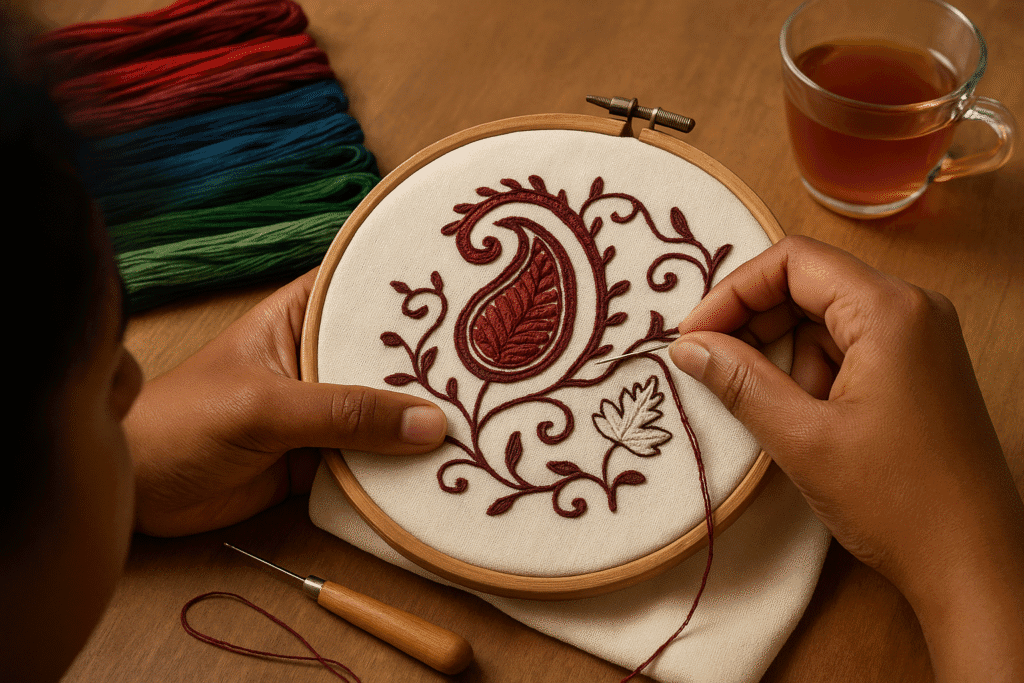
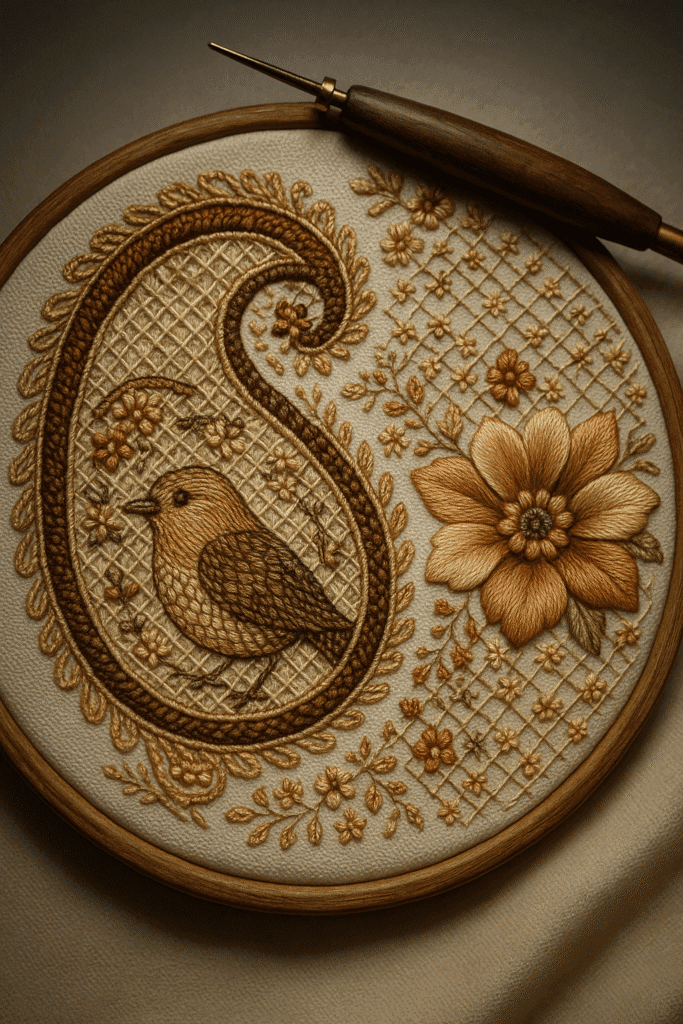
See What's TrendingKashida embroidery—also spelled Kasida or Kasidakari—is the poetic needlework language of Kashmir: vines that meander like mountain streams, paisleys that curl like winter smoke, and chinar leaves that glow in thread the way they do in autumn light. It looks intricate, but the magic of Kashida is that it’s built on just a handful of stitches, repeated thoughtfully, with a strong eye for motif and color. That means you can absolutely learn it at home, even as a beginner—without surrendering the elegance that makes Kashida so instantly recognizable.
In this guide, you’ll learn the easiest way to start Kashida from scratch, the core stitches to master (no overwhelm—promise), classic and contemporary pattern ideas, and pro tricks that keep your work smooth, reversible (if you want to flirt with Sozni finesse), and joyfully creative.
Along the way, I’ll point you to a few quality tools that make the process simpler—like a wood‑handled aari hook set for faster fills and a 36‑skein cotton floss bundle so you can play with the classic Kashmiri palette right away.
Price: $39.50
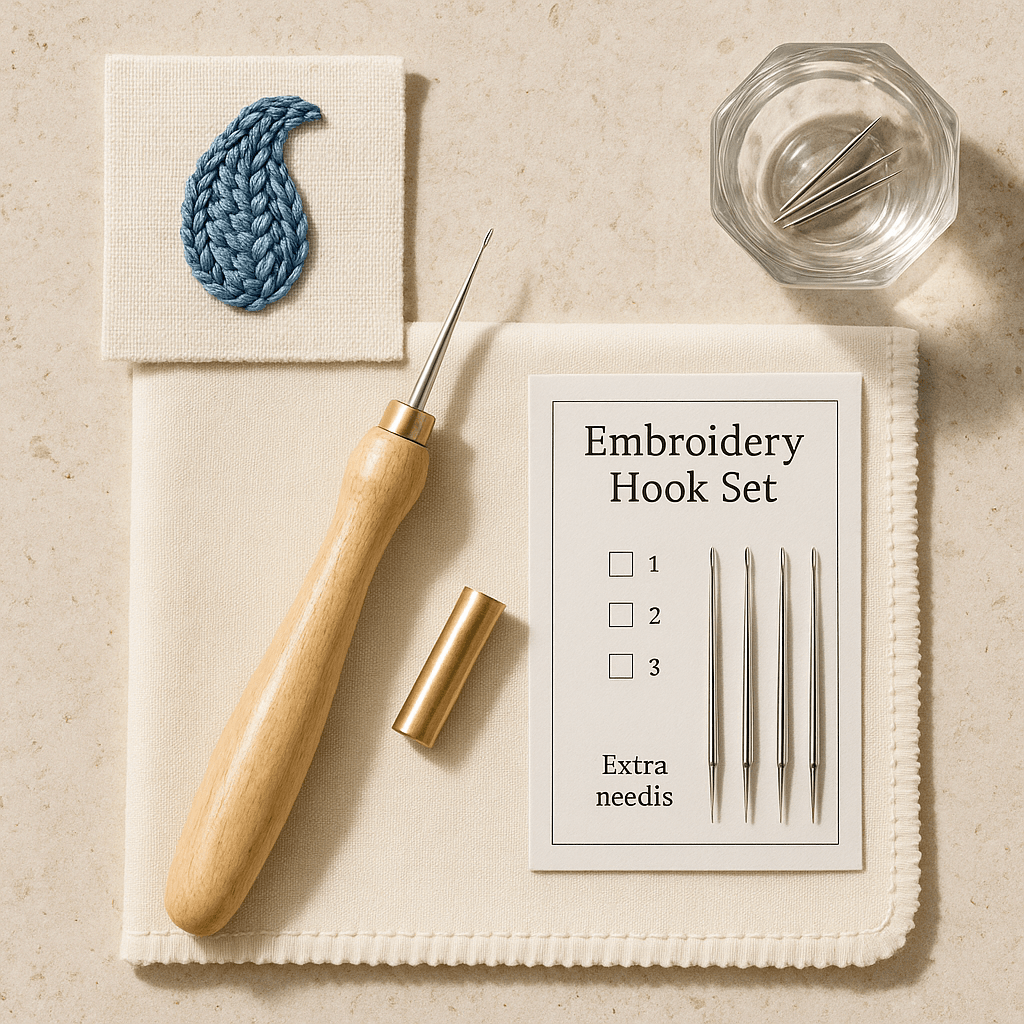
Shop Similar: Aari Embroidery Hook Set with Wooden Handle + Extra Needles – a must-have featured in this post.
Kashida, in a (well-stitched) nutshell
At its heart, Kashida is motif-driven. Think paisleys, florals, chinar leaves, birds, vines, jaal (lattice) fills, and fruit clusters. Instead of hundreds of stitch types, Kashida tends to rely on a minimal vocabulary—often chain stitch, stem stitch, satin stitch, and (when you’re going more artisanal) aari hookwork (zalakdozi) or the reversible Sozni technique. The restraint is intentional: the simplicity lets the motifs and color story take center stage.
What you need (and why it matters)
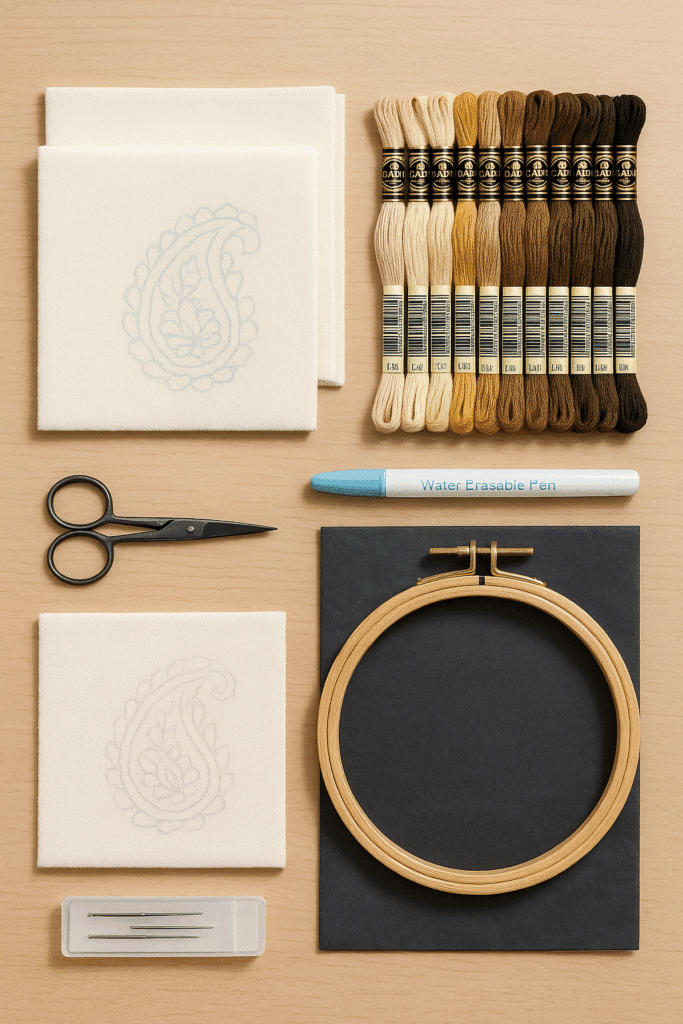
Keep your kit focused, beginner-friendly, and versatile:
- Threads: A versatile cotton bundle like the DMC 100% Cotton Embroidery Floss 36‑Skein Pack gives you easy access to classic Kashmiri shades—deep reds, midnight blues, leaf greens, golds. Cotton behaves beautifully on most base fabrics and is easy to tension evenly.
- Needles: Embroidery/crewel needles in sizes 7–9 for cotton; switch to finer needles if you experiment with silk threads.
- Aari hook (optional but amazing for speed fills): Try an Embroidery Hook Set with Wooden Handle + Extra Needles—perfect for zalakdozi-style chain fills and large motifs.
- Fabric: Start with tight-weave cotton, mulmul, or a silk-cotton blend. Wool and pashmina are traditional but harder to start with (save those for when your hands are confident).
- Hoop: A non-slip bamboo or beechwood hoop (6″–8″) stabilizes your fabric without warping it.
- Transfer tools: Water-erasable pen or dressmaker’s carbon paper—your choice. If you want a fuss-free start, try iron-on transfer paper with motifs you print at home.
- Sharp scissors + lint brush (threads shed, and lint loves satin stitch).
Pro tip (the “easy way” to start): Begin with pre-drawn motifs on cotton (print your own or buy a pre-printed kit) and stick to just two stitches—chain and satin—for your first full piece. This lets you master line + fill without analysis paralysis.
How to choose your first Kashida pattern
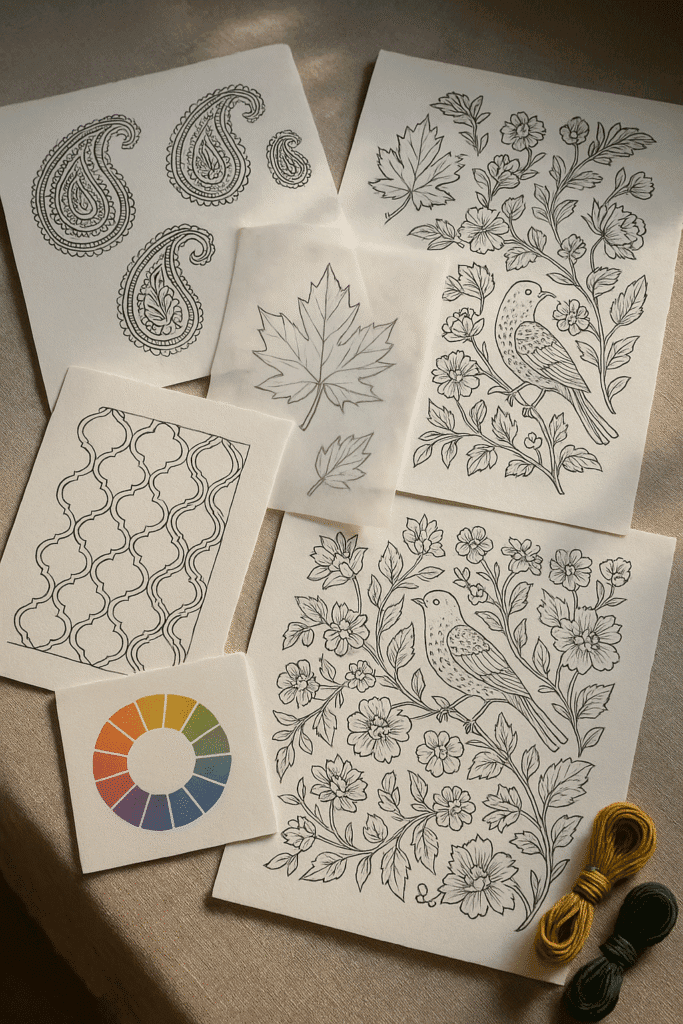
Start with something that teaches you outline + fill logic:
- Single Paisley with Floral Fill
- Outline: Stem or chain stitch
- Fill: Satin stitch or aari chain to create dense color pools
- Why it’s great: Teaches you how to move from line to volume
- Chinar Leaf + Veins
- Outline: Stem stitch
- Fill: Long-and-short satin stitch for a soft gradient
- Why it’s great: Veins give you practice in directional stitching
- Vine + Buds Border (Jaal Lite)
- Outline: Chain stitch (for vines)
- Fill: Tiny satin petals
- Why it’s great: Works as a scarf edge, cushion border, or table runner motif
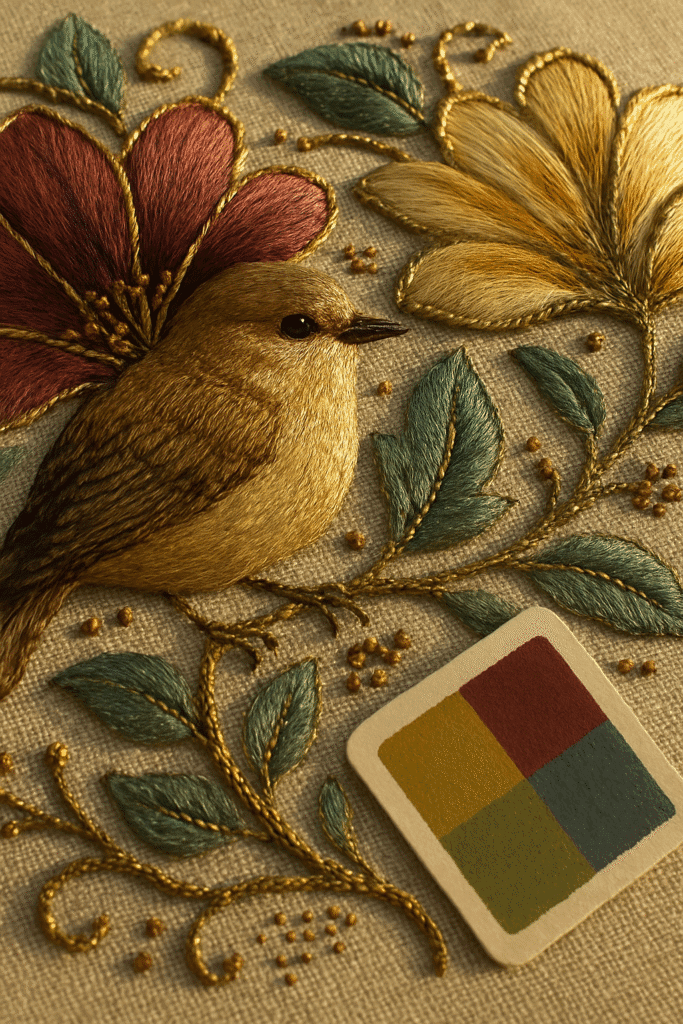
- Bird Perched in Flowers (Layered Motif)
- Outline: Fine stem stitch
- Fill: Varied: satin for petals, dense aari for the bird’s body
- Why it’s great: Teaches layering + visually separating motifs with color/value contrast
The must-know stitches (and where to use them)
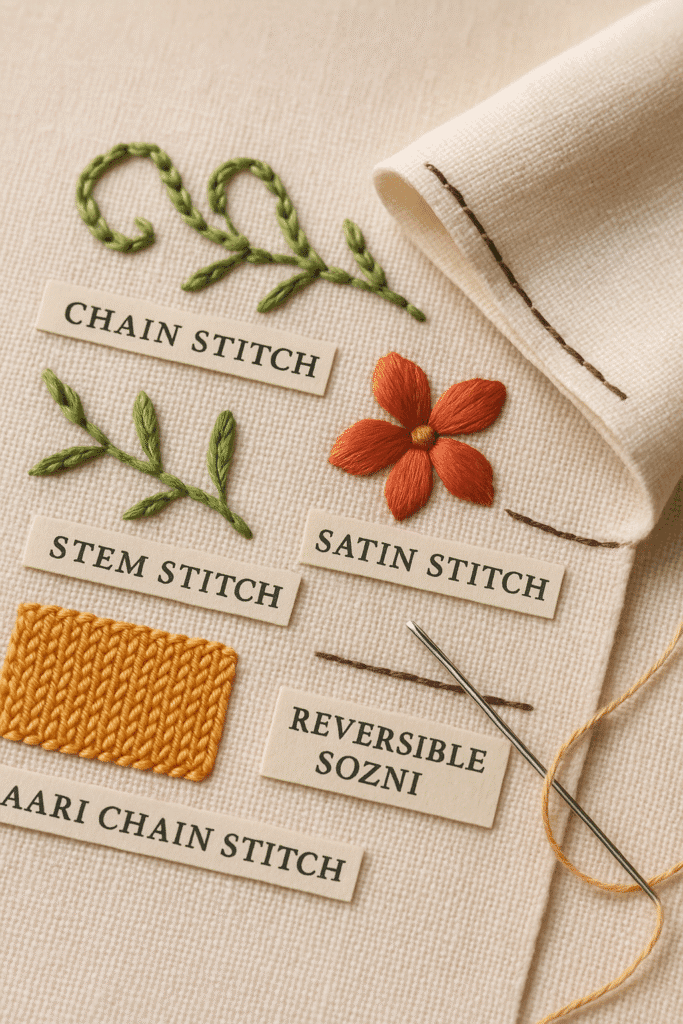
1) Chain Stitch
Use for: Vines, outlines, border repeats, jaal fills
Why: It mimics flowing ink—perfect for Kashida’s fluid motifs.
2) Stem Stitch
Use for: Curving lines, veins, delicate stems
Why: It gives you a slightly ropey, textured line that follows curves beautifully.
3) Satin Stitch
Use for: Petals, fruits, leaves, paisley torsos
Why: High coverage, high drama. Perfect for color-blocking.
4) Aari Hook / Zalakdozi (Optional)
Use for: Speed-filling large motifs; dense chain textures
Why: Faster, smoother fills—especially on silk or fine cotton. The learning curve is worth it.
5) Sozni (Reversible)
Use for: High-precision, reversible shawls or scarves
Why: Two-sided perfection—every stitch must mirror the front on the back. Advanced, but gorgeous.
Step-by-step: your first Kashida piece (Beginner flow)
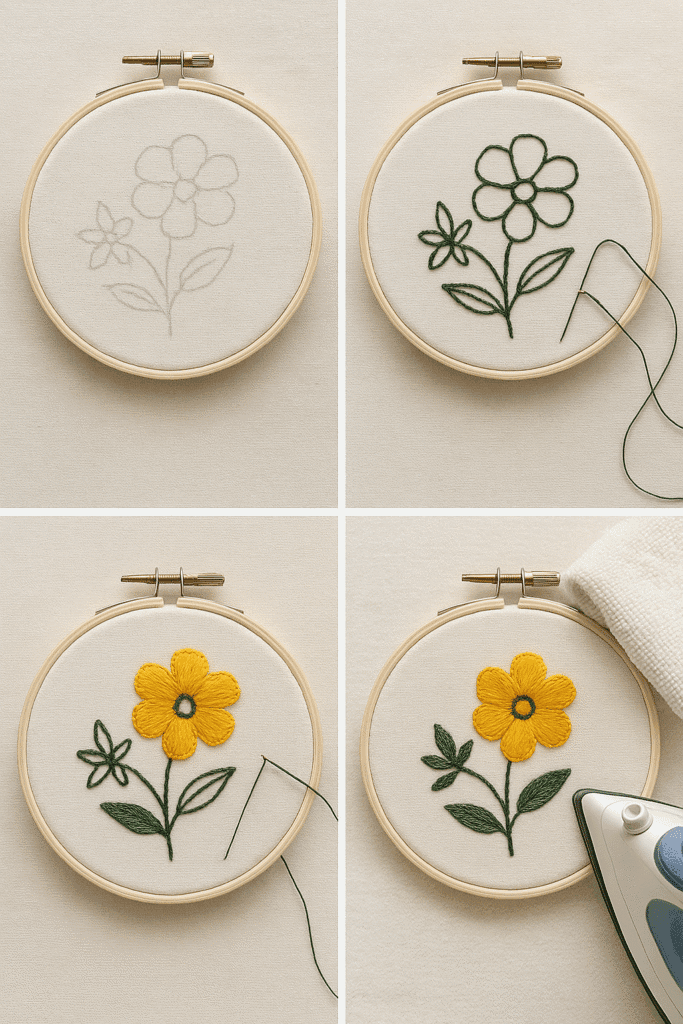
Project: Small paisley + vine sampler on cream cotton
- Trace/Transfer
- Use a water-erasable pen. Outline a large central paisley, a small floral cluster, and a vine border.
- Keep the design clean—no excessive line crossings on your first try.
- Hoop & Stabilize
- Gently tension fabric in your hoop—taut like a drum, but not stretched out of shape.
- Outline
- Vines: Chain stitch
- Paisley + petals: Stem stitch for crisp edges
- Bird or leaf veins (if added): super-thin stem stitch with one strand of thread
- Fill
- Satin stitch for leaves and paisley interiors
- Optional: Try your aari hook for filling the paisley body—aim for even chain spacing, no gaps.
- Detail & Texture
- Dot tiny seed stitches inside petals for a pasha-level finish
- Add outline shading with a deeper tone (e.g., burgundy on maroon, bottle green on pale sage)
- Finish
- Carefully rinse out transfer lines if erasable ink was used
- Press from the back with a clean towel between embroidery and iron to avoid crushing the texture
Color stories that sing “Kashmir”—and new palettes if you want to remix it
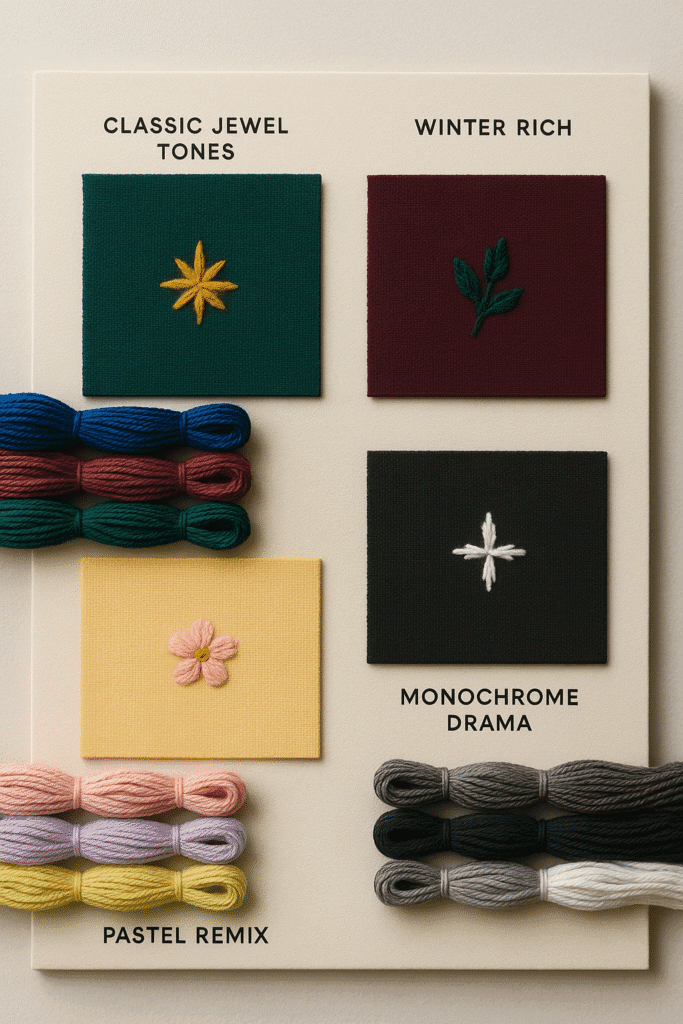
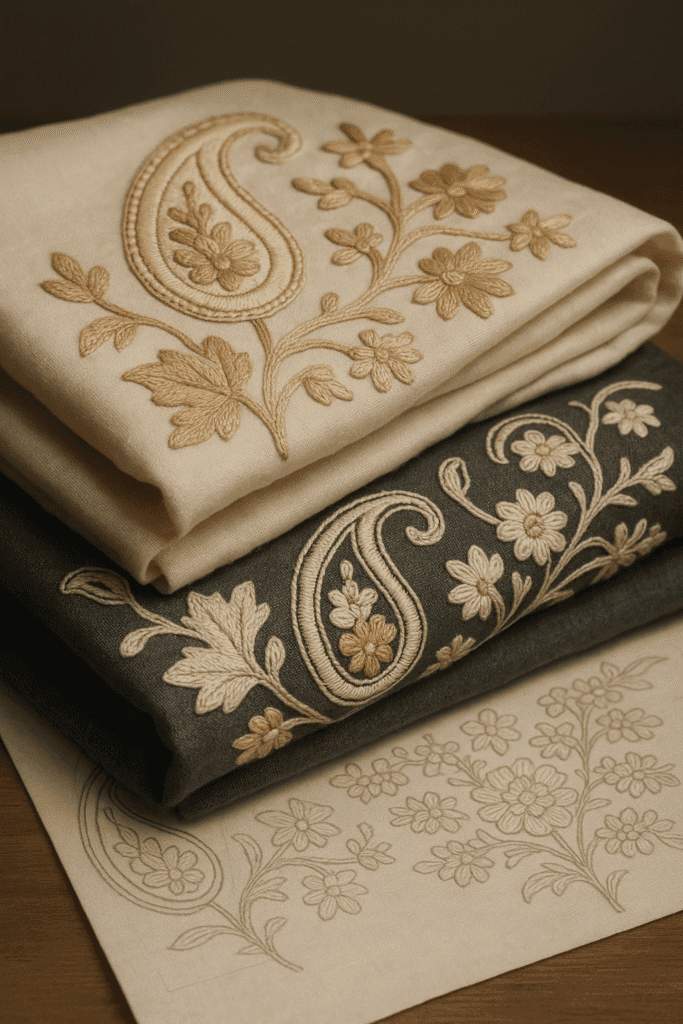
Classic Kashmiri Palette
- Deep crimson, forest green, mustard, navy, cream
- Works beautifully on ivory or charcoal bases
Contemporary Pastel Remix
- Soft mauve, dusty rose, sage, butter, slate blue
- Ideal for linen tote bags, wall hangings, and blouses
Winter Rich
- Burgundy, burnt orange, black, antique gold
- Looks exquisite on wool shawls (save for later, when you’re confident)
Monochrome Drama
- All ecru satin stitch on off-white linen, with texture doing the talking—minimalist but couture
Advanced (but doable) ideas to try when you want more
- Negative Space Paisley: Outline the paisley, fill the background instead.
- Jaal Mesh Fill: Create a lattice framework with stem stitch, then drop tiny florals in every alternate cell.
- Birds Inside Paisley: A classic sub-motif—tiny bird stitched inside the paisley, surrounded by floral tendrils.
- Shaded Satin: Use two or three tones in one satin-fill to softly grade a petal or leaf.
The easy route (AKA: “I want this to look perfect without a PhD in needlework”)

- Use iron-on motif sheets or downloadable printable patterns—they’re consistent and fast.
- Limit yourself to one outline stitch + one fill stitch per project. Less switching = fewer mistakes.
- Pick 5–6 thread colors max. Palette discipline makes your piece look curated, not chaotic.
- Start on cotton or linen, not slippery fabrics.
- Work small but complete (e.g., a coaster, pouch panel, or border) so you build finish-line momentum.
Troubleshooting (so you don’t learn the hard way)
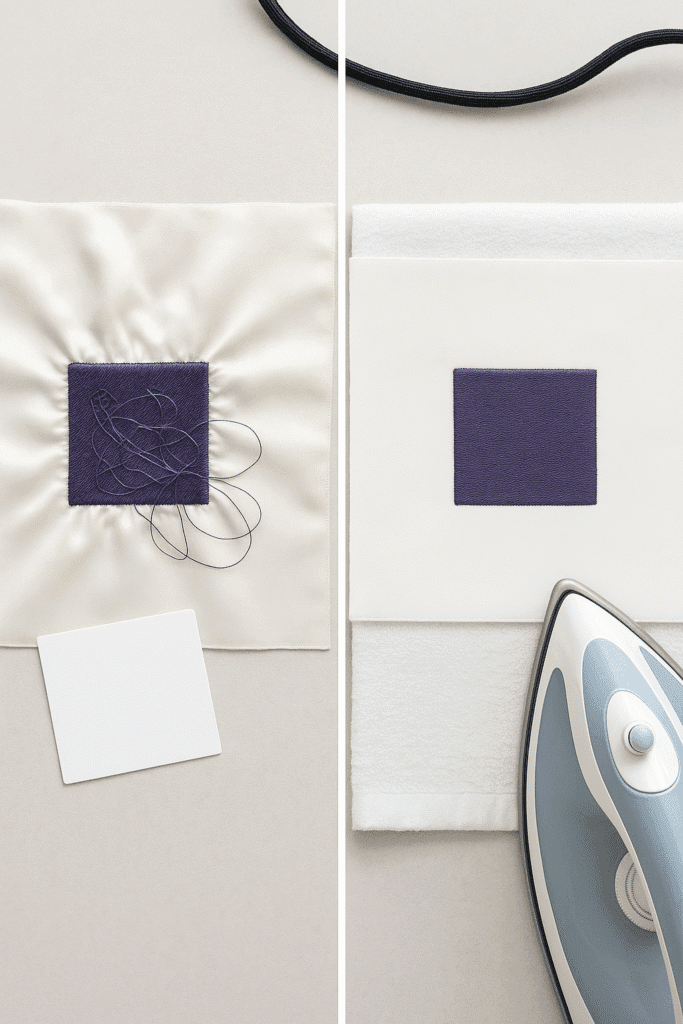
- Puckering? Your tension is too tight or your stitches are pulling. Loosen up (and re-hoop if needed).
- Bulky satin stitch? Reduce thread strands or switch to a finer needle; align stitch direction.
- Messy backs? Thread tails too long, knots too chunky. Trim shorter, weave in neatly.
- Colors bleeding after rinse? Always test-thread in water first—especially reds and navies.
Where to place Kashida in your life (beyond shawls)
- Minimalist cushion covers with a bold paisley in one corner
- Linen napkins with a tiny chinar leaf repeat at the edge
- Canvas totes embellished with a floral jaal panel
- Muted, contemporary kaftans with monochrome Sozni borders
- Framed art panels—perfect for showcasing textured satin petal work