Velvet Cat Eye Nails: Short, Chic & Shockingly Easy at Home
November 30, 2025
Trending Finds Readers Are Loving
Explore affordable luxe discoveries people are clicking on right now.
See What's TrendingThe glossy, light-catching beam of the cat-eye finish is back in a big way. Good news: on short nails, the velvet effect looks luxe, wears longer, and is simple to DIY.
Velvet Cat Eye Nails: Why Short Lengths Win (No Salon Needed)
Velvet cat eye nails translate that moody, light-catching sheen you see in editorials into a wearable, everyday manicure that you can pull off at home without a salon appointment. The technique uses magnetic pigments to create a beam of light that appears to glide across the nail whenever you move your hand, instantly reading more expensive than a flat cream polish. On short nails, the look is surprisingly powerful: shorter canvases keep the beam tight and crisp, reduce chipping from typing and daily tasks, and make application easier because you are moving less product and controlling a smaller surface.
The vibe sits perfectly between minimal polish and full nail art; you get dimension and drama without decals or hand painting, which is ideal if you are craving a glow-up that is still office-appropriate and easy to refresh. The best part is that the cat-eye system works with regular gel or long-wear polish routines, so you can keep your prep exactly the same as your go-to. If you need a refresher on shaping, base coats, or long-wear habits before you start, hop over to your internal classic, Your Go-To Nail Care Routine, then come back here to create that polished, camera-ready finish. By the end, you will know how the magnetic layer works, the placements that photograph best, and the troubleshooting tricks that keep the beam snatched and shiny day after day.
Cat-Eye 101: The Velvet Formula Explained
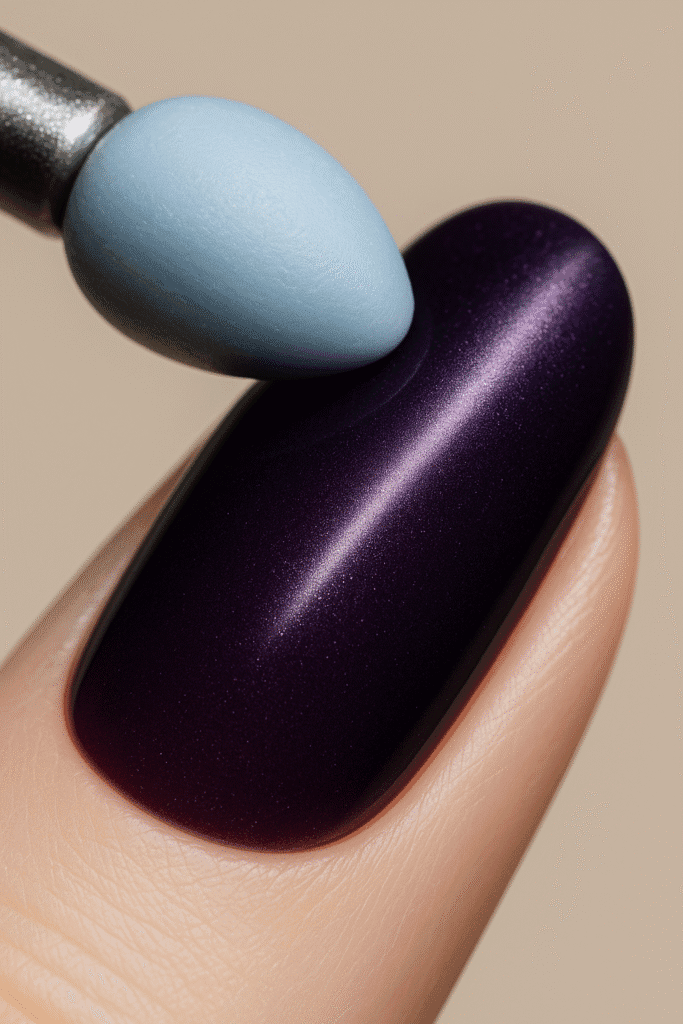
Cat-eye polishes suspend ultra-fine iron particles in a tinted base. When you bring a small magnet close to the uncured or not-yet-dry layer, those particles align into a concentrated band that looks like a moving highlight. The placement of your magnet determines the look: hold it parallel to the free edge for a straight bar, angle it 20 to 45 degrees for a diagonal beam, or position it at the center to create a soft halo that resembles plush velvet. The core stack is simple: nail prep, base coat, deep tinted base color (optional but recommended for richness), one thin layer of cat-eye polish, magnet to shape the beam, then topcoat. With gels, you will shape the beam before you cure each layer; with long-wear or regular formulas, shape quickly and avoid shaking the nail afterward so the particles do not drift.
Beginners sometimes try to build the beam with heavy coats, but thinner layers actually give more control and a sharper line. Keep lint away from your work area, wipe excess on the bottle neck, and clean the magnet’s edge if it picks up stray pigment. For technique visuals and deeper context, high-quality how-to articles from beauty publishers are helpful; browse a cat-eye breakdown on Byrdie or trend coverage at Allure Nails to calibrate your expectations for shine, beam width, and color saturation. Once you get comfortable with a single-beam diagonal, you can experiment with micro-French cat-eye tips or a subtle halo layered under a sheer neutral for a plush, velvet-like depth that still reads minimal and chic in real life.

Shape, Length & Placement: Short Square vs. Soft Almond
Short nails are your strategic advantage with velvet cat eye nails. On a short square, the beam reads structured and graphic, especially when angled 30 to 40 degrees from the free edge; the crisp geometry looks modern with blazers, knits, and denim. On a soft almond, the beam takes on a more fluid, elongated character that flatters dressier looks without requiring extra length. To get a micro-French cat-eye on short square nails, brush a sheer neutral or coordinating deep base, then apply a narrow band of cat-eye polish at the tip, bring the magnet close from below the tip, and watch the beam hug the smile line for a subtle, wearable shimmer. For a diagonal beam, paint a thin layer over the whole nail, hold the magnet at a slight angle across the nail plate for five to ten seconds, and freeze the shape by curing (gel) or allowing the surface to set before moving the finger.
Halo placements are beginner-friendly on both shapes: position the magnet in the center for two to three seconds, then lift slowly to avoid smearing the alignment you just created. Pro tip for photography and daily wear: keep the beam narrower than you think; a thinner, more concentrated band looks luxe on camera and hides micro-chips better than a wide, diffuse stripe. If you ever feel the beam is too faint, gently re-pass the magnet closer to the surface before topcoat, or add a second thin cat-eye layer, shape again, and seal. The goal is intentionality: a deliberate beam that reads designer, not a random shimmer cast.

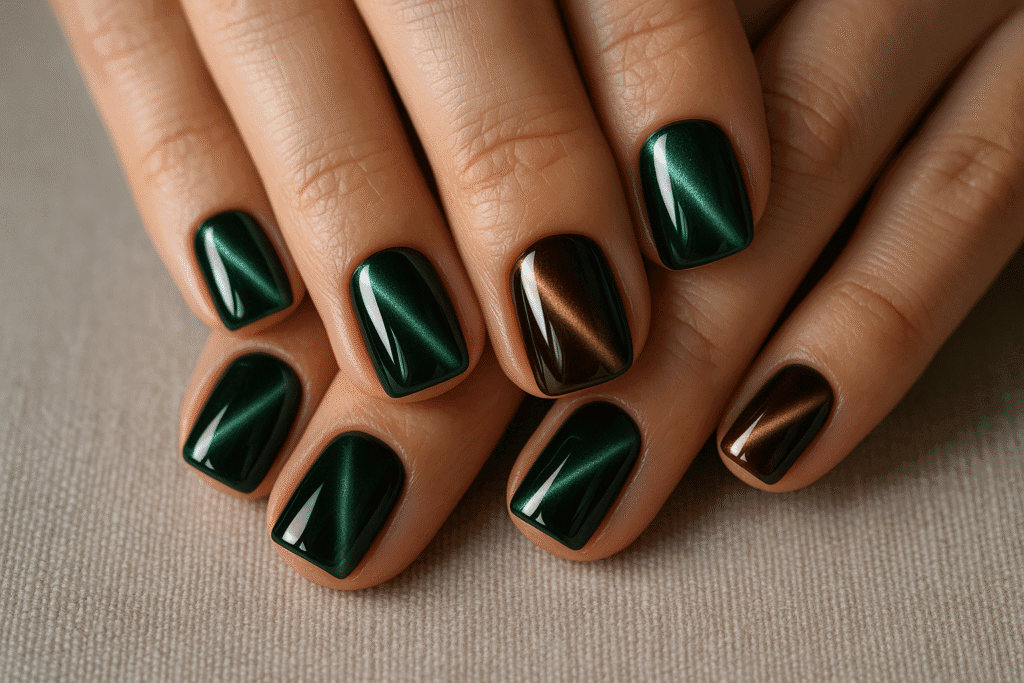
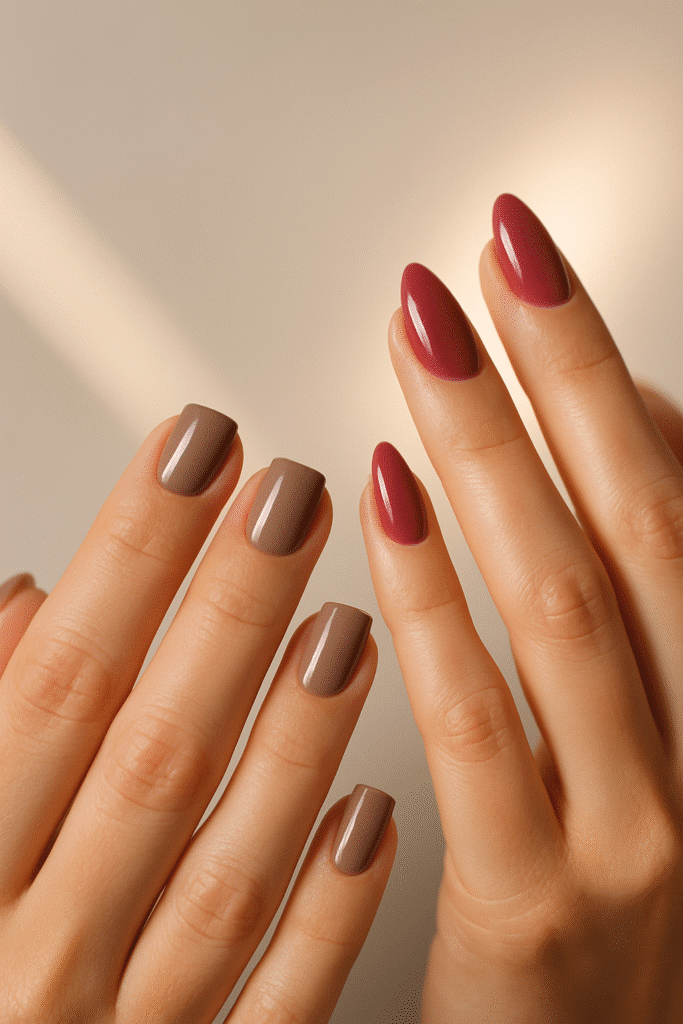
Color Palette & Finish Strategy: Mocha, Emerald, Cranberry, Champagne
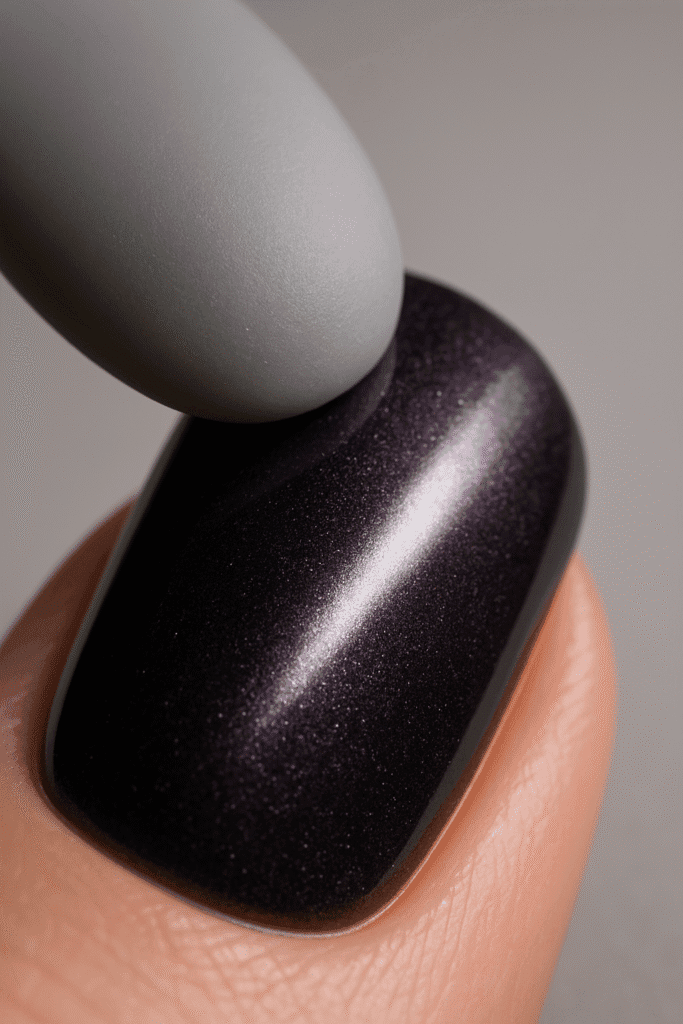
Color drives the mood of velvet cat eye nails. Deep mocha and espresso tones feel like cashmere and read expensive in low light; emerald delivers a jewel-box intensity that pops against cream sweaters; cranberry offers a festive-adjacent richness without going literal holiday; and champagne gives a soft gold-sand glow that pairs beautifully with minimalist wardrobes. If you want exacting harmony across outfits, stack two shades on the same hand: mocha on most nails, emerald or cranberry as the cat-eye accent, then echo that accent in a ring or earring to tie the story together. For an elevated twist, add a micronic chrome speck to the accent nail only and keep the rest clean; the contrast between velvet and micro-sparkle photographs like studio lighting.
Finish matters as much as color: a high-gloss topcoat makes the beam look like liquid metal and maximizes depth, while a velvet-matte base under a glossy cat-eye layer adds plush dimension without extra thickness. Keep coats thin to avoid bulbous sidewalls and cap your free edge twice for chip resistance. If your skin tone runs cool, emerald and champagne balance redness while mocha prevents a washed-out effect; if warm or olive, cranberry and deep coffee shades glow without turning brassy. Remember lighting: these shades were made for soft window light around 4800 to 5200K; avoid mixed lighting that can make cranberry skew orange or emerald go muddy. Thoughtful color plus clean finish equals a scroll-stopping manicure that still integrates seamlessly with real clothes in daylight and evening settings.

Step-by-Step: The At-Home Application Playbook
Start with smart prep: cleanse, gently push back cuticles, refine sidewalls, and buff only enough to remove surface shine. Dehydrate if you run oily, then apply a thin base coat and cure or dry fully. For the richest result, brush a coordinating deep base color (mocha, emerald, cranberry, or champagne) and let it set. Apply a thin layer of cat-eye polish; the thinner the layer, the sharper your beam will look. Bring the magnet close to the nail surface without touching it. For a diagonal beam, hold at roughly 30 to 40 degrees for five to ten seconds; for micro-French, hold beneath the tip so the beam settles along the smile line; for halo, hover centered for two to three seconds. If you are using gel, cure immediately after shaping so the particles do not drift. If the beam looks soft, you can add a second thin cat-eye layer and re-shape. Seal with a high-gloss topcoat and cap the free edge carefully; a second thin layer of topcoat on high-wear fingers can dramatically boost longevity.
Keep nails still for a minute after topcoat to prevent micro-slides in regular formulas. New to magnets? Practice on a swatch stick first; it is the easiest way to understand distances and angles before working on your hands. If you need a concise refresher on core nail-care technique, revisit Your Go-To Nail Care Routine, then return to your cat-eye stack. For additional finish inspiration, browsing nail trend explainers on Byrdie Nails helps you visualize shine levels and beam styles before you shoot.

Shoot It Like a Pro: Phone-Friendly Photo Tips for Pinterest
Velvet finishes love soft, directional light. Position yourself near a window with indirect daylight around 5000K, place a white card opposite as a bounce, and turn off any warm ceiling lights so you do not mix color temperatures. Compose vertical frames in a 2:3 ratio (for example, 1000 x 1500 px) and leave breathing room in the top third so overlays never cover the beam if you make pins later. Lock focus on the brightest point of the cat-eye line and gently tap to lower exposure until reflections show detail instead of blowing out. Use natural props sparingly: a knit cuff, a ceramic mug, or a linen napkin in a complementary neutral helps communicate lifestyle without stealing attention.
If your camera has a macro mode or you can attach a clip-on macro lens, shoot one ultra-close detail of a single nail, then a pulled-back lifestyle shot of the full hand to tell a compact story across a carousel. Keep hands relaxed; avoid clawing or flattening fingers, which can distort nail shape and shadows. A quick edit pass is all you need: straighten, crop, set white balance, lift shadows slightly if your skin reads too deep, and add a touch of clarity on the nail area only so skin stays soft. With this workflow, velvet cat eye nails consistently photograph like glossy editorial beauty even in a simple home setup, which is exactly what performs on Pinterest and drives saves, clicks, and session depth on the blog.
Troubleshooting & Wear-Extenders (Keep the Beam Snatched)
If your beam looks fuzzy, you are likely using too much product or holding the magnet too far away. Wipe the brush at the bottle neck, lay a thin coat, and bring the magnet closer without touching; hold steady for a slow five count so the particles align. If the beam collapses before you cure, it is drifting in a still-wet layer; re-shape and cure immediately, or flash cure for five seconds and then finish the cure so the design stays crisp. Notice micro-bubbles? They usually come from overworking the layer or shaking the bottle; roll the bottle gently in your hands and apply with a light touch. Tip wear is most common on index and thumb; capping twice and adding a second thin topcoat on those fingers can extend wear by days.
If your color looks off on camera, you might be mixing light temperatures; shoot under window light only or balance to roughly 4800 to 5200K and avoid warm lamps in the frame. For regular polish wearers, resist the urge to oil immediately after topcoat; give it a few extra minutes so you do not dull the surface. Gel users who see lifting at the sidewalls may need a more thorough dehydrate or a slightly stiffer base on high-flex nails. Finally, when you are ready for a week-two refresh, file tips minimally, add one ultra-thin cat-eye layer on the middle and ring fingers, re-shape the beam, and re-seal; the set will look newly minted with ten minutes of work while your hands stay in that glossy, plush lane you built on day one.