
Baking Nail Decals: The Chic Fall Manicure You Can DIY at Home
December 2, 2025
Trending Finds Readers Are Loving
Explore affordable luxe discoveries people are clicking on right now.
See What's TrendingCozy, photogenic, and totally non-holiday – baking-inspired nail art layered over a foliage palette is the cutest way to transition from fall into winter without a salon visit.
Baking Nail Decals: Why This Cozy Trend Works (No Salon Needed)
Baking nail decals are the sweetest way to capture fall’s warm textures without leaning on holiday motifs or complicated salon art. Think pie-lattice French tips, cinnamon-roll swirls, maple-sugar silhouettes, and tiny star-anise icons – layered over a foliage-inspired palette that photographs like a dream. The magic sits at the intersection of mood and minimalism: you are signaling comfort and craft (aka the fall baking vibe), but the execution stays clean and chic so it complements real-life outfits – soft knits, neutral denim, and glam evening layers alike. With decals, you also get repeatable results with a short learning curve, making it easy to refresh a manicure on your own schedule and budget. Better yet, the non-holiday framing makes the look evergreen from late October through November (and even into pre-winter) because the references are seasonal, not seasonal-specific. If you are new to decal application, do not stress; this guide covers palette selection, motif curation, application pro-tips, and photo styling so your baking nail decals read editorial on Pinterest from the first post. For foundational nail prep and long-wear basics, you can always circle back to your internal go-to: Your Go-To Nail Care Routine.
The Foliage-Bakes Palette: Syrupy Neutrals with Cozy Contrast
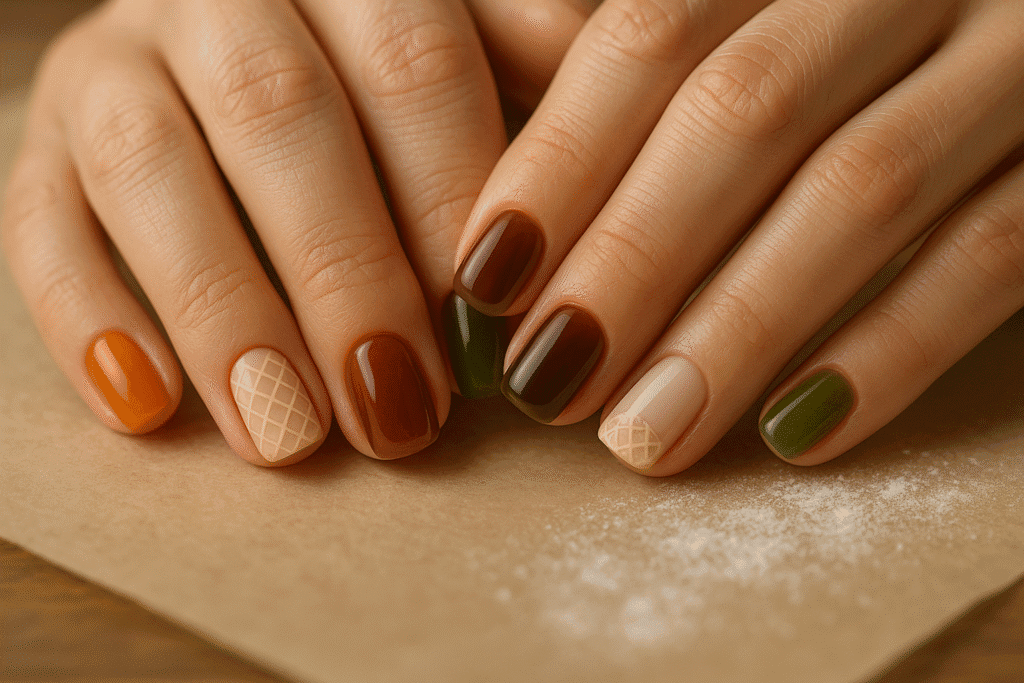
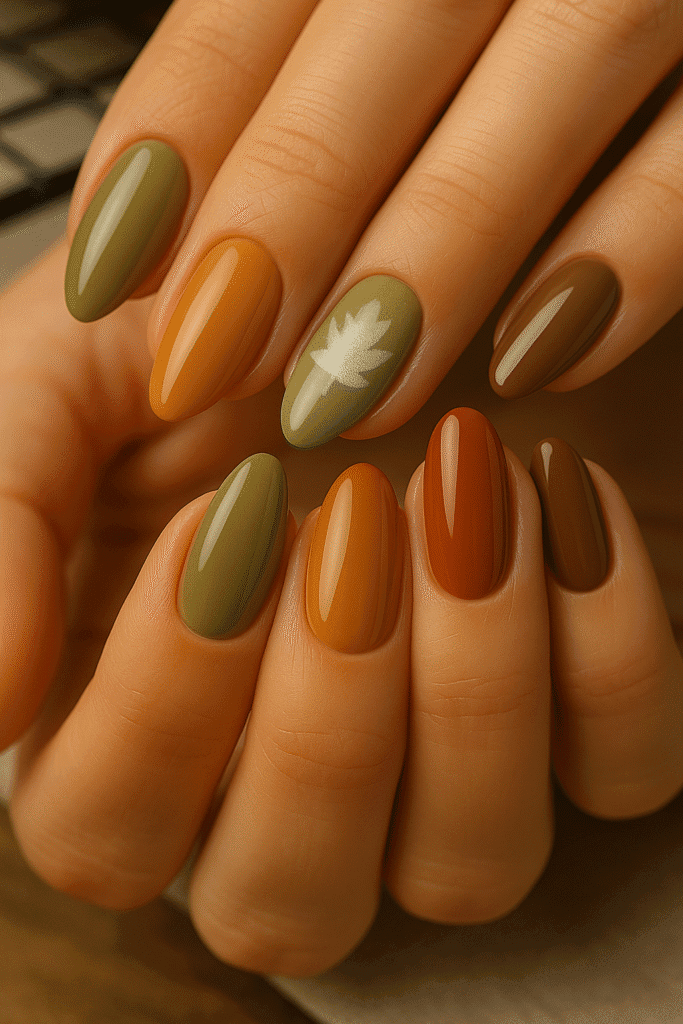
The color story that elevates baking nail decals is a foliage-bakes hybrid: spiced orange (#C05621), amber maple (#D08C2B), chestnut brown (#6A4A3C), rum-raisin berry (#6B2F3B), mossy green (#3C5A4B), and buttercream nude (#E7D9CC). Together they deliver warmth, depth, and a touch of moodiness that makes micro-motifs pop without feeling kitschy. Start with two neutrals (buttercream nude and chestnut), add a “flavor” tone (spiced orange or amber maple), then ground the set with one cool-earth shade (mossy green) to avoid monotone beige. For finishes, pair velvet-matte bases with glossy, “syrupy” accents or layer a thin jelly tint over nude to get that mouth-watering, glazed effect under bright light. If you love chrome, use it sparingly – think micro-speck on an accent nail – so your decals remain the focus. When photographing, these tones thrive under soft window light or warm white at 4500-5000K; the richer hues hold depth without blowing out highlights. And because the palette is season-coded rather than holiday-coded, your pins stay relevant all November. The net effect: nails that read like a curated dessert bar – inviting, layered, and softly luxurious – so your baking nail decals feel editorial, not novelty.

Motifs That Read Chic (Not Kitschy)
Food micro-art is having a moment, but refinement is the differentiator. Anchor your baking nail decals set with two timeless motifs and one playful accent so the story feels intentional, not costume-y. Our best-in-feed trio: (1) Lattice French tips – slender criss-cross “crust” lines over buttercream or nude jelly; keep spacing tight and lines fine so it photographs elegant. (2) Cinnamon-roll spirals – a single continuous line that curls to center; place it on one accent nail per hand and frame with a whisper-thin metallic outline if you want a dessert-case sheen. (3) Maple-sugar silhouettes – soft white, slightly diffused leaf shapes misted at the cuticle or tipped diagonally; these act like powdered sugar without dominating the look. For micro-details, star-anise and clove icons add a subtle spice nod; a miniature gingham check (one nail only) references napkins and bakeshop packaging without turning into a theme party. If you previously explored micro-fruit in summer, re-tone cherries or berries into deeper, jammy shades for continuity. The guiding principle: fewer, finer lines and strategic negative space. That balance keeps baking nail decals aligned with your sophisticated Bellencia aesthetic and makes mixing-and-matching across outfits effortless.

Application Masterclass: From Soak to Seal
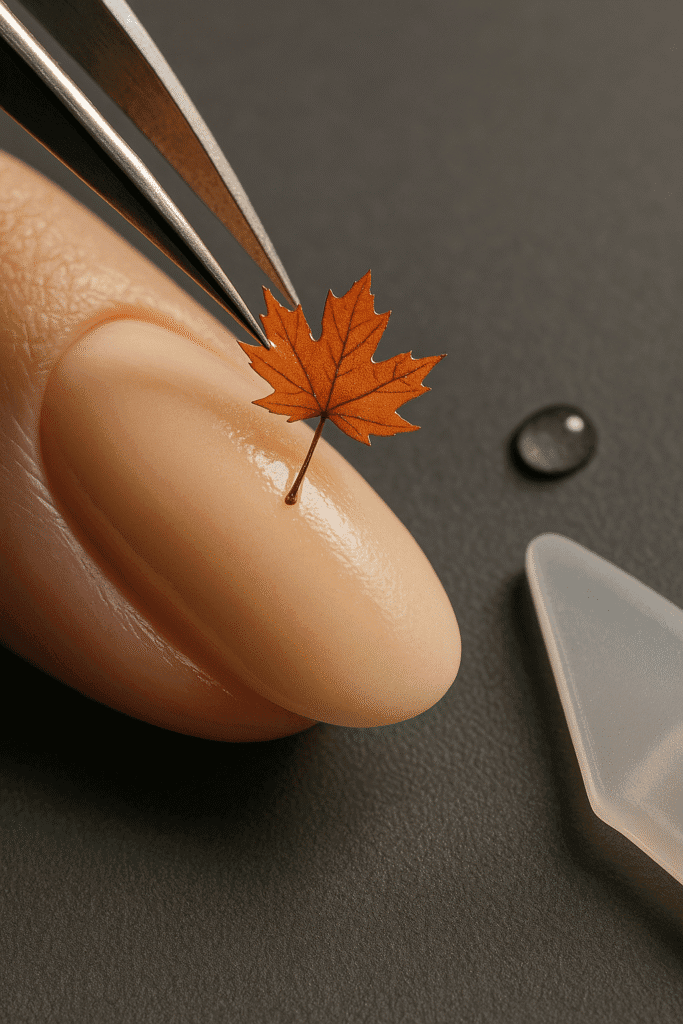
Decals are only as good as the surface you apply them to, which is why prep is non-negotiable. Start with clean, gently buffed nails and a dehydrator if you run oily; lay down a thin base coat and cure or dry thoroughly before color. For baking nail decals, consider a two-finish strategy: matte the base for grip, then bring back gloss in the topcoat to create that “glazed” dessert effect. If you are using water-slide decals, cut each motif close to the edge so excess film does not cloud your base. Soak for 10-15 seconds (lukewarm water helps), slide the decal off the paper with tweezers, and float it into place on a slightly tacky surface or with a drop of decal solution. Gently squeegee with a silicone tool from center outward to remove bubbles; let it set a minute before sealing. For sticker-style decals, warm them between your fingers for flexibility, then roll onto the nail to avoid micro-wrinkles. Cap the free edge with topcoat – essential for longevity – and consider a thin second coat for high-gloss “syrup.” If you are prone to lifting at the edges, flash-cure (gel) or wait an extra minute (regular) before oiling. For technique refreshers or trend context, skim credible nail-beauty hubs like Byrdie Nails or Allure Nails – great for finish ideas and care basics.
Shape, Length & Finish: Short Square vs. Soft Almond
For tiny motifs, canvas matters. Short square gives you crisp tips for lattice linework and feels modern against chunky sweaters; it also photographs flatter, which helps decals stay sharp in macro shots. Soft almond elongates the hand and turns swirls elegant – great for cinnamon-roll accents or diagonal maple misting. Either way, aim for harmony between shape and motif scale: the smaller the canvas, the finer the lines. In finish, matte bases read velvety (ideal for bread-crust browns and mossy greens), while jelly topcoats create “syrup” highlights that make baking nail decals look almost edible. If your skin tone runs cool, lean into chestnut, moss, and rum-raisin to avoid washed-out beiges; if warm or olive, buttercream and amber maple will glow without going flat. Nail beds with prominent ridges benefit from a ridge-filler base – especially under nudes – so your decals sit smooth. Finally, life-proof your mani: keep oiling cuticles lightly (post-set), avoid steamy dishwater the first few hours, and cap edges religiously. These micro habits stretch wear time so your pins remain accurate representations of how the manicure actually looks after day three and beyond.

Shoot It Like a Pro: Pinterest-Optimized Photos at Home
You do not need a studio to make baking nail decals look editorial. Build a simple scene that nods to your theme without stealing attention: parchment paper, a dusting of flour, a baking rack, or a linen napkin in micro-gingham. Shoot near a window with indirect light and add a white foam board opposite for bounce. Position fingers relaxed and slightly angled; avoid flattened poses that widen fingertips. If your phone allows, lock focus on the decal details and tap down exposure to preserve highlight texture on glossy “syrup” finishes. For color accuracy, shoot under consistent lighting (no mixed daylight + warm bulbs). Compose for Pinterest verticals (2:3 or 1000 x 1500 px) and leave breathing room near the top third so overlays never cover the art when you generate pins later. To showcase the palette, capture one crisp macro for detail and a pulled-back lifestyle shot with a mug or a small dessert plate – suggestion, not staging. A quick edit checklist: straighten, crop, set white balance (neutral parchment is your friend), then nudge clarity only on the nail area to avoid crunchy skin texture. The result: nails that read premium and scroll-stopping without heavy props.

Troubleshooting & Wear-Extenders (So Your Set Lasts Longer)
If decals wrinkle, you are either applying on a still-wet base or the motif is too large for the curve. Let color dry fully (or fully cure gel), then re-cut motifs smaller so they flex. Bubbles usually mean trapped water – press and roll gently with a silicone tool, then wait a minute before topcoat. Silvering (a faint cloudy halo) often comes from excess film; trim closer, and when possible, apply over matte for better grip before sealing glossy. If tips chip early, add a whisper-thin layer of builder gel or a hardening topcoat at the free edge. For daily life – typing, dishes, workouts – thin gloves or a quick post-shower oil can be a game-changer. Planning a second-week refresh? File tips minimally, add a thin color glaze (jelly tint) to revive depth, and re-topcoat; pick a new single accent decal so the mani feels new without a full redo. As always, strong wear starts at prep: gentle cuticle work, a dehydrated plate, and the right base for your chemistry. If you are still optimizing your routine, revisit Your Go-To Nail Care Routine for a quick tune-up before your next baking nail decals set.