Trending Finds Readers Are Loving
Explore affordable luxe discoveries people are clicking on right now.
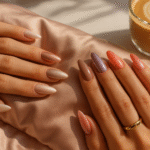
See What's TrendingGlazed almond nail tips are taking over every beauty feed—and the best part? You don’t need a salon budget to get the look. With the right affordable tools and a little practice, you can recreate that glossy, high-shine finish from the comfort of home. Whether you’re scrolling Pinterest for subtle nail inspo or chasing that Hailey Bieber-glaze moment without the luxury price tag, you’re in the right place. Glazed finishes work beautifully on almond-shaped nails, giving the fingers a long, tapered look while reflecting light with a clean-girl aesthetic.
The finish is versatile enough to complement everything from loungewear to formal wear and looks especially elevated in soft neutrals or blush tones. This guide is all about making that trend affordable. It’s for those who want to skip the $50+ gel sets and instead build a chic, budget-friendly nail routine at home. Whether you’re starting from scratch or refining your DIY mani skills, these glazed almond nail tips will walk you through the best shape, base shades, budget-friendly chrome alternatives, and layering hacks. You’ll even find Amazon finds that won’t break the bank but will absolutely make your nails look like they came straight from a salon. Here’s how to get that perfect glossy finish—without spending a fortune.
1. Choose the Right Almond Nail Shape at Home
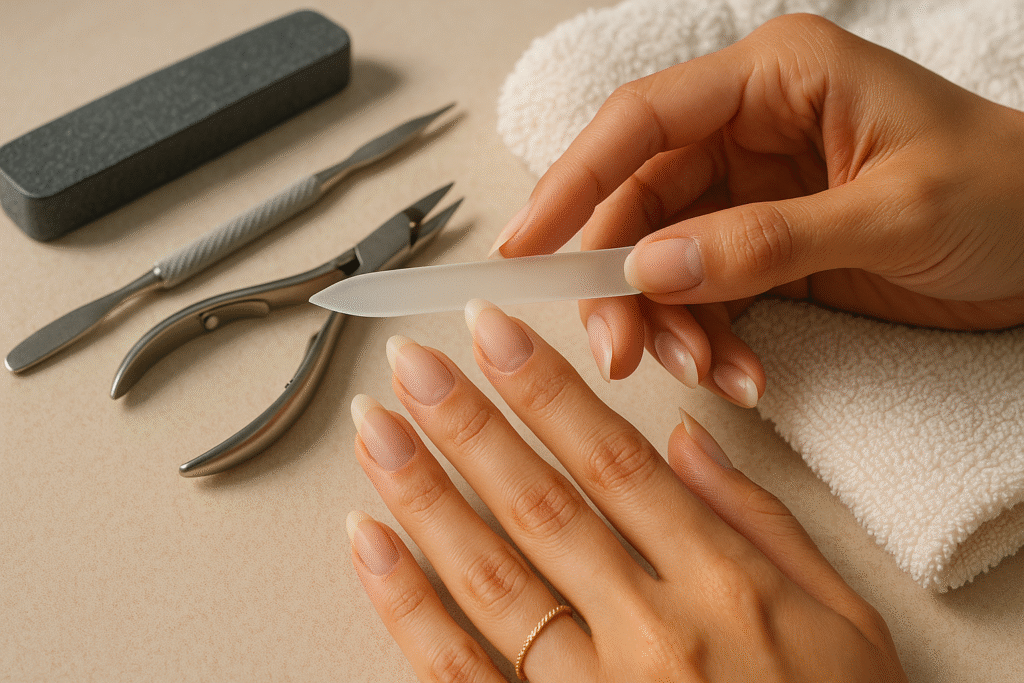
The almond shape is beloved for a reason—it’s universally flattering, elongates the hands, and looks effortlessly feminine. But the key to nailing this shape at home is having the right filing technique and tools. Start by trimming your nails to a moderate length, then use a glass nail file for almond shape to file from the outer edge toward the center in one direction only. Avoid the sawing motion, as that can cause splits or uneven edges. Glass files are not only gentle on natural nails but also reusable and easy to sanitize, which makes them perfect for home use. The tapered tip of the almond shape mimics the silhouette of an actual almond—wider at the base and gently narrowing at the top.
This structure gives your nails an elegant, runway-ready look that works perfectly with any type of polish, especially glazed finishes. But shaping isn’t just about appearance—it also helps polish adhere better by reducing rough edges. After shaping, prep your nail beds by pushing back cuticles using a cuticle pusher kit and gently buffing the surface. A clean, smooth nail base enhances every coat you apply afterward. When your base is flawless, your glaze will reflect beautifully and look more expensive than it actually is. Don’t skip this step—it’s foundational to getting that mirror-shine finish.
2. Use Milky Base Colors for That Signature Glaze
A signature feature of any glazed nail look is that dreamy, milky undertone. This is where you build the foundation for that glossy, donut-inspired finish. Rather than opaque or bold colors, glazed almond nail tips start with sheer, whisper-soft bases that create depth under the top layer. Milky white, blush pink, soft mocha, or sheer beige all work well depending on your skin tone and desired effect.
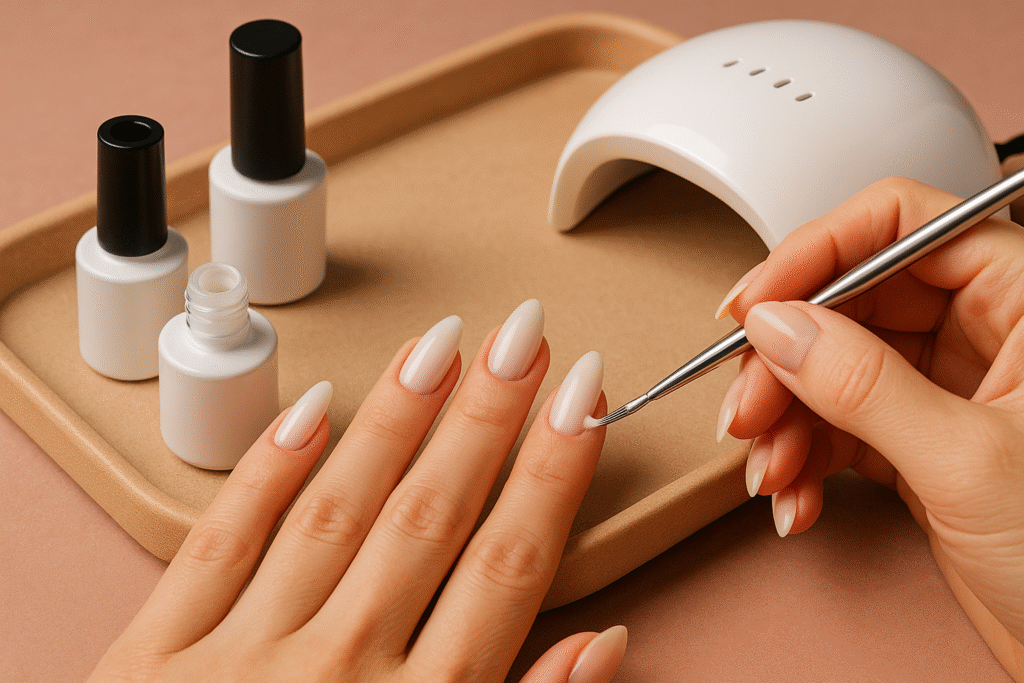
These base colors give your nails that healthy, luminous look that shines through once the chrome or high-gloss coat is added. You can find budget-friendly options like milky white gel polish sets that come with multiple hues for layering or tonal contrast. Start with clean, shaped nails and apply two thin coats, curing between each with a budget nail lamp to ensure even drying. One affordable tip? Blend shades together by dabbing a drop of soft beige into a white base before applying. This creates a semi-translucent custom shade that looks like salon gel. Layering subtle tints gives your nails that “glazed from within” glow, and when topped with chrome or clear coat, the results look 100% high-end. It’s one of the easiest, most transformative steps in recreating this trend at home—and costs a fraction of what you’d pay in a studio.

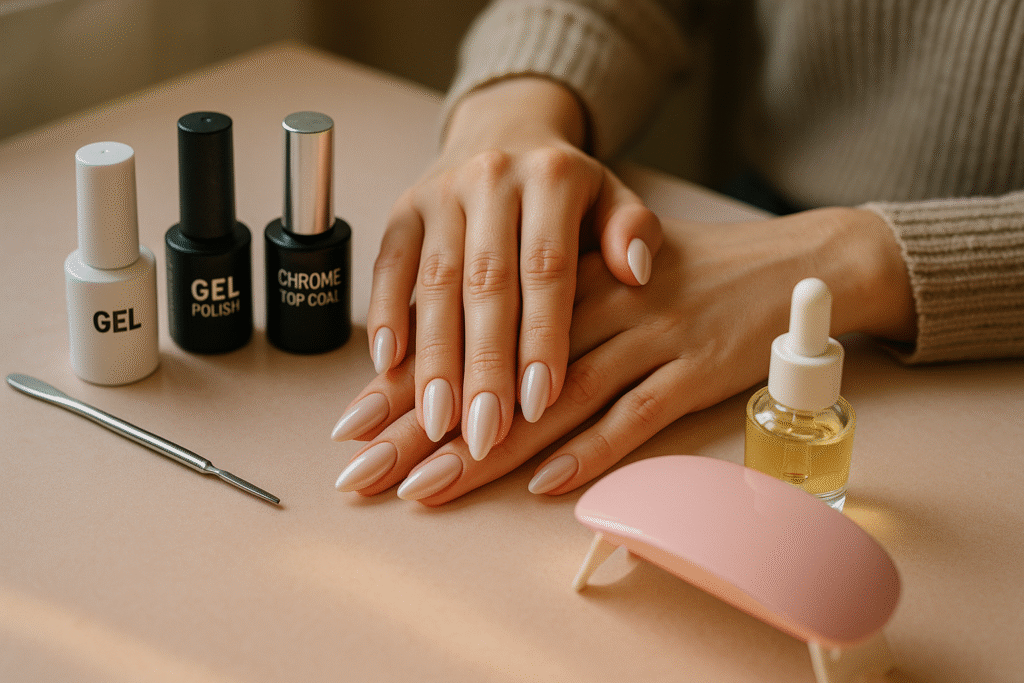
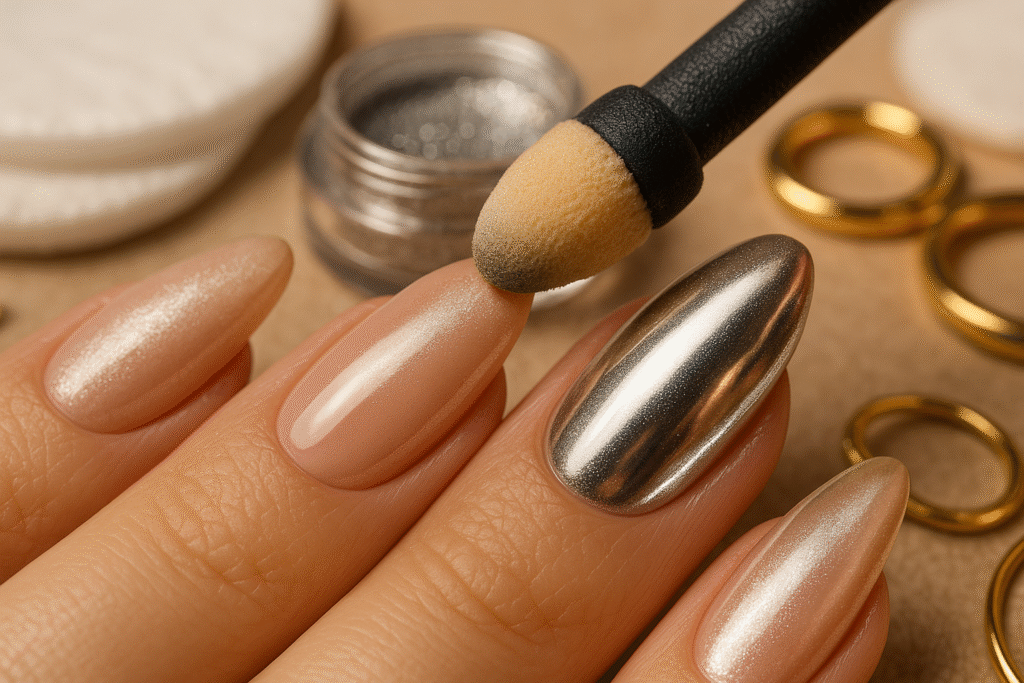
3. Go for Chrome Powder or Top Coat Alternatives
If you’ve ever watched nail techs dust chrome powder across a cured gel base, you know the magic it creates. But the truth is, you don’t need expensive pro products to achieve the same mirror-glazed effect at home. Plenty of drugstore-friendly options offer incredible shine—often for under $10. Your best bet is either a chrome top coat gel polish or a basic chrome powder with an applicator wand. These formulas typically include mica or pearlescent pigments that bounce light in every direction. Buffing in powder over your base and sealing with top coat gives you a shimmer that rivals any nail salon finish. You can also double-up with a clear glaze over chrome to lock it in for 7+ days of wear.
The key is to apply lightly and cure well between layers. Even if you skip the powder and use just a high-shine glaze, the result is still glossy, dimensional, and very on-trend. Some brands offer entire “donut glaze” kits that include a chrome polish and UV gloss gel. And unlike salon visits, once you’ve bought one kit, it can last you 10–15 manicures. Pro tip? Match your glaze undertone to your base for an ultra-smooth look—like rose gold over blush, or champagne over white. This gives your glazed almond nail tips that luxury aesthetic, all without the luxury price tag.
4. Layer Your Glaze for Maximum Shine
One secret that nail techs don’t always share? The shiniest, most luxe-looking glazed almond nail tips come from layering—not from one thick coat. Building layers gives your manicure that glassy, dimensional look that shifts slightly in different light. Start with your milky base, then apply a sheer chrome or pearl polish, cure it, and finish with a clear high-gloss gel coat. Each step enhances the last. Using something like a donut glaze nail top coat over a mirror shine gel polish can give a radiant finish that looks wet—but won’t smudge. Layering also adds durability, making your at-home manicure last up to two weeks.
If you’re using powder chrome, you can even sandwich it between two layers of clear gel to seal it in. What makes layering such a budget-friendly tip is how far each product goes. A single bottle of glaze or chrome can be used in a dozen manis when applied in thin layers. And since you’re creating depth with products you already have, there’s no need to buy a dozen different finishes. This step isn’t just about making your nails shinier—it’s about faking that $60 pro look with just $10 worth of polish. It’s the difference between glossy and “did-you-get-those-done?” nails.
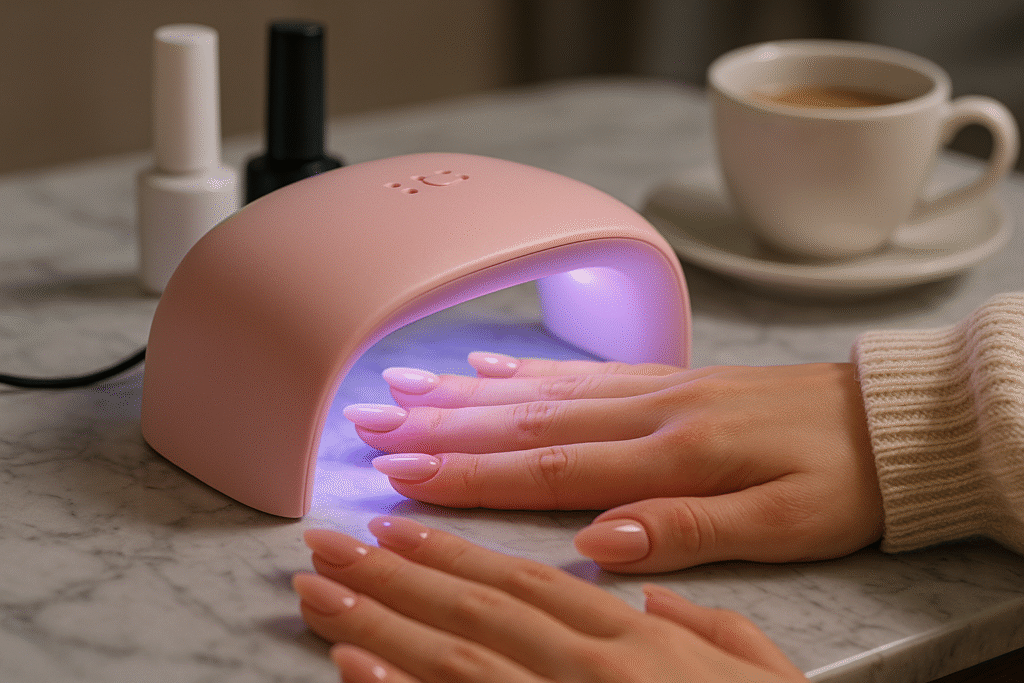
5. Invest in a Mini Nail Lamp for Salon Results
If you’re serious about nailing the glazed almond look, a mini nail lamp is a non-negotiable. It’s what takes your polish from basic to brilliant—sealing in layers, creating a hardened finish, and giving you that iconic gel gloss. And the good news? You don’t need a salon-grade lamp. Affordable models like the mini gel nail lamp are under $25 and powerful enough for long-lasting results. Look for one with a USB plug and automatic timer for convenience. Most compact LED lamps cure polish in under 60 seconds per layer and are easy to store in a drawer or beauty bin. This step ensures your base coats, chrome, and top coats all fuse together without bubbles or dullness.
Even the best polish looks flat without proper curing. A lamp doesn’t just make your nails shinier—it also helps prevent peeling and chipping. If you’re layering multiple products as recommended, it becomes even more essential. And the best part? It pays for itself after just two skipped salon visits. Having a nail lamp on hand means you can switch up your glaze whenever the mood hits—no appointment needed. Whether you’re going minimalist with pearly neutrals or bold with rose chrome, a lamp ensures your finished look is flawless, fast, and budget-friendly.
Final Thoughts
Getting the perfect glossy, glazed almond nail look doesn’t require salon prices or luxury products. With a few smart tools, layering techniques, and affordable Amazon finds, anyone can recreate this trend from the comfort of home. From choosing the perfect almond shape to layering soft milky bases with reflective chrome top coats, each step helps build a manicure that looks high-end but costs under $20. These tips aren’t just budget-friendly—they’re long-lasting, low-maintenance, and endlessly wearable. So the next time you’re scrolling for nail inspo, skip the expensive booking app and open your bathroom drawer instead. You’ve got everything you need to create that luminous, camera-ready finish without stepping outside. For more trendy nail looks, check out our article on Milky White Glazed Nails from Bellencia.com.


Pingback: Bold Graphic Eyeliner - 2025 Beauty Trend - Bellencia