Trending Finds Readers Are Loving
Explore affordable luxe discoveries people are clicking on right now.
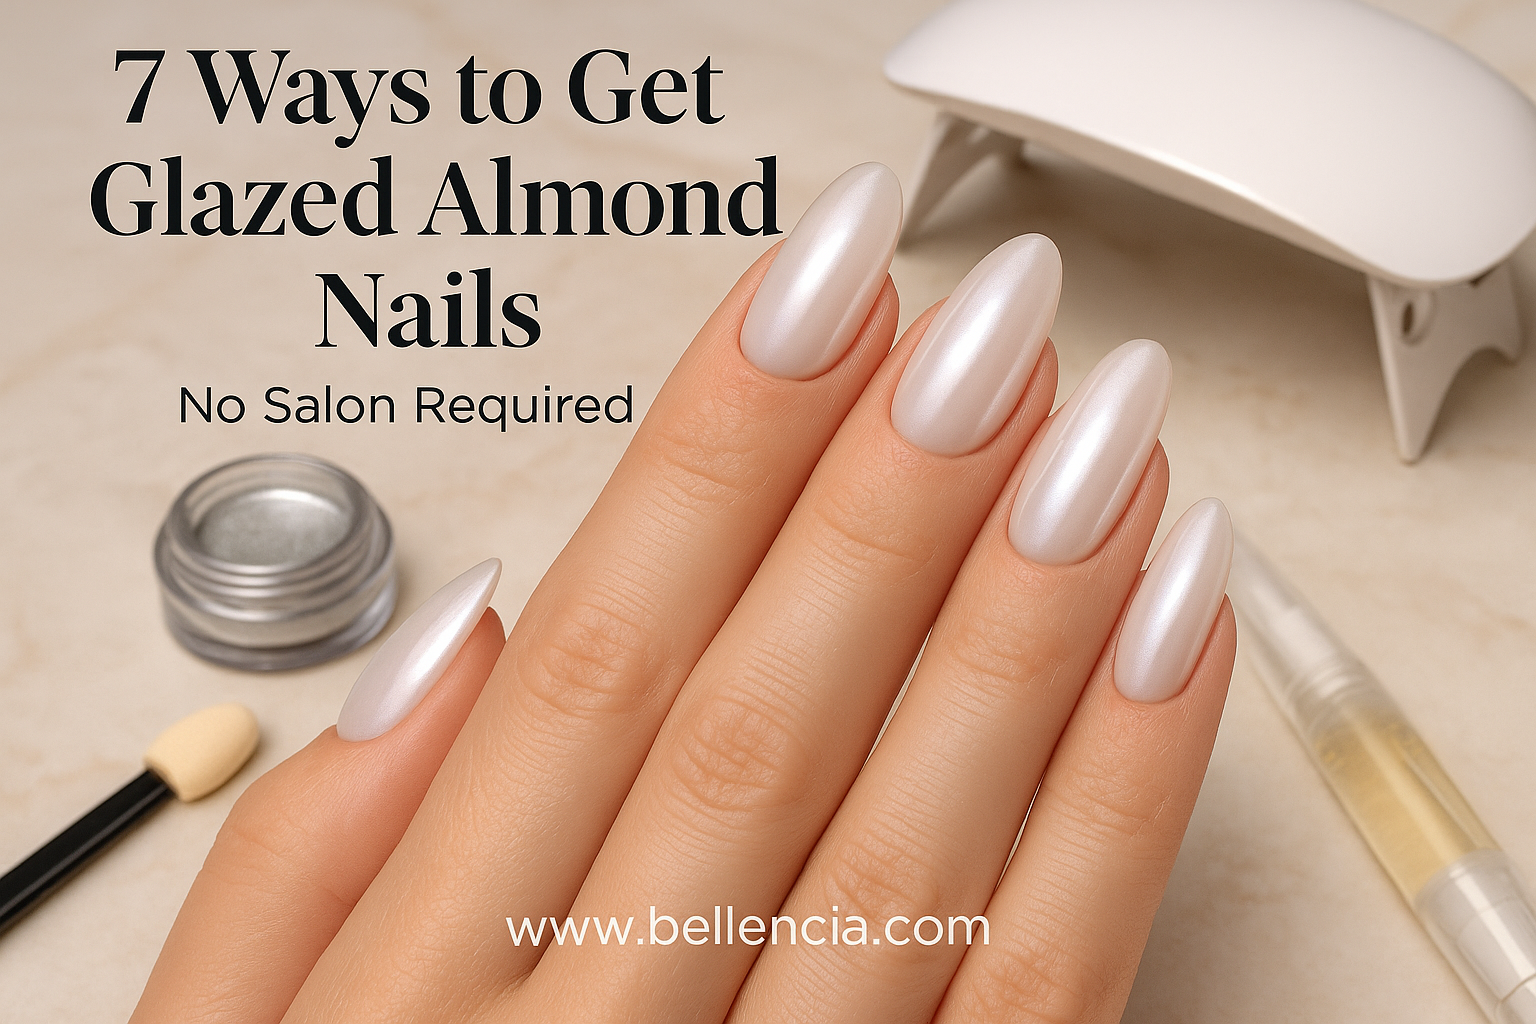
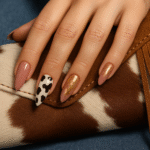
See What's TrendingGlazed almond nails without the salon price? Yes, it’s absolutely possible—and way easier than most beauty lovers think. The trend, made iconic by pearl-like finishes and sleek almond shapes, looks high-maintenance but is totally achievable at home with a few strategic product swaps and some clever hacks. This look blends soft, milky tones with reflective chrome or sheer gloss layers to create a luminous, glass-like finish.
And while salons may charge upwards of $60 for the effect, you can easily recreate the same look for a fraction of the cost using affordable Amazon tools and drugstore polish dupes. With the right steps, you’ll not only save money but also master a mani routine that keeps your hands looking photo-ready at all times. These seven easy, budget-conscious tips will have your glazed almond nails looking salon-fresh—without ever booking an appointment.
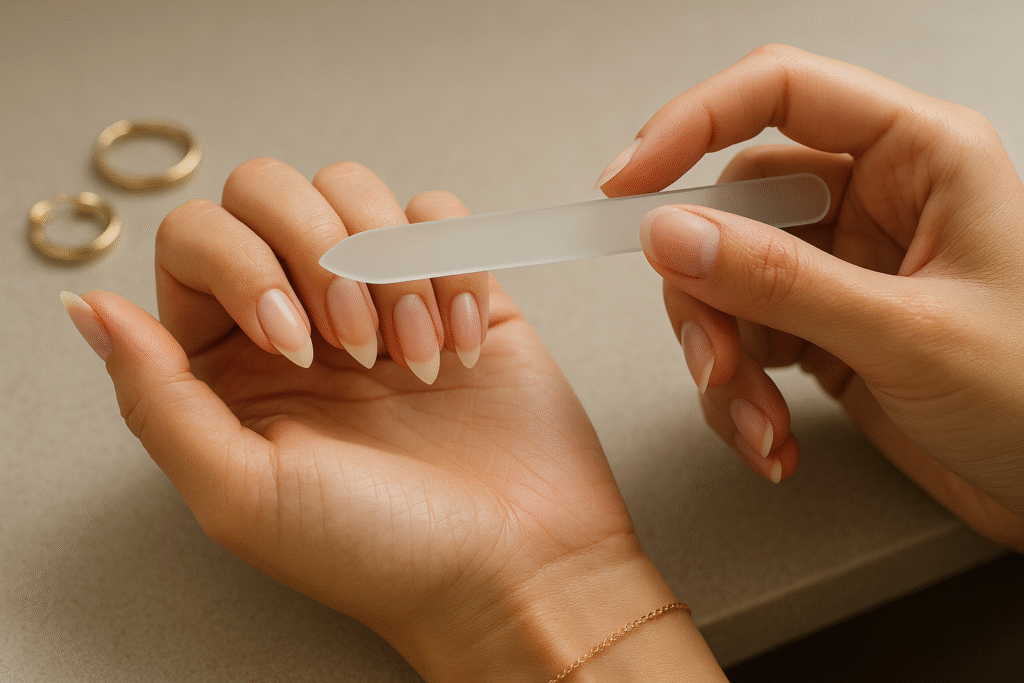
1. Shape with a Reusable Glass File for Almond Precision
Nail shape is everything when it comes to the glazed almond trend. To get the sleek, tapered look without risking nail damage, use a high-quality glass nail file. These files are gentle on natural nails and provide a smooth finish without creating microscopic tears, which cheaper files often do. Filing in one direction, rather than back and forth, ensures a clean edge and prolongs the life of your manicure.
Begin by rounding each side into a soft point, then blend the edges for a seamless curve. The almond shape elongates the fingers, making the hand look more elegant—and it’s the perfect canvas for a glazed overlay. After filing, buff the top of each nail with a 4-way nail buffer to create an ultra-smooth surface for polish. This base prep step is what gives that ultra-reflective, “wet” look once your top coat is on. Plus, once you’ve invested in a good file, it lasts for years—unlike salon visits.
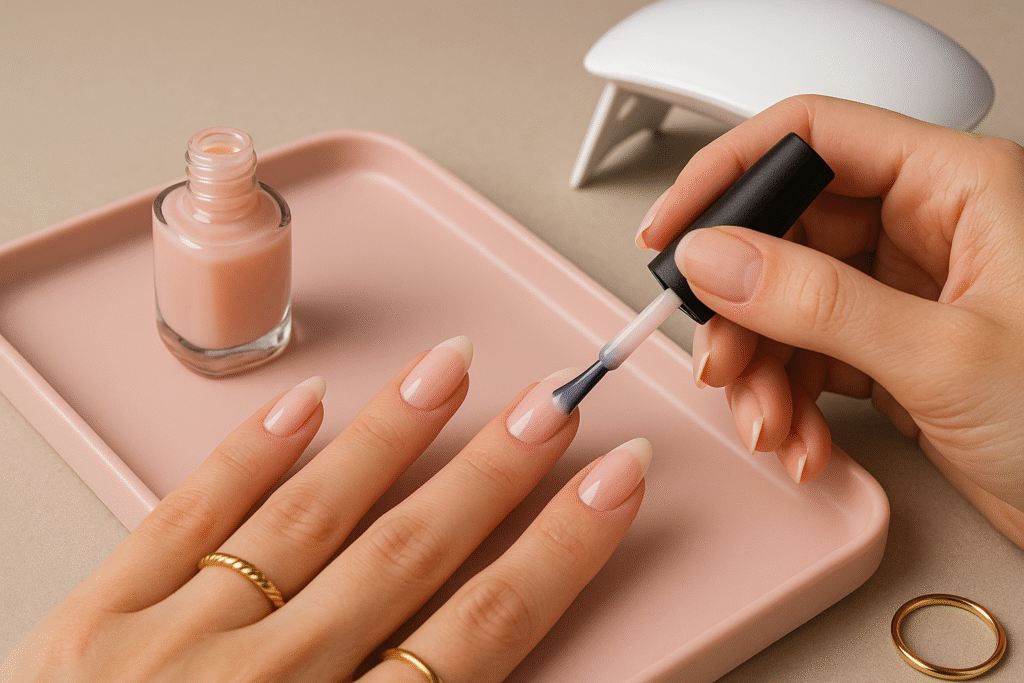
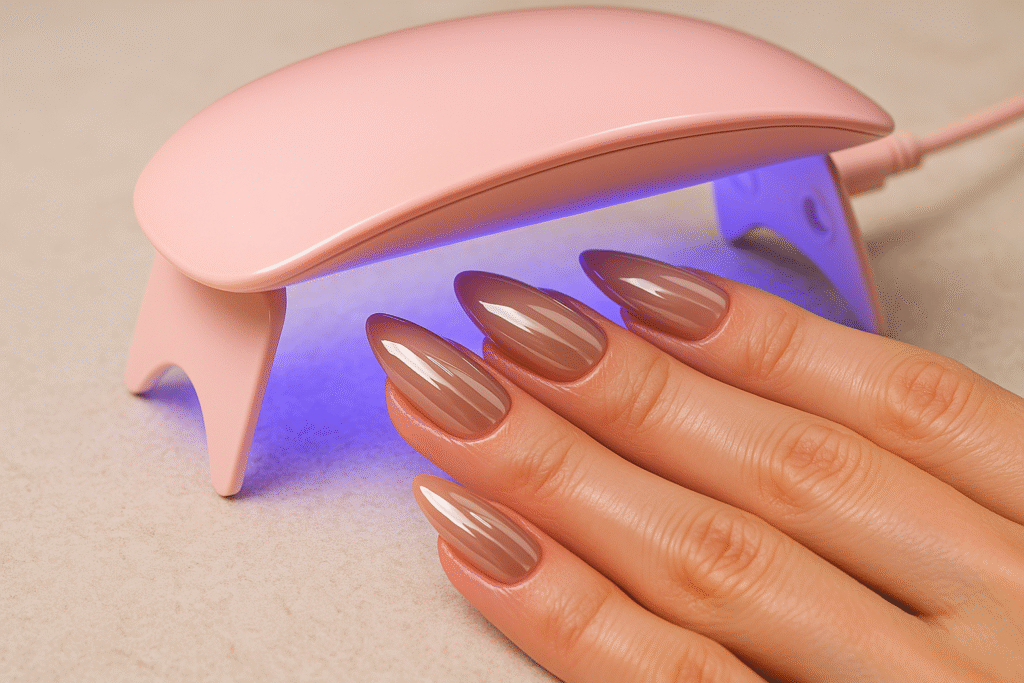
2. Use Sheer Milky Polishes to Build the Perfect Base
One of the best-kept secrets for achieving glazed almond nails without the salon price is using sheer, milky polish as your base layer. These translucent gel formulas provide that softly blurred, “your-nails-but-better” look and act as the perfect canvas for chrome or pearl overlays. Look for polish sets like a milky white gel polish set that includes tones like blush beige, creamy ivory, or soft mocha.
Apply two thin layers and cure in between each using a mini UV gel nail lamp. These lightweight shades enhance the natural shape of your nails while keeping the look understated and elegant. Bonus tip: mix a drop of sheer beige with a pink tone on a nail palette for a custom milky glaze that matches your skin tone. This trick alone elevates a $10 polish set into something that looks professionally blended. Whether you’re going for a “clean girl” mani or a soft-glam finish, this base step sets the tone—and saves big over custom color blends at salons.
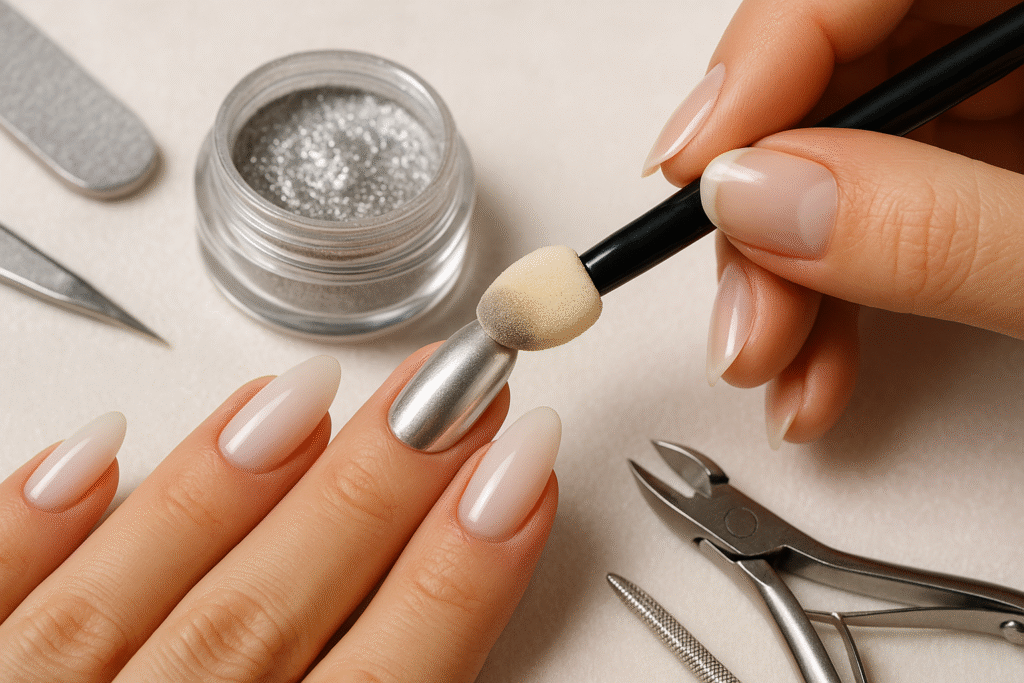
3. Try DIY Chrome Kits Instead of Salon Powder
One of the most effective and budget-friendly ways to mimic that expensive glazed look is by using a DIY chrome powder nail kit. These kits usually come with several pearl-toned or iridescent powders, a sponge applicator, and sometimes even a no-wipe gel top coat. After curing your sheer polish base, rub the chrome powder directly onto the nail using the sponge tip, then seal it in with a glossy gel top coat. What makes this hack truly salon-worthy is the depth it creates—each movement of your hand reflects light from a slightly different angle, just like the pro finishes. Chrome kits offer a huge bang for your buck, giving you multiple full manicures per container. And since you can mix and layer different powders, you can create custom tones like blush chrome, pearl taupe, or even lavender shimmer, all without paying a cent more.
4. Swap in Gloss Top Coats for Instant Glaze
Even if you skip the chrome step altogether, you can still achieve that gorgeous glazed almond nail finish by using a mirror shine top coat gel. The trick is to layer it over a neutral base like milky beige or soft blush and cure thoroughly to set the glossy finish. These top coats are specifically designed to add a reflective, salon-style sheen that mimics the look of chrome without any powders. Look for formulas labeled as “non-wipe” to avoid dealing with sticky residue after curing. For added shine, apply two thin layers and cure each one under a mini UV nail lamp. What’s amazing about this method is how it amplifies any polish underneath, whether you go minimal or full glam. Best of all, one bottle lasts for months, making this hack one of the most affordable upgrades to your at-home nail routine.
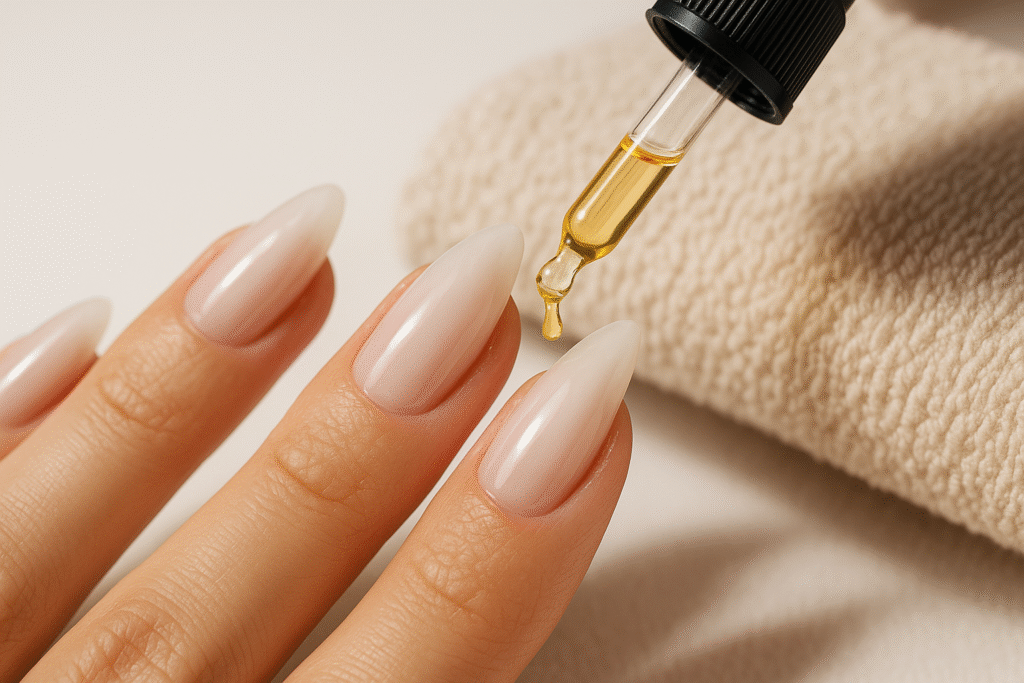
5. Cuticle Oil for the Final Glaze Effect
The final step that gives glazed almond nails that high-end, finished look is the addition of hydrating cuticle oil. After your polish and top coat are cured, gently massage a drop of oil around the base of each nail. Not only does this nourish the skin and promote nail growth, but it also enhances the overall shine and softness of your manicure. Go for formulas that include ingredients like jojoba, vitamin E, or sweet almond oil. These absorb quickly and won’t dull your polish. For a luxury finish, use a soft polish buffing cloth to gently shine the nail surface after oiling. This technique mimics the post-manicure glow you’d normally get from a salon hand massage and topcoat buff. It’s a subtle but transformative hack that adds a finishing touch most DIY manis miss.
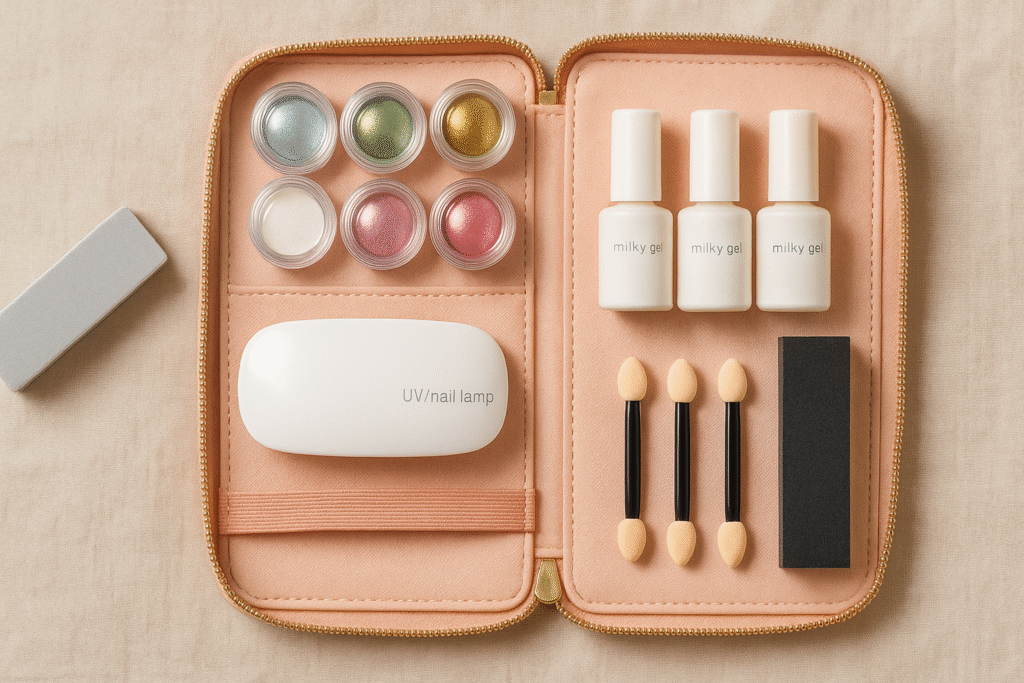
6. Build Your Own Glaze Kit for Under $30
Instead of buying random products one at a time, build a dedicated “glaze kit” to keep your at-home manicures quick and polished. Start with a zip nail care pouch and stock it with a glass file, buffer, mini nail lamp, milky gel polish, chrome powder, sponge applicator, top coat, and cuticle oil pen. You can find each item for under $10 and often in bundles. By organizing everything in one place, you avoid clutter, reduce prep time, and create a go-to beauty ritual that’s easy to keep up. Label the pouch or store it in a drawer next to your mirror or vanity. Keeping these tools together streamlines your mani time and turns your bathroom or desk into a mini salon station. And because everything is reusable, it’s the ultimate long-term budget hack for maintaining glazed almond nails all year.
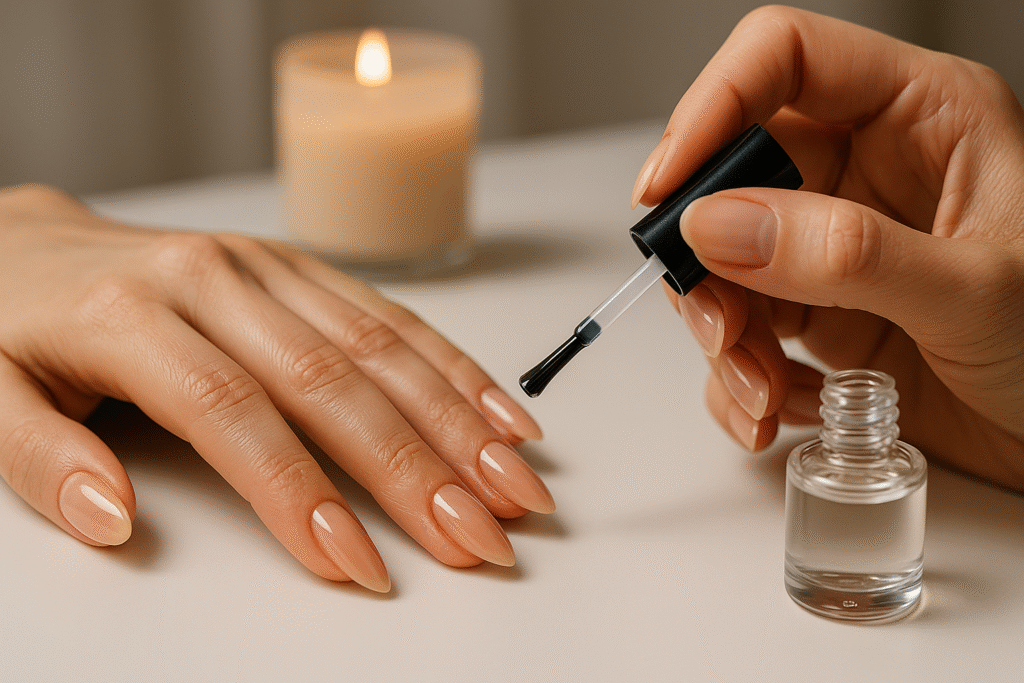
7. Maintain Between Manis with a Top-Up Coat
To stretch your glazed almond nails even further and avoid redoing your entire manicure, use a top-up coat midweek. Apply a fresh layer of a high gloss top coat gel every 3–4 days and cure it quickly to refresh the shine. This also helps seal in any tiny chips or dulling that might happen with regular wear. You can even touch up just the tips to extend the life of your glaze without starting from scratch. Pair it with cuticle oil at night and you’ll have that brand-new, glassy finish for up to two weeks. This tip alone saves both time and product—and it’s exactly how professionals extend the life of gel sets between fills. If you’re going to invest time into a salon-inspired at-home manicure, this quick extra step keeps the illusion alive way longer.
Final Thoughts
You don’t need to splurge to get that flawless, glossy finish everyone’s obsessing over. With these seven simple strategies, glazed almond nails without the salon price are totally within reach. From shaping techniques to chrome hacks and glossy layering tips, each step adds up to a manicure that looks pro—without the price tag. Whether you’re going soft glam or ultra-minimal, all it takes is a few affordable tools and a little practice. Plus, the freedom to redo or restyle whenever you want makes DIY even more rewarding. For more glowing nail inspo, check out this article on Milky White Glazed Nails from Bellencia.com.


Pingback: Milky White Glazed Nails: The Look Everyone Wants - Bellencia
Pingback: 30-Day Capsule Wardrobe Challenge to Simplify Your Closet - Bellencia